You will learn the steps necessary to configure the CI pipeline and best practices in relation to a CI pipeline for Unity projects.
The reason for creating our CI pipeline is the development of a Unity AR App (iOS), for which we want to automate the build process in our workflow. The advantages we would like to get from this pipeline for our project and our team of seven developers are:
- automatically test and build code on a suitable build server after each push
- fast, automated feedback that can be accessed by everyone in the team
- making the build artifact available after a successful build automatically for every developer
It should also be mentioned that we don’t use the available Unity Cloud Build option but decided to implement our own Unity CI pipeline (https://unity3d.com/de/unity/features/cloud-build). This results in the following benefits:
- full control over CI process
- use of known environments like GitLab / GitLab CI
- lower costs for the developer team (license for Cloud Build / Unity Teams is about 40€ for 7 developers (https://unity3d.com/de/teams))
1. GitLab CI
Because we already had a GitLab project repository for our application, it was the obvious choice that we use the integrated GitLab CI solution for our CI pipeline. The configuration of GitLAb CI pipeline is described in detail in the provided GitLab documentation (https://docs.gitlab.com/ee/ci/README.html). All settings of a GitLab CI pipeline generally, are described in a .gitlab-ci.yml file. In our project, we have the following settings:

As you can see in the .gitlab-ci.yml file (Figure 1), we have defined 2 stages, the test and buildIos stage. The two powershell scripts are used to execute the test and the iOS build on our build server. They are described in section 3 (Build Server) in more detail, as well as the configuration of the GitLab CI Runner, which is installed on the build server and runs our build job. Furthermore, the paths for the artifacts of the test results and builds are defined. The saved build artifacts are available for 1 week (expire_in: 1 week). The .gitlab-ci.yml file and the powershell scripts are stored in the GitLab project repository.
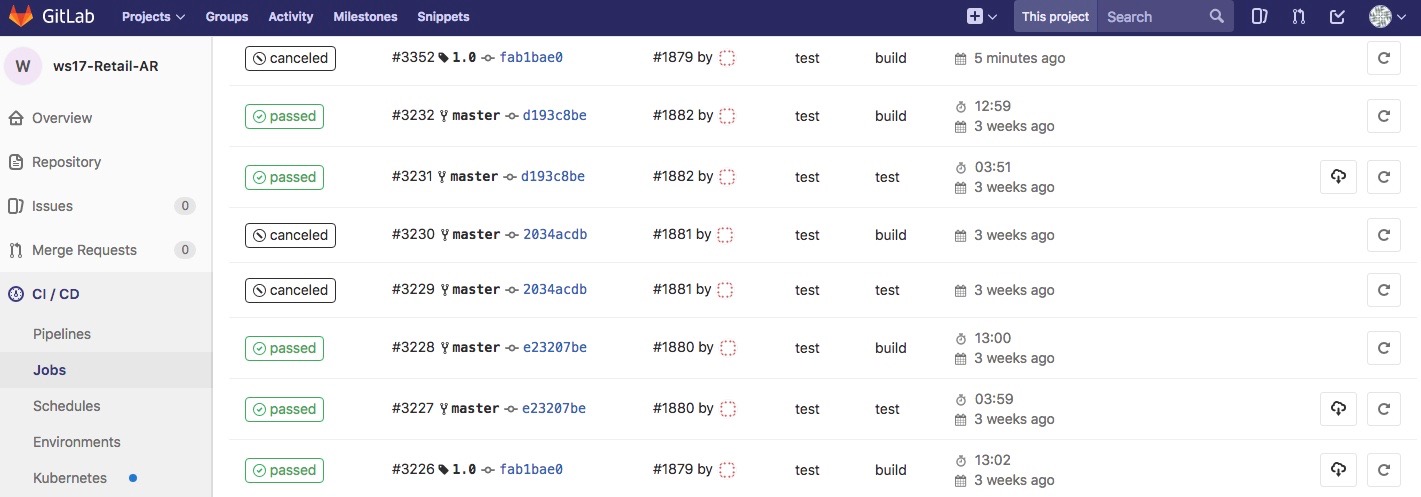
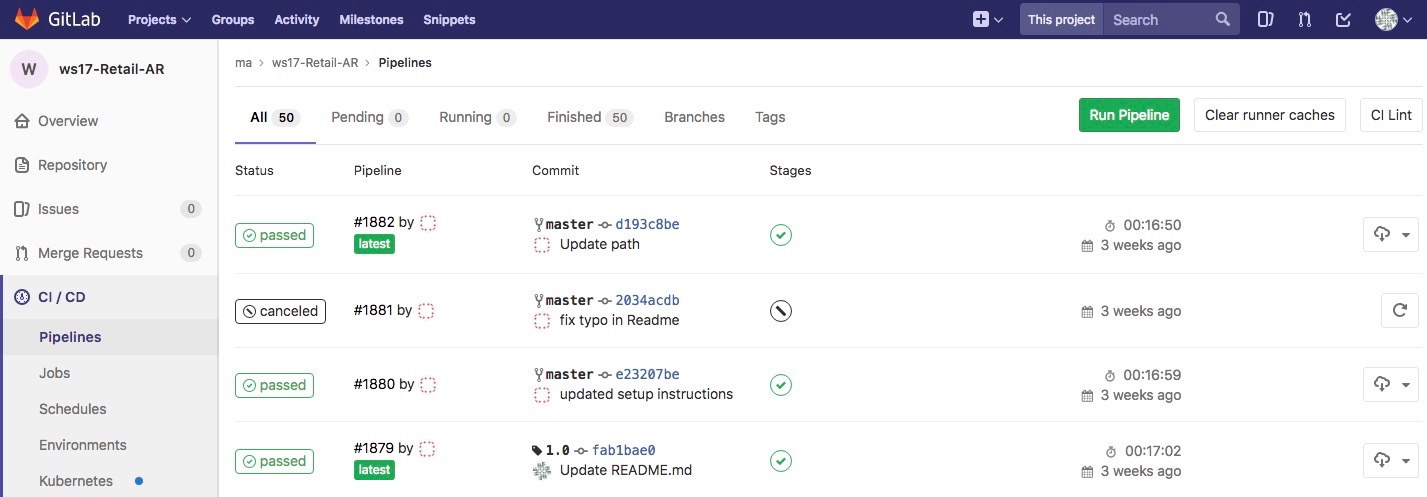
Figure 2 and 3 show sections from the GitLab CI web interface. You can see examples of our pipelines and some executed jobs. To analyze them you can select the desired pipeline and stage. It’s possible to analyze the console output of a build job and see the code changes.
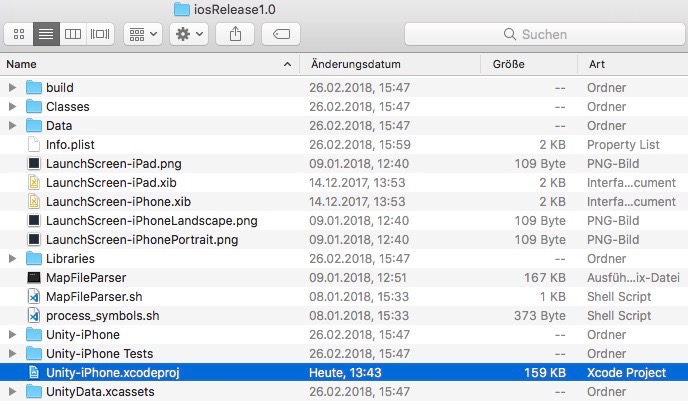
After a successful build job, the iOS build artifacts can be downloaded as a ZIP file. When the folder is downloaded and unpacked, the Xcode project (.xcodeproj File) can be opened in Xcode. With an Apple Developer Account you can now build and run the application on a selected iOS device. Figure 4 lists the unzipped build artifacts provided by our build job.
2. Infrastructure and development process

Figure 5: Infrastructure
In Figure 5 you can see our infrastructure for this project. We use two servers for our CI pipeline. One internal server of our university (mi.hdm-stuttgart.de), to run GitLab / GitLab CI and another configured VM to run JIRA as separate project management tool. The JIRA configuration is not discussed in this blog. For the other server, the build server, we use an AWS instance whose configuration is explained explicitly in the third section of this blog (Build Server).
The exactly development process we use for our CI pipeline is depicted in the figure below.
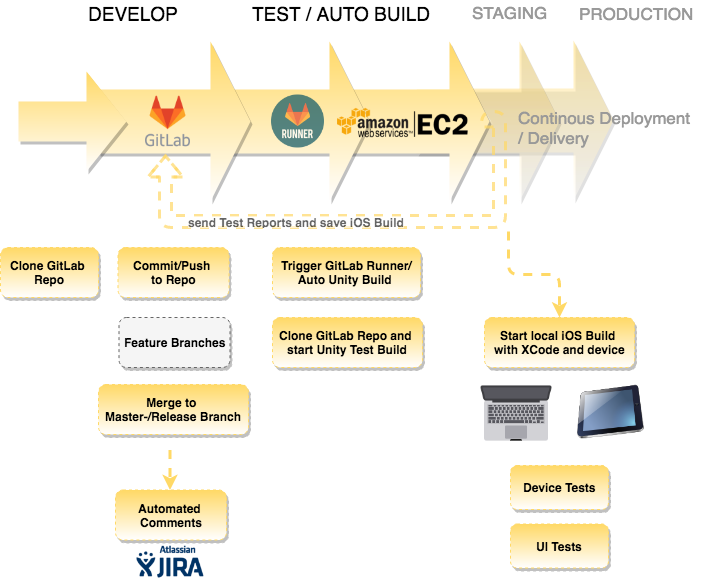
The visualization again shows that the focus of our CI pipeline is on executing & testing the Unity Build and deploying it as an Xcode project. Explicit device or UI tests as well as a automatically Continous Delivery (CD) process are not planned for our pipeline.
3. Build Server
By building a CI pipeline we want to make the build process independent from each developers developing environment. Therefore we need a build server that is able to automatically build the application whenever it is triggered by Gitlab CI. Unfortunately a build inside Docker seems to be difficult at the moment because Unity Community Edition cannot be activated over command line arguments (https://gitlab.com/gableroux/unity3d-gitlab-ci-example/issues/5). Once this issue is resolved, this would be a great option to build Unity apps as well.
In our setup we chose Amazon AWS as the IaaS platform. We chose AWS because of the wide variety of services, our prior knowledge and to learn more about the market leading cloud platform. For our infrastructure we use an AWS EC2 instance combined with a Elastic GPU. On this machine we have our properly set up Unity environment and everything we need to build the app.
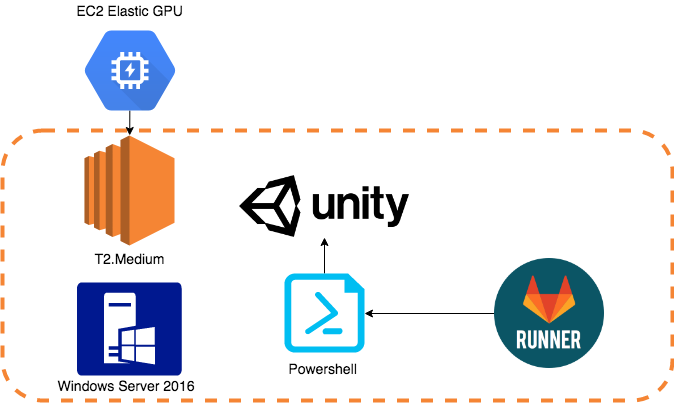
The build server itself is a EC2 “T2.Medium” running with Windows Server. On this Windows machine we will have a Unity Instance with installed iOS and Vuforia support in the correct Version to build the app. Each build is triggered by the Gitlab Runner which uses a Powershell script to execute the build process.
Steps to setup the Server
1. Launch EC2 Instance
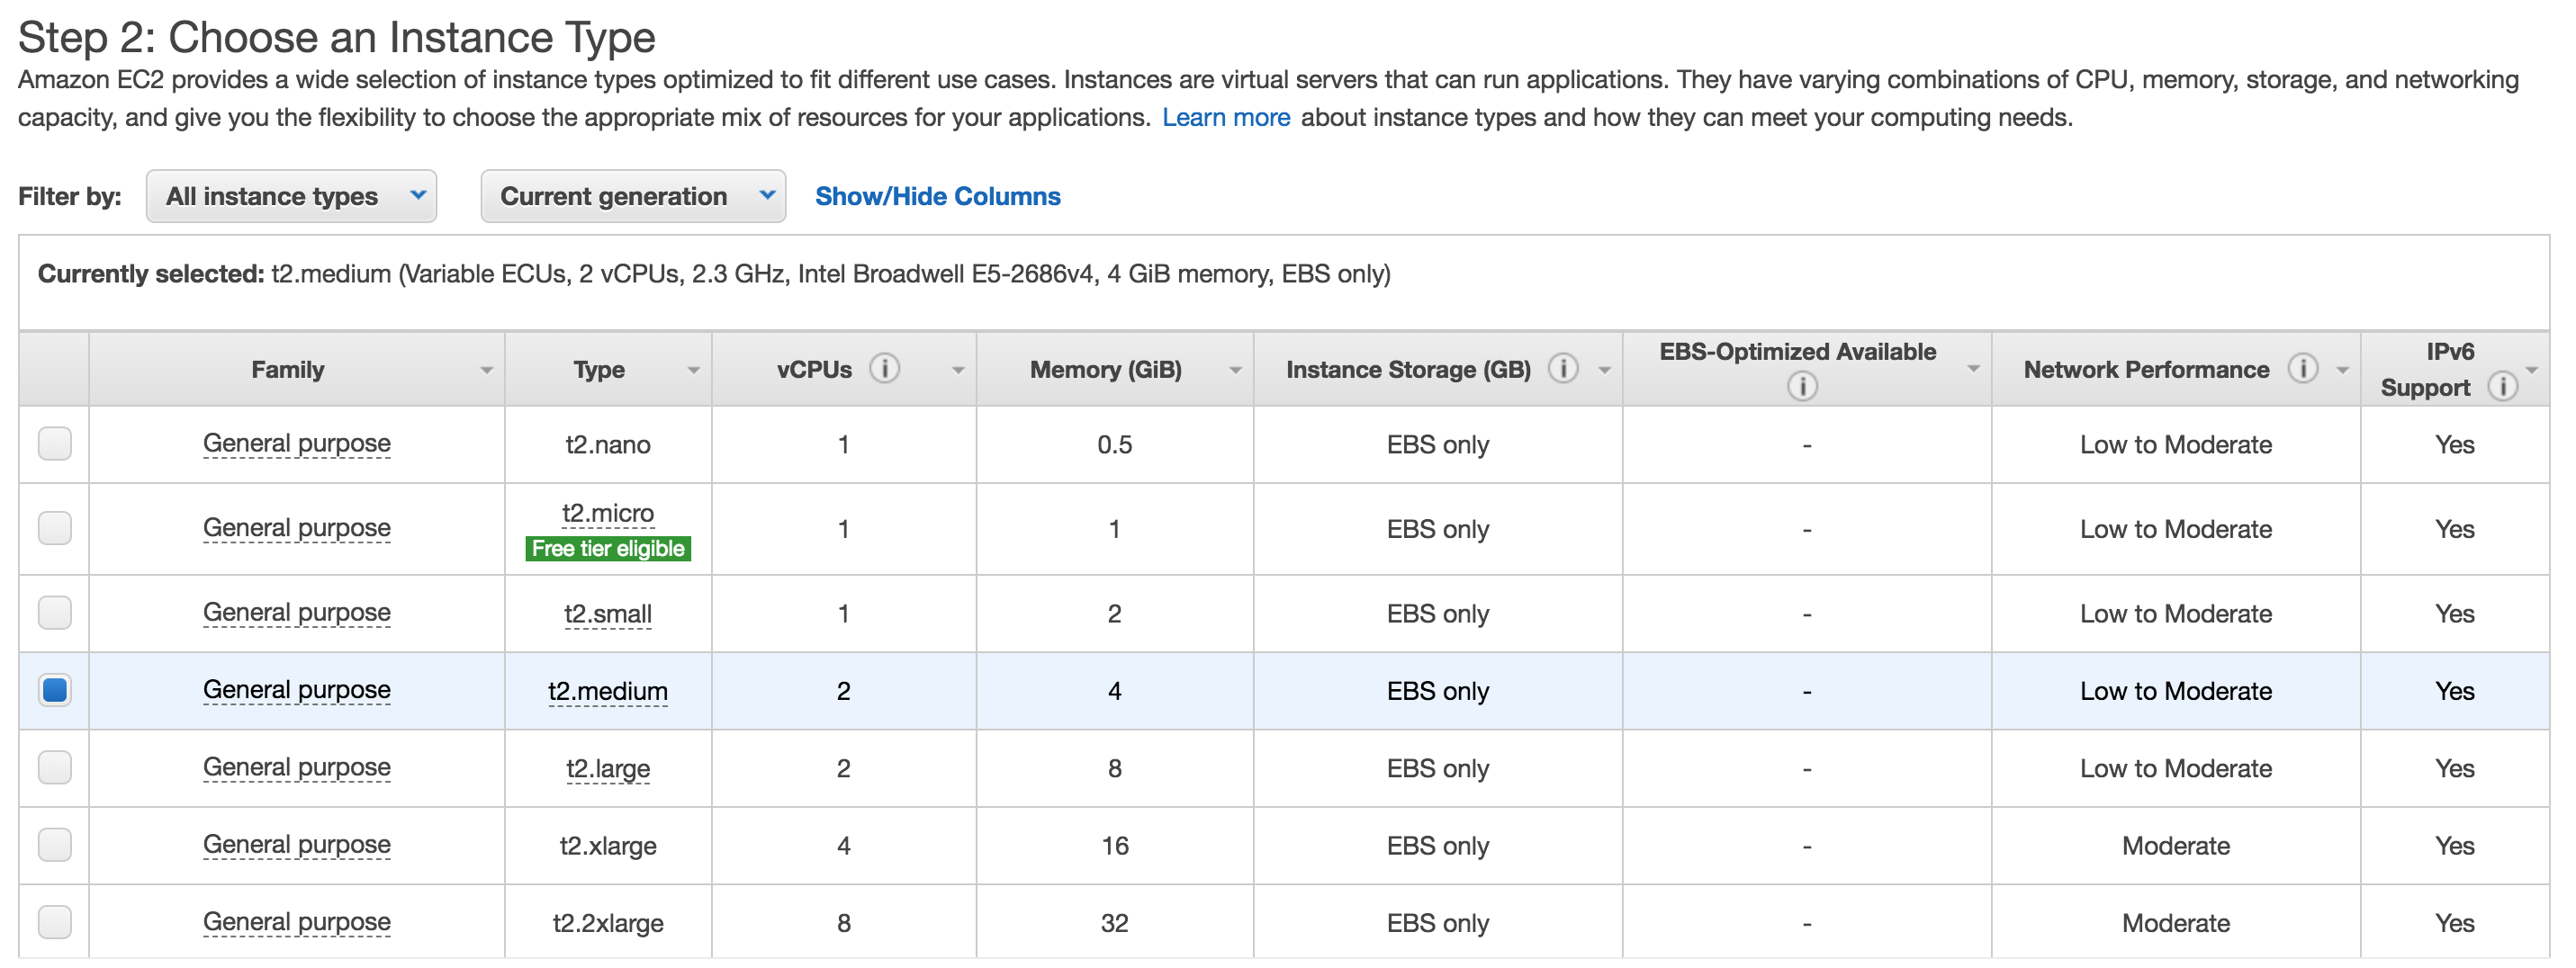
On the EC2 panel (https://console.aws.amazon.com/ec2/v2/home) choose “Launch Instance”. In order to use the EC2 GPU (to be able to start the Unity editor) we need to choose a Windows machine. Except of the following settings you can leave standard values.

Elastic GPU service is only available for EC2 Instances t2.medium and above. So at least choose t2.medium as your machine type.
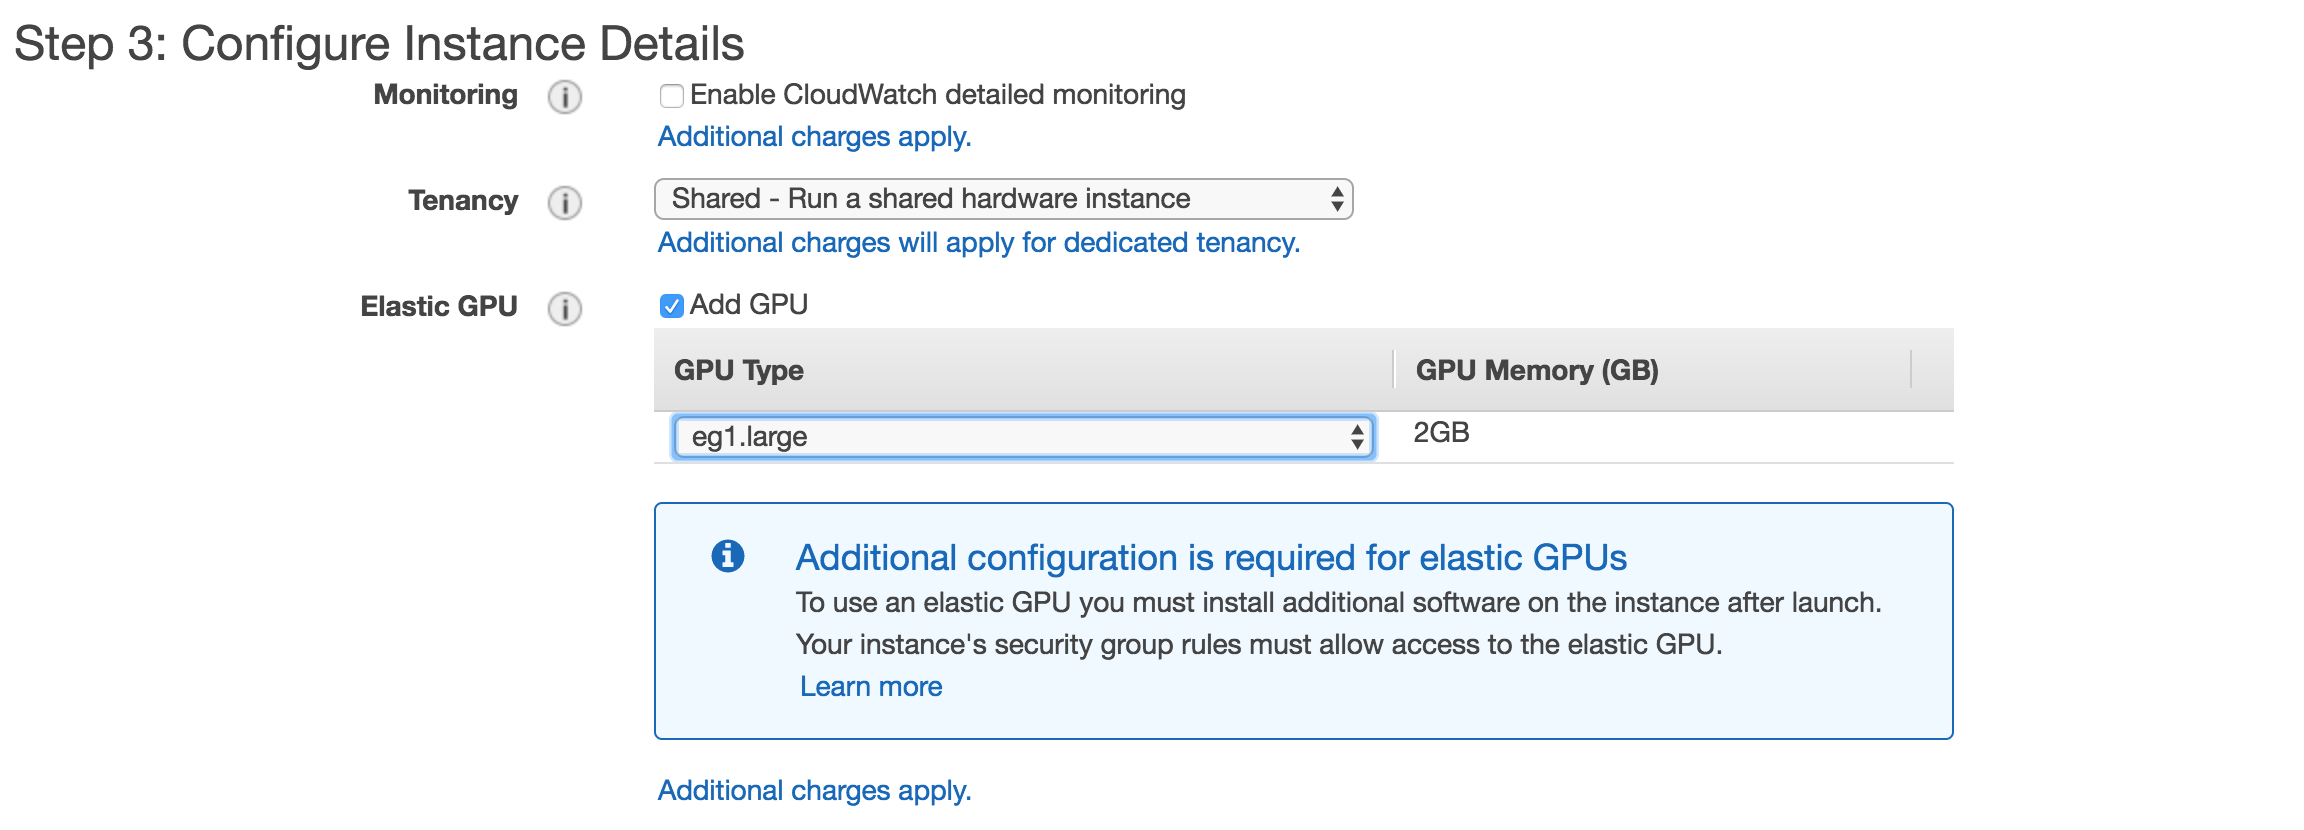
Now in step 3 you can activate Elastic GPU and choose eg1.large.
Because the Unity installation needs a lot of space, we need to increase the SSD size to 50GB. So we have enough space left on the disk to run all needed software.
2. Setup Unity
- Once your machine is ready to use, download and open a Remote Desktop Session to the Windows Server.
- Download Unity Installer
- Install Unity, Vuforia and iOS Support / Android Support
- launch and activate Unity once using your Unity account
3. Setup GitLab Runner
- Download and install GitLab Runner https://docs.gitlab.com/runner/install/windows.html
- Register the runner with your project https://docs.gitlab.com/runner/register/index.html
The Gitlab Runner is now registered with your project and will be able to execute the script to build the software whenever a build is triggered. The build files (XCode Project) will then be submitted to Gitlab where it can be downloaded and built for your device.
In the Powershell script to start the build process, we need to call Unity with the following command line options:
| C:\’Program Files’\Unity\Editor\Unity.exe | call unity executable |
| -batchmode | execute in batchmode to prevent the editor from opening |
| -nographics | needed on windows to really make sure there is no GUI |
| -executeMethod BuildScript.Build | calls the Method “Build()” in the Unity BuildScript |
| -projectPath $(pwd) | sets the project path to current directory (repository downloaded by GitLab Runner) |
| -quit | quit Unity after execution of the buil |
| -logFile build.log | specify log file |
Now the method of the Unity Build Script is executed. For iOS the Unity build method looks like this:
public static readonly string[] scenes = { "Assets/Scenes/LandingPageScene.unity", … };//add all Scenes to include in Build

public static void Build()

{

    Console.Write("build for Ios");

    BuildPlayerOptions buildPlayerOptions = new BuildPlayerOptions();

    buildPlayerOptions.scenes = scenes; // add scenes

    buildPlayerOptions.locationPathName = "./iOSProdBuild"; //set location

    buildPlayerOptions.target = BuildTarget.iOS; // build for iOS

    buildPlayerOptions.options = BuildOptions.None; // set default for others

    BuildPipeline.BuildPlayer(buildPlayerOptions); //build

}
Lessons learned
- related to our Unity project: Start to configure your CI pipeline as soon as possible to benefit from it right from the start of the development process
- Unity installation and configuration on server can be very time-consuming (e.g. the installation of required Unity packages)
- maybe consider Docker Container (in combination with X Server) or Infrastructure as Code (IAC) to get easier environment setup for Unity
Leave a Reply
You must be logged in to post a comment.