Helga Schwaighofer – hs082
Celine Wichmann – cw089
Lea Baumgärtner – lb092
Motivation
Imagine you are having a bad day, but you don’t know what to do. Your friends are not available, but you’d like to have advice depending on your mood.
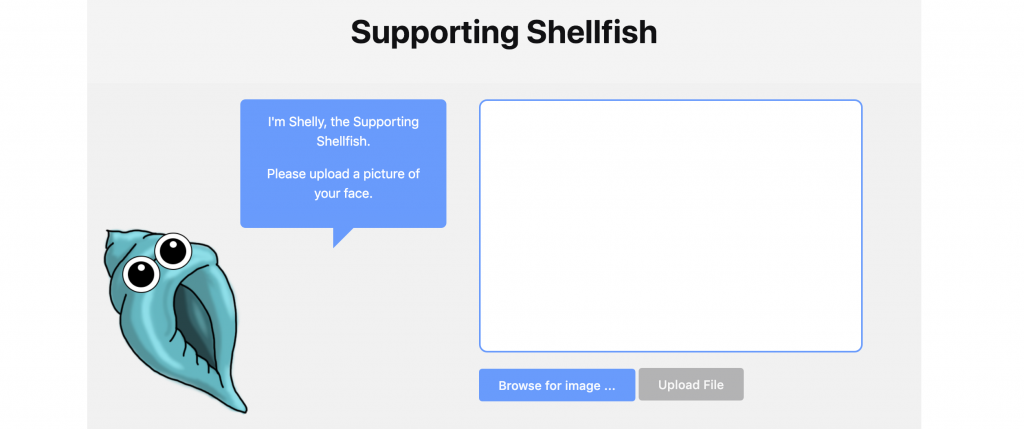
For that case, we created the Supporting Shellfish! This service generates advice based on the mood it recognises on your face.
The following blog post describes a step by step explanation of how to create a personalised classifier based on the IBM Visual Recognition cloud service and the integration of those functionalities into a JavaScript- / Flask-based Web Application.

Research on different services
In order to realise our idea, we had to choose between different cloud based services in the field of image recognition or to be more specific, in the area of face recognition.
Machine Learning as a service is the overall definition for diverse cloud-based services providing functionalities in the area of Artificial Intelligence such as data pre-processing, model training and prediction. The prediction results can be used and integrated through REST APIs. First of all, we analysed three of the most popular companies and their services.
Google, Amazon and IBM. Which one should we choose?
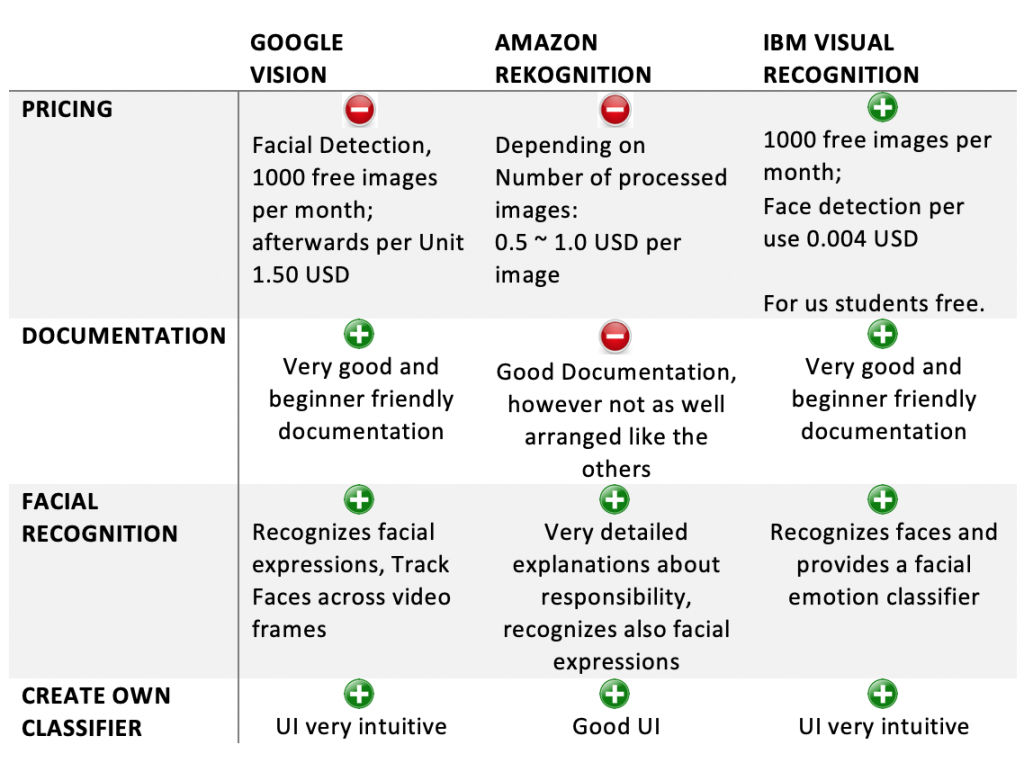
All of those services provide the usage of pre-trained models via API or the possibility to create and use a customised model. This Website provides a very good overview of the detailed functionalities of the different services. However, for our case we focused on the following pros and cons of those different services:
Creating a customised classifier
After analysing the pros and cons of the different services, we decided to use IBM Cloud. The deciding factor for us was the pricing. But the well-structured documentation and the available tutorials also helped convince us.
Although IBM provides a facial emotion classifier, we decided to create our own facial expression recognizer based on Visual Recognition of IBM Watson for studying purposes.
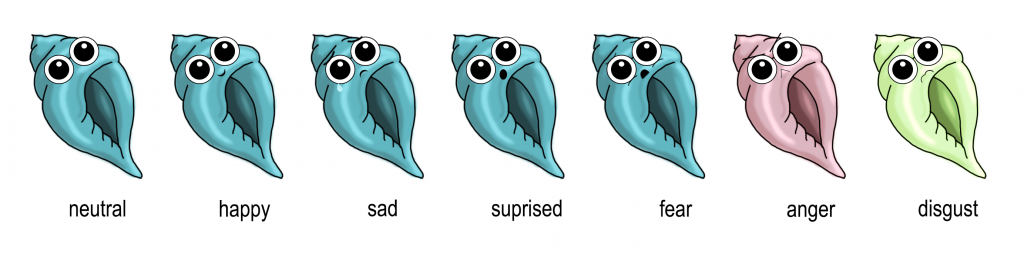
We searched for different emotion datasets and found the MUG Facial Expression Database. After having read and accepted the license agreement we requested access. A few weeks later we received the necessary access credentials. The database provides videos and images of 52 different people expressing the emotions happiness, sadness, neutral, anger, surprise, disgust and fear.
To create our own classifier in IBM Visual Recognition, we had to summarise the data in a zip file per class / emotion and therefore created a whole new structure for the facial dataset. We had the possibility to choose between using the terminal or the well-structured user interface of IBM Watson Studio – we decided to use the later.
First, we configured the model:

After the model was created, we were able to drag and drop our zipped training data on the right-hand side of the user interface below “2. Add from project”. We named the zip files equal to the classes we wanted to predict. We had to censor the faces in the following screenshots due to data protection. As soon as we finished uploading our training data files, we hit the button „Train Model “ and the training began.
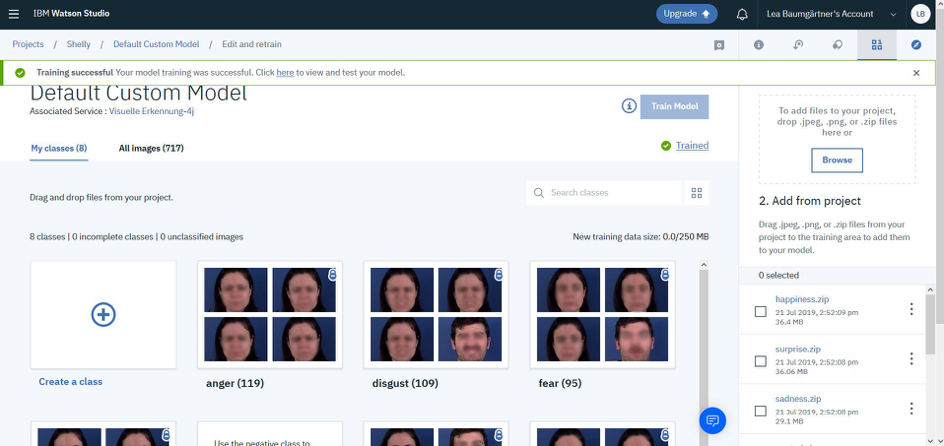
After circa 15 to 20 minutes, the training finished successfully and we were able to embed our custom model into the backend of our web application.
Building the Web App
Parallel to this process, we created a one-page web application, using Python / Flask as backend and HTML / JavaScript as frontend.
Frontend Description
The frontend of our application is made up of one html site, which can be rendered as a Jinja template by flask. The functionalities are implemented in JavaScript and the design was created via Kube CSS.
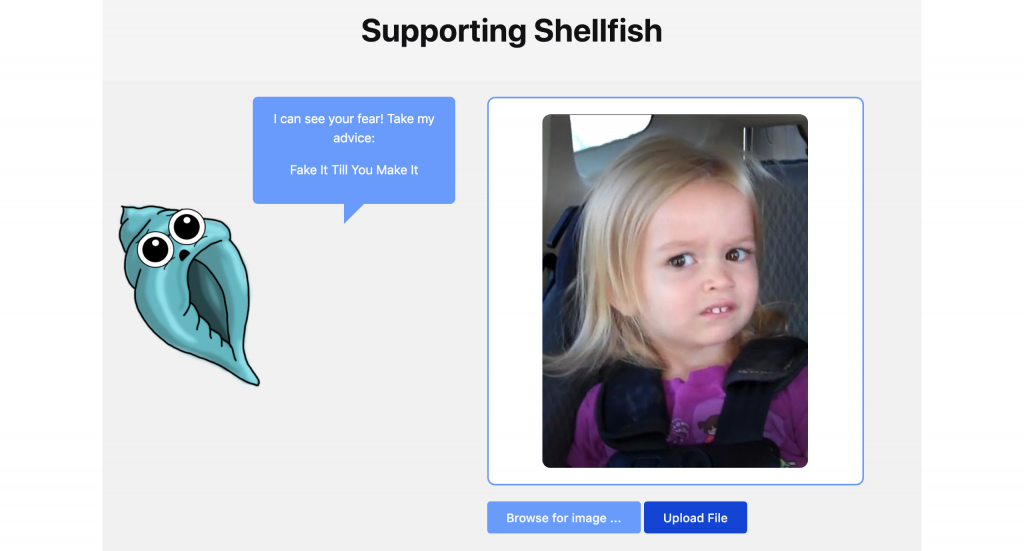
We got two buttons: One enables the selection of an image from your local device and the other button enables the upload of that selected file. As soon as an image is selected, the user receives a preview of the image in a form next to Shelly, the Supporting Shellfish. After selecting the file, the image is encoded into a base64 format and sent to the backend. After pushing the Button “Upload File”, an XMLHttpRequest will be made.
Finally, the frontend waits for the status code of the backend and catches exceptions, if something went wrong.
Backend Description
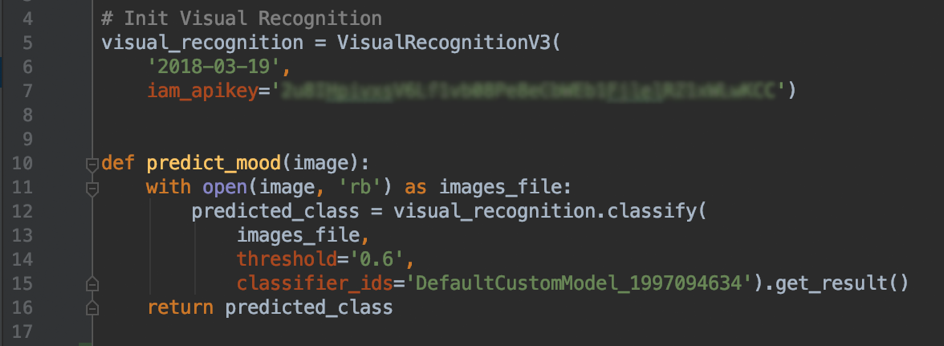
The backend consists of two routes: one GET Route for the landing page and one POST Route for requesting the image from the frontend. The requested image will be decoded from base64 and processed by IBM visual recognition. Our classifier will predict the mood based on the received image and sends back a JSON File containing the predicted class with the highest probability.
Based on that prediction, a random advice will be picked from the corresponding advice-list and send to the frontend.
Demo
How does Shelly the Supporting Shellfish generate her advice?
First of all, upload a picture of your face. After hitting the button “Upload File”, Shelly will use the customised model via IBM Cloud and predict the mood on your face. Based on the recognised mood, she will provide you a more or less helpful advice.
Conclusion
Every member of the Supporting Shellfish Team has been active in the area of artificial intelligence. However, we wanted to analyse the advantages and disadvantages of integrating a cloud based service and the usage of “machine learning as a service” in an application.
The most interesting part for us was to create a customized model in a cloud. We were especially impressed by the functionality and usability of this process. The tough part was the selection of the dataset to train the model. We had to restructure the data to fit our needs and the requirements of IBM. After the training was completed, the integration of the model into our Web-App went smoothly and quite quickly.
If you are interested in the project, you can have a deeper insight here.
Leave a Reply
You must be logged in to post a comment.