In our final application, we have put together a solution consisting of four different modules. First, we have again the Raspberry Pi which raises and sends the sensor data using the already presented Python script. We changed the transfer protocol in the final application to MQTT, which gives us more possibilities in different aspects, but more on that later.
The main part of our application in the cloud is based on a Node.js application where various frameworks such as Express and Passport are used.
To secure the data persistently, we use the NoSQL solution MongoDB, which is linked to our application via its manifest file as a Bluemix service.
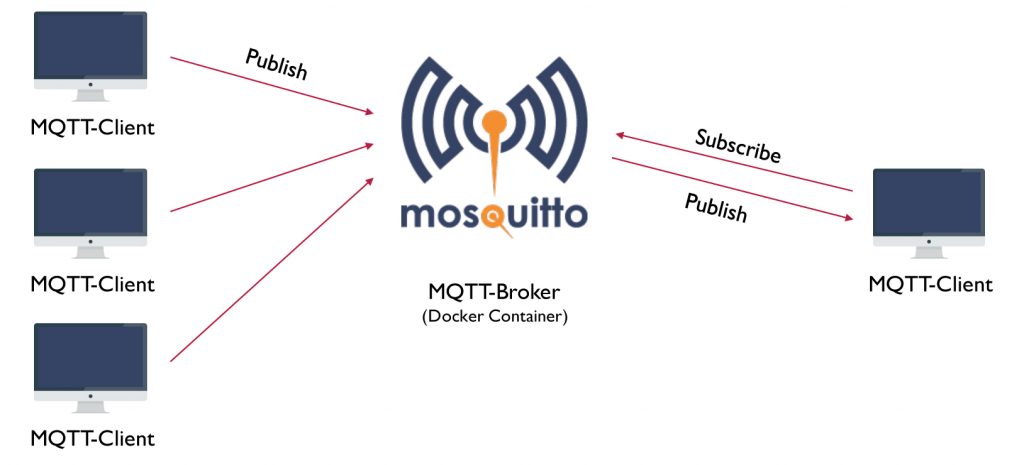
Last but not least, we also need a broker for the chosen MQTT transmission protocol. The approximate task of the broker is to take care of the transmission of data between Raspberry Pi and the cloud application. In order to realize this service at Bluemix, we have created a Docker image that includes the MQTT broker.
Module 1 – Raspberry PI
To determine the sensor data, the Raspberry PI continues using the already presented Python script. In order to transmit the sensor data via the MQTT protocol, we integrated the Eclipse Paho MQTT client into the project.
Module 2 – MQTT broker
MQTT (Message Queue Telemetry Transport)
MQTT is a lightweight transmission protocol for machine-to-machine communication (M2M). To realize the transmission of the data the protocol is based on the principle of a Publish / Subscribe solution. In this context, there are clients that take on different roles. On the one hand, there is the role as publisher, which provides and sends messages. On the other hand, there is the role as subscriber, which accepts the provided messages. Communication takes place via a topic with a unique ID. You can see the topic as a bulletin board with
a unique inventory number. For example, there may be a publisher who sends its data to a particular topic and an undefined set of subscribers who have subscribed to this topic to receive the data.
MQTT broker
A MQTT broker is the central component in the communication via MQTT. It manages the topics and the related messages. Also, it regulates access to these topics and takes care of data security as well as the Quality of Service levels. The Quality of Service can be defined in three different stages. The lowest level is declared by 0 and means that there is no guarantee that the message arrives at the receiver. This variant produces the least overhead during transmission, it follows the principle fire’n’forget. The next level, 1, says the message is recognized at least once in the topic queue. At level 2 it is ensured that the message arrives exactly once.

Setting up our own MQTT-Broker
Instead of using the Bluemix-Services to register the devices, we wanted to use our own solution to be more flexible. For that step, we used this Docker image which includes the open source Eclipse Mosquitto MQTT broker. The Docker image builds on a Linux distribution called Alpine Linux which is described as small, fast and safe.
For more security and to disable everybody is sending us data an auth plugin for the MQTT broker is included into the Docker image. The auth plugin is written in c and uses a c-library for handling requests to the MongoDB. The Bluemix service for the MongoDB requires an authentication via a certificate. But the auth plugin doesn’t support this so we had to include this step by ourselves and had to modify the Docker image for our needs.
In order to be able to transfer data, users first have to register on our cloud application and create a sensor. With this user data a topic is generated to which the user is allowed to send his data. This topic is structured as follows:
client/username/devicename
The auth plugin expects the password for authentication in the form of PBKDF2 (Password-Based Key Derivation Function 2). This is a standard function to derive a key from a password.
PBKDF2$sha256$901$veyFV98cpOUiYpuI$pr+/jGkvwCdPu6n/SnTKxjOUtgfx34Qp
The various parts of this key are separated by the separator $. The first part is the start marker followed by the description of the hash function. The third part shows the number of iterations followed by the salt. The last part is the hashed password. We have adapted the registry of our application so that the user password is stored in the database in this form.
For the cloud application, we have created a so-called superuser, who has the rights to subscribe to each topic. In the application, this user connects and subscribes to the topic “client/#”. The diamond is a placeholder for all possible topics.
To load the Docker image in Bluemix you have to install the Bluemix Container registry plug-in. This is done via the command-line interface.
bx plugin install container-registry -r Bluemix
You now have two options: Either create the Docker image on the local computer and push it to Bluemix or you create the image, like us, right in the Bluemix cloud.
bx ic build -t registry.eu-de.bluemix.net/my_namespace/my_image:v1 .
At Bluemix, we also tested the delivery pipeline for the Docker image. Unfortunately, compiling the image in the pipeline failed. Since we had to do this step only once, we did not deal with this problem any further. Then log in to Bluemix and create a new container. The created image should now be selectable. You have to unlock the required ports if not already done in the Dockerfile and request a fixed IP address.
Module 3 – MongoDB as Service
We used MongoDB in our main application in combination with Mongoose. It was somewhat tiring to establish within the Node.js application the connection with the MongoDB via Mongoose. The supplied credentials by the MongoDB service are designed to automatically connect to the admin database. However, this database ideally shouldn’t be used in productive use. Mongoose does not directly provide the possibility to select another one after connecting to a database. You have to submit the desired database name into the connection call with additional settings. Without this settings the connection call would be much shorter.
// load local VCAP configuration and service credentials
var vcapLocal;
try {
    vcapLocal = require('./vcap-local.json');
} catch (e) { }

const appEnvOpts = vcapLocal ? { vcap: vcapLocal} : {}
const appEnv = cfenv.getAppEnv(appEnvOpts);

// mongoose - mongoDB connection
var mongoDBUrl, mongoDBOptions = {};
var mongoDBCredentials = appEnv.services["compose-for-mongodb"][0].credentials;

if (mongoDBCredentials) {
    var ca = [new Buffer(mongoDBCredentials.ca_certificate_base64, 'base64')];
    mongoDBUrl = mongoDBCredentials.uri;
    mongoDBOptions = {
        auth: {
            authSource: 'admin'
        },
        mongos: {
            ssl: true,
            sslValidate: true,
            sslCA: ca,
            poolSize: 1,
            reconnectTries: 1,
            promiseLibrary: global.Promise
        }
    };
} else {
    console.error("No MongoDB connection configured!");
}

// connect to our database (iot)
var db = mongoose.createConnection(mongoDBUrl, "iot", mongoDBOptions);
While testing the application, we probably filled the 1 GB database completely because we couldn’t save any new data anymore. The Bluemix backend has reported only 0.035 GB of used storage capacity. After clearing the database, the data was saved again.
Module 4 – Cloud application
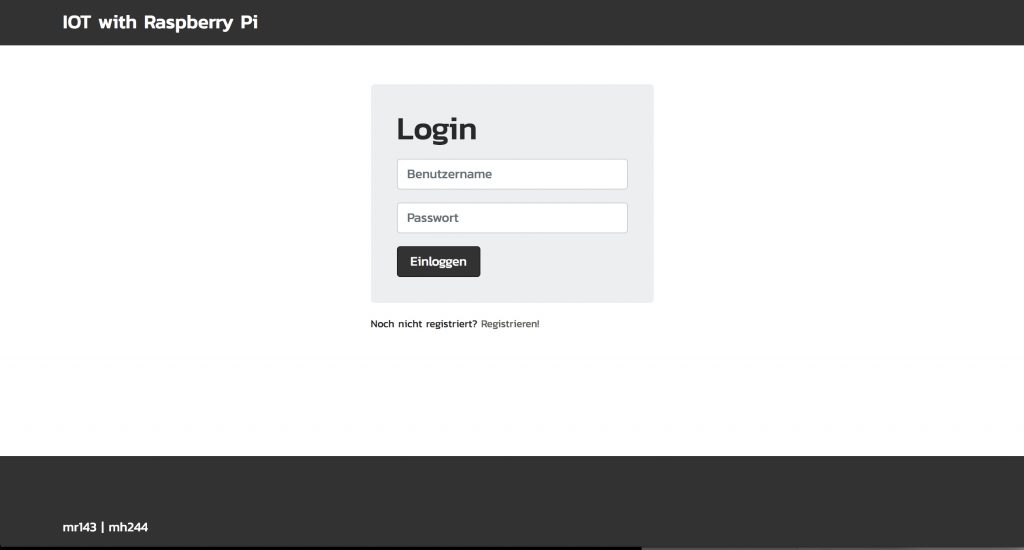
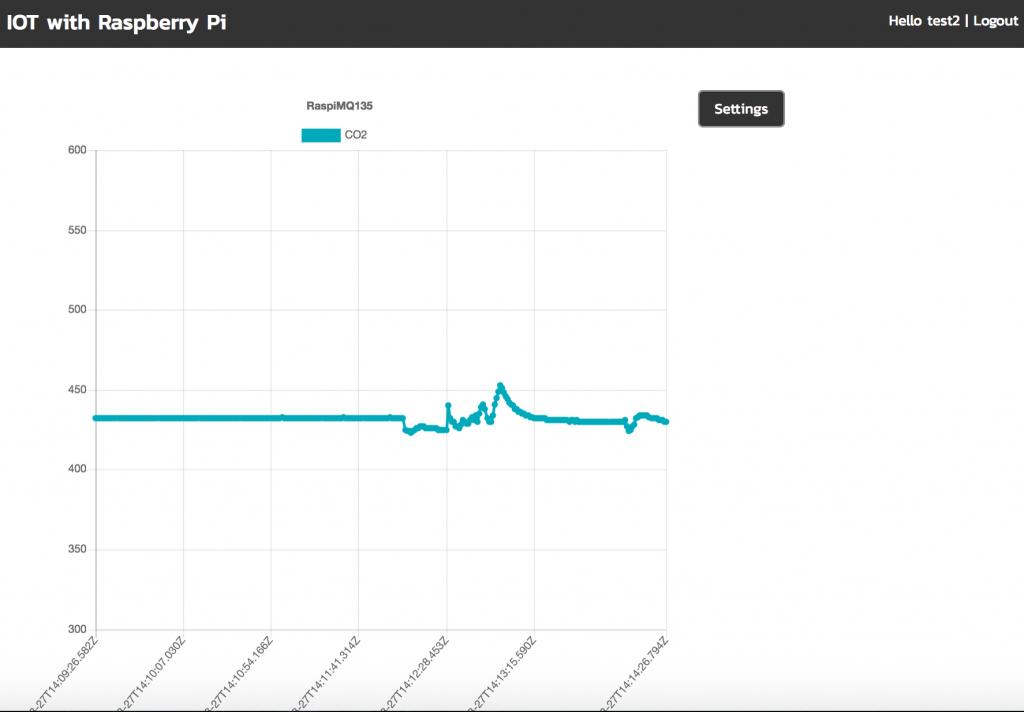
We created and launched a Cloud Foundry App for Node.js at Bluemix for the main application. The application allows users to register, create a sensor and then download a configuration file for the Raspberry Pi script. The user must enter his or her correct password in the configuration file. If the sensor now successfully sends data to the application, these can be read out in a chart.

The application relies on common JavaScript packages which are loaded via the package manager npm and managed in the package.json file.
- Express is a web framework for Node.js and performs important tasks such as routing and has a view system that supports a variety of template engines.
- Passport is an express compatible authentication middleware for Node.js. Through a plugin for Passport we implemented the user registration in our application.
- Instead of using Paho Eclipse as a MQTT client like at the Raspberry Pi, we use MQTT.js in the application. MQTT.js offers a wider range of functions, a simpler API and often receives updates.
Frontend
We use Pug as template engine in the frontend. It’s a very simple view engine and recommended for small projects. If we would be going to expand the project further, we would exchange it for a view engine with a larger range of functions. Reading out nested arrays wasn’t always easy with Pug.
For the basic layout we used Bootstrap 4, so the application is also responsive. However, reading the diagrams on the smartphone is not ideal. Bootstrap 4 was still in beta status during the project. This status was already so far advanced that we were able to work productively with it. Currently Bootstrap 4 has gone into the alpha phase.
Last but not least, the graphic heart of our application. We use Chart.js, which offers a large range of configuration possibilities and a variety of different diagram types. Its declarative approach makes it easy to use and the huge community makes it easy to find answers to any additional questions. Via a modal we offer adjustment possibilities such as the limitation of the time period of the sensor data. These settings are currently stored via a cookie.

Build tool
As build tool we used Webpack. For the development we additionally relied on the plugin webpack-dev-middleware. It provides a watch mode that recompiles the JavaScript and Sass files as soon as changes are made to them. The plugin does not write the files directly to the hard disk, but keeps them in memory, which increases the speed. Before the application is pushed into the cloud, the data must be compiled with Webpack.
Gitlab
As repository we used the Gitlab of the HdM. In Gitlab we have set up a delivery pipeline. Once a commit is made to the repository, the data from the repository is pushed into the cloud. In the application, a Yaml file with the name .gitlab-ci.yml is created in which the required commands are stored.
stages:
  - test
  - deploy
test:
  image: node:6
  cache:
    paths:
      - node_modules/
  stage: test
  script:
   - npm install
   - npm test
staging:
  image: ruby:2.3
  type: deploy
  script:
    - apt-get update -yq
    - apt-get install -y ruby-dev
    - gem install dpl -v 1.8.39
    - dpl --provider=bluemixcloudfoundry --username=$BLUEMIX_USER --password=$BLUEMIX_PASSWORD --organization=$BLUEMIX_ORG --space=$BLUEMIX_SPACE --api=https://api.ng.bluemix.net --skip-ssl-validation
  only:
  - master
The variables are created in the backend of Gitlab.

Leave a Reply
You must be logged in to post a comment.