When we started the project “Flora CI” for the lecture “System Engineering”, we planned to deal with Continuous Integration. As an important aspect of software engineering all of us have previously been involved in projects where code of developers had to be merged and builds had to be automated somehow. Anyway we felt we could dive deeper into CI pipelines and learn what it needs to get them running in a performant, useful and reliable way.
On our journey building such a system we also planned the containerization of all components in order to achieve the strongest possible encapsulation of the individual processes and to gain experience in this topic as well. Another planned goal was the automatic deployment into the corresponding Android and iOS App Stores as well as the provision on a web server.
Since all costs for the project were covered privately, it was also important to find a cost-effective solution for all challenges that arose.
The following list summarizes the goals set:
- Continuous integration of a cross-platform application (Android, iOS, Web)
- Containerization of all components (GitLab, Runner, Webserver)
- Deployment in different App Stores or on web servers (Staging & Production)
- Enable automated testing of the application
- Cost-effective solution
Approach
Building a Hybrid App with Ionic
Hybrid apps are a combination of native and web apps. They are written with web technologies like HTML5, CSS and Javascript and run on the respective platforms in a WebView. Using a hybrid framework such as Apache Cordova or Electron, the applications are wrapped and built for the desired platform. In addition, these frameworks provide interfaces to native device resources.
For our project we are using the Ionic Framework, an open source framework for building mobile apps, licensed under MIT. Ionic uses Apache Cordova to deploy natively, or runs in the browser as a Progressive Web App.
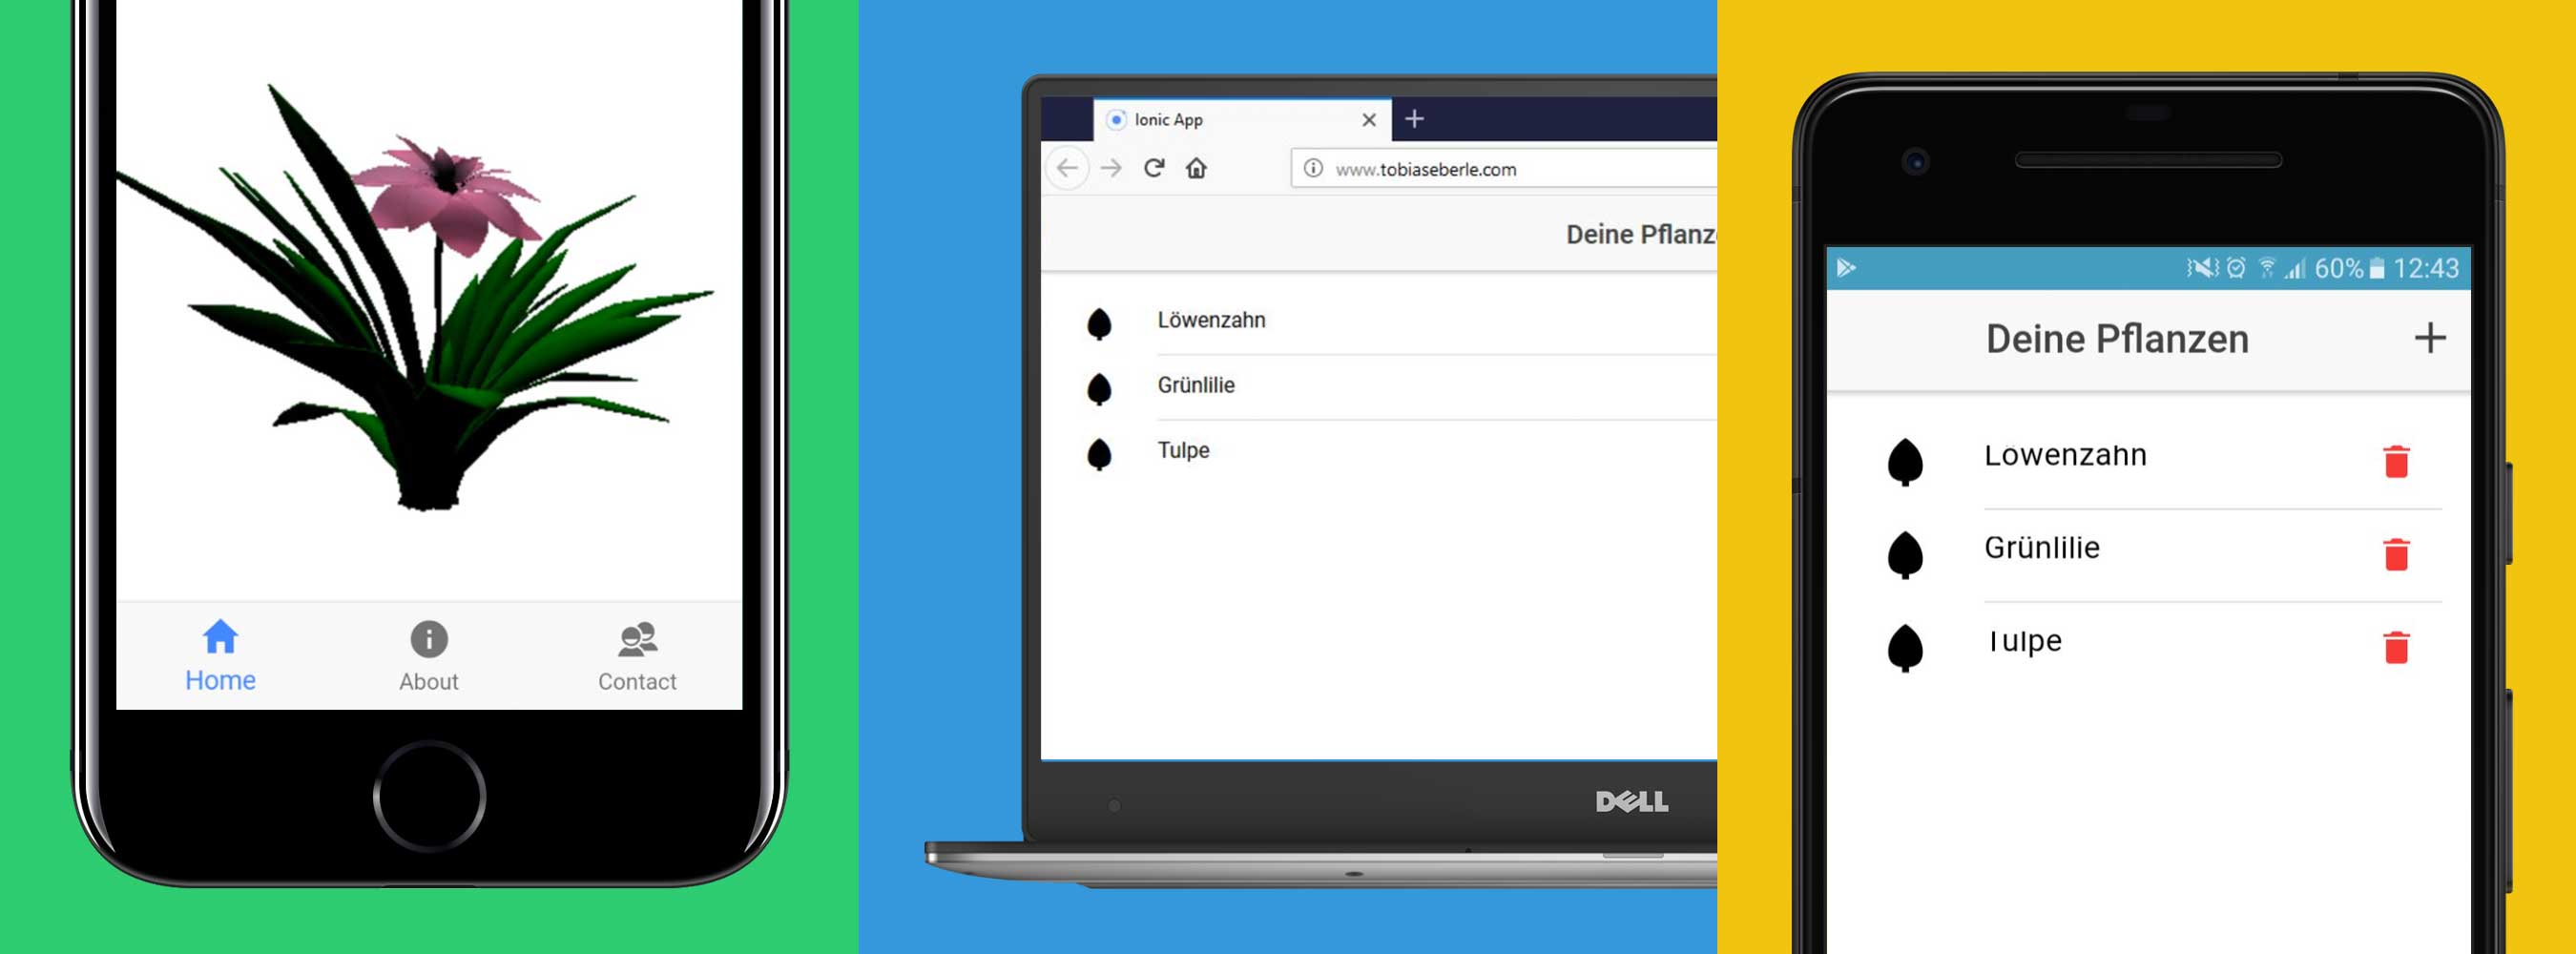
Our app called Flora is a simple application that provides you a list of plants you can manage. By opening the detail view you get a 3D view of the plant. The data is always synced to a backend (Node.js & MongoDB).
Integrating 3D context
When we decided to carry out a continuous integration project for several platforms, we also wanted to take this opportunity to integrate a 3D context into the application as real-time 3D applications can pose a great challenge in terms of development and maintenance due to the different hardware and operating systems. This is the case for instance, if you use different OpenGL/OpenGL ES for different target platforms.

The implementation of the 3D content was based on the WebGL Framework Three.js, which is executed in a browser or framework like Ionic. Only this part actually communicates with the hardware. Compared to other projects in which the respective hardware and operating system had to be supported natively, in this case the effort for a cross-platform application was significantly lower.
Evaluating CI Tools
After setting our goals, we defined a few points of content for further action. After one goal was the development according to the Continuous Integration principle, we started looking for a suitable CI tool. We finally chose GitLab CI/CD because we had already used GitLab in other projects as a versioning control system and wanted to gain experience regarding its possibilities in the context of continuous integration. During our research we came across other popular tools for continuous integration besides GitLab, which we would like to mention briefly.
Originally developed by Sun Microsystems, Jenkins is a build system now available under MIT license that is very popular and widely used in Java projects. By means of a plugin it can also be used for other languages. However, a native JIRA integration is missing and it is often mentioned that the actual operating costs are difficult to estimate. In addition, the possibilities for cooperation within Jenkins seem to be limited. For example, a developer cannot see the commits of another developer.
Another tool with JIRA integration is Bamboo, which is developed by Atlassian like the software project management system JIRA. This is a proprietary product with a variety of useful functions. Nutern criticized that the most cost-effective basic version has extremely limited functionality.
TeamCity, developed by JetBrains, is another very popular continuous integration tool. JetBrains is known for its mature products in the area of Integrated Development Environments, which are usually also available across platforms and therefore also allow cross-platform development. A disadvantage here seems to be a too high license price for many users.
In the end, the reason for using GitLab CI was not just because we had already gotten to know it as a repository hosting platform. Compared to Jenkins, we had even more advantages. On the one hand, GitLab CI combines the administration of the repository and tools required for continuous integration in one web application. In addition, the good user experience of GitLab is emphasized again and again, and so far we have had only positive experience with the use of GitLab. The web application also includes tools for an agile development process, like the Issue Board. We had already used these tools more intensively in previous projects.
Another important point is that GitLab jobs can be performed in Docker Containers and runners (which execute jobs) can be distributed across multiple GitLab projects.
Infrastructure
Finding suitable Hardware
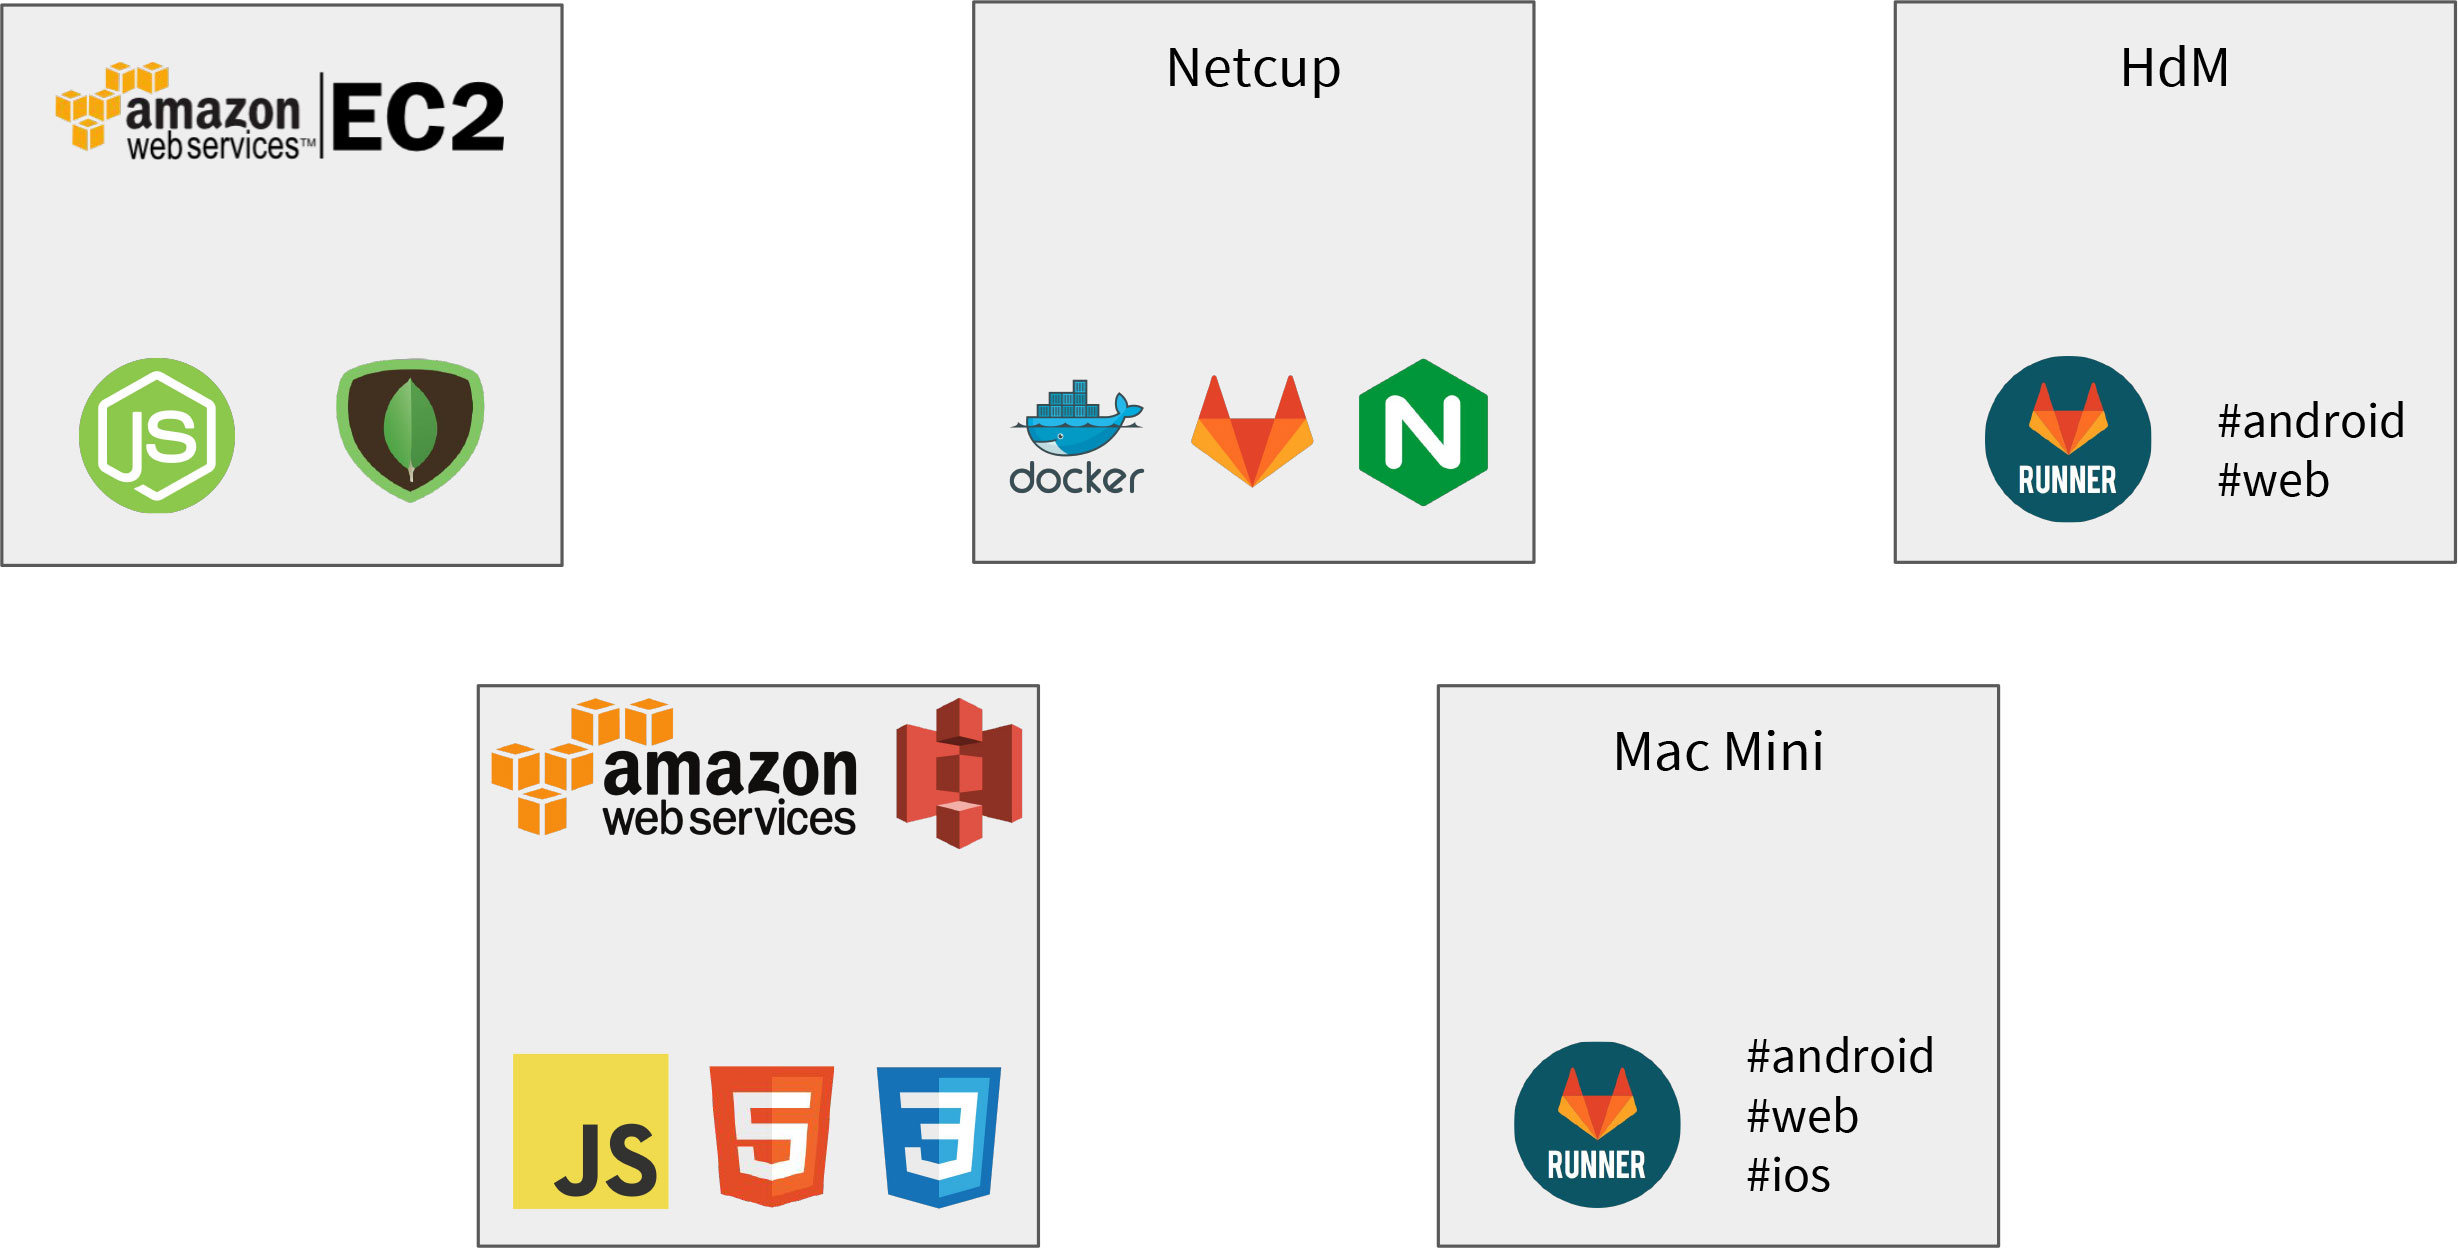
The very first task to get a hands-on experience with Docker, CI and CD was setting up a server. Since we all had some experiences with a virtual server on Amazon AWS, we quickly took an EC2-instance, installed Docker, gave all of us admin access and tried to launch GitLab in a Docker container as described in the GitLab docs. Unfortunately, it did not work.
We only got some meaningless error output in the console that GitLab could not be started. After some research, we found out that GitLab needs at least 2 GB RAM (recommended 4GB). Consequently, this free AWS instance didnt’t have enough capabilities for our goals. Instead of using the HdM server, where we expected a lot of problems with insufficient rights, blocked ports, blocked applications and so on, we decided to buy an own server to get a more ‘real-world-use-case’.
After some research we decided to use a vServer with 4 GB DDR3 RAM which costs 4€/month and seemed to be enough for our use case. So, we had to transfer all of our Docker images and config data to our new server and thereby we created a perfect scenario for using Docker, since one of its main advantages include its portability. This process was really easy even though we learned why Docker is called a stateless application: Only transferring the Docker images to the new server was not enough since e.g. the complete GitLab configuration (like projects, tickets, webhooks, users, …) is saved in a separate folder which has to be transferred as well. File or folder like those can be specified in the Docker file with the ‘volumes’ key, which determines where e.g. the GitLab config will be mounted to: e.g.: /srv/GitLab/config:/etc/GitLab
Consequently, transfering stateless as well as stateful applications with Docker is really easy!
But the infrastructure was still not completely solved: Our first builds needed about ~50-60 minutes on our own server! That was way too much and unsatisfying. Additionally, our server was down quite often and overstrained by executing the build process. So, again, we transferred some processes to another server: this time we moved all runners (which run the CI jobs) to the (quite fast!) HdM Server, which lowered the build time at a large scale!
Additionally, we had to rent Apple-related hardware and software to be able to build our application for iOS and mac OS. So, in the end we had one vServer with GitLab, the HdM Server to run #web and #android jobs and a Mac Mini Server which is able to run #web, #android as well as #ios jobs.
In the end, we also moved our backend to an Amazon AWS EC2 instance and put the web build to an Amazon AWS S3 storage. Thereby we decreased our build time to 10-20 minutes.

Setting up the server
All applications (node.js and MongoDB backend, GitLab, nginx) are defined by a Dockerfile using docker-compose and are executed in a Docker container. This brings us portability, containerization and scalability. However, as a counterpart we had to discuss how those different containers are able to communicate with each other: The solution includes the ‘ports’ key in the Dockerfile, where it is defined which port will be exposed, as well as nginx as a reverse proxy.
The setup of nginx is straight-forward: You define the port that nginx listens to, which is port 80 as a reverse-proxy. You declare the server name like the root example.de or gitlab.example.de and finally the port the request will be mapped to. In this example, all requests for the subdomain GitLab will be forwarded to the port 9090, on which the Docker of GitLab is exposed.
As the root page we wanted to display the current web build: So in the end of each build process we started an nginx webserver, in which we mounted the web build artifact and exposed a certain port. That way it was easy accessible by configuring the nginx. Later, as the frontend was moved to Amazon AWS S3, we only had to change the location of root to proxy_pass it to the address of the S3 location.

So, all in all setting up nginx as a reverse-proxy is really easy but you have to think about the structure of your application. You have to think in particular about how the applications in their Dockerfiles will be able to communicate to each other.
A more annoying problem is the hardware as you do not want to spend a lot of money when getting a hands-on experience with Docker and such. On the other hand, you should at least invest enough to get a server which empowers you to focus on your application and your use case instead of getting distracted from server issues all the time.
In the second part of our blog article we will cover how we set up our pipeline with GitLab CI, what problems we encountered and how we solved them. Stay tuned!


Leave a Reply
You must be logged in to post a comment.