Bad days happen to everyone, but when one happens to you, just keep doing your best and never let a bad day make you feel bad about yourself.”— Big Bird about a day with deployment problems

“Continuous Integration” (CI) and “Continuous Delivery” (CD) are topics every modern software developer should have heard of or at least is pretending to be. But working on student projects you rarely take time to set up a clean environment to integrate, test and deploy your code or trigger any of those tasks automatically. Sometimes you don’t even try to run your code on a real server. Or you might try to deploy your final project at 23:59 o’clock before the submission… GOD BLESS there are automation tools for that nowadays!
Normally you just finish your projects barely in time and under the influence of lots of coffee and ultimately don’t care whether the fancy new web application you wrote would survive outside of your local machine (Hint: It probably won’t). Therefore we have decided to take a closer look into said topics in the context of the module “System Engineering and Management”. Our goal is to set up a CD for a project of our choice and share the insights we make in an understandable and enjoyable way – enjoyable like the Sesame Street!
We hope to give a tutorial to students with a similar technical background like ourselves on what it means to implement CI for a project. Also we would like to evaluate whether it is necessary or worthwhile to consider the whole process for small student-like applications and projects. Our main goal is to give you a deeper knowledge on the topic and we hope that you feel comfortable enough afterwards with CI and Jenkins to list it as topics you are familiar with in your curriculum vitae. We will document every mistake we made to ensure that you won’t run into the same errors as we did – and we are sure, that there will be a lot when working with CI and CD for the first time.
Because of it’s wide popularity in the industry at the moment, we are going to set up Jenkins (although there are other solutions like Magnum CI, which probably has the coolest logo out there). Jenkins is a common tool for CD: you can basically automate everything with it and deploying becomes as easy as clicking a button. Furthermore we are using Amazon Web Services (AWS) for hosting Jenkins, because it has free solutions and is easy-to-use.
Setting up Jenkins on AWS
In this first blog post we are going to guide you through the necessary steps to get a Jenkins instance up and running on your Amazon Web Services machine.
First, head over to AWS and get yourself a shiny new account, in case you don’t own one yet. Amazon will ask for you credit card number. If that’s fine for you, go on, if not, there are other alternatives like a IBM Bluemix or Microsoft Azure etc. The smallest available machine on AWS, which is still free, is the T2.Mikro.
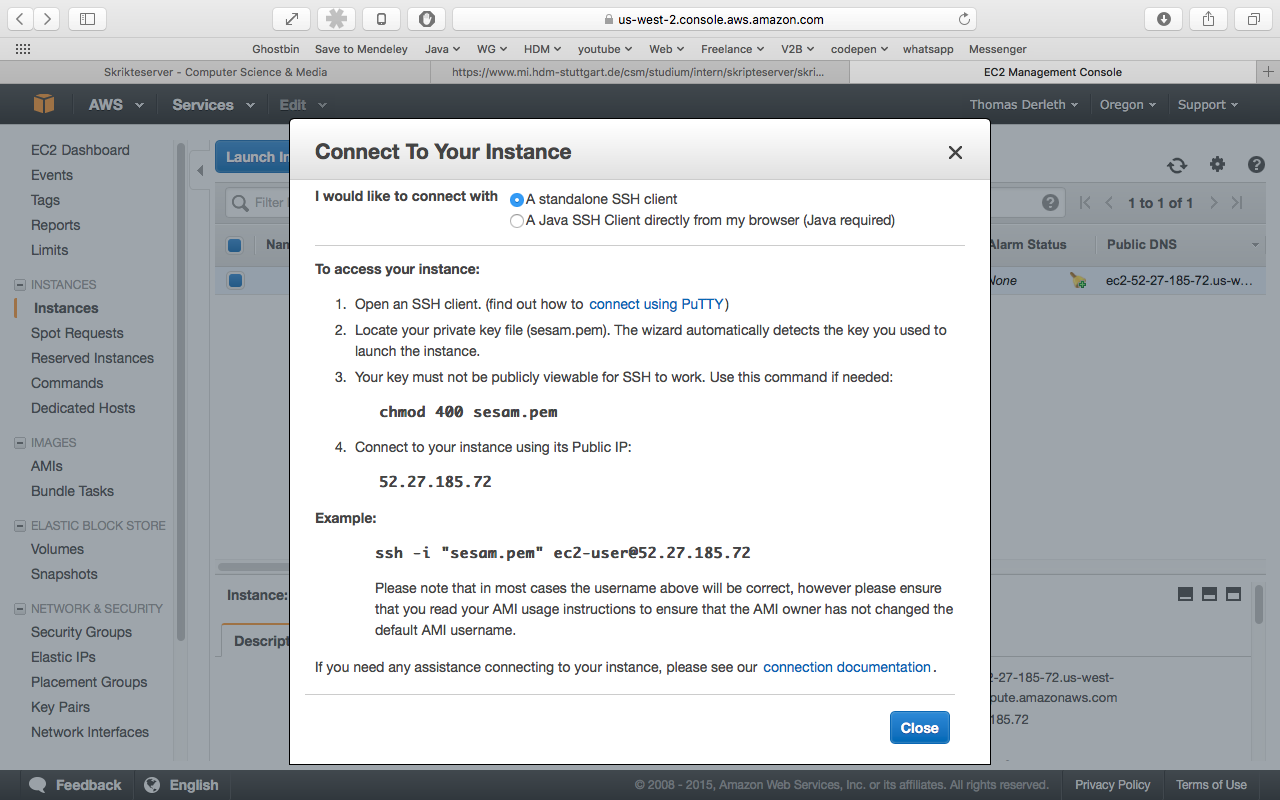
After you created the instance with your SSH Key, it is time to visit your new machine. You can just ssh into the host with the given url and take a look around.
ssh -i <path/to/key.rsa> root@<ip adress>
By default you will be logged in as ec2-user. We are going to do some actions, which need root access. To login as root user simply type
sudo su -.
After you got root-access, update all the available software packages on the server via
yum update.
This is not necessary but recommended due to the fact, that we don´t know which preferences Amazon uses to launch our instance. You should see some magic happening in the terminal window. Now it’s time to fetch the current available Jenkins version via:
wget -O /etc/yum.repos.d/jenkins.repo http://pkg.jenkins-ci.org/redhat-stable/jenkins.repo
After you also got yourself a nice repository key via
rpm --import http://pkg.jenkins-ci.org/redhat-stable/jenkins-ci.org.key
, you are ready to install. So don´t hesitate and run
yum install jenkins .
Everything worked? Then we are ready to start our newly installed service via
service jenkins start.
This should work fine, but what if we want to restart our instance? To ensure that Jenkins starts with rebooting our instance type
chkconfig jenkins on.
Enough messing around with the terminal. Let´s go back to our AWS interface.
Jenkins is already running on port 8080. Unfortunately, on AWS you don´t have access to this port. What we need to do next is creating a new AWS security rule for inbound traffic. To do so, choose your instance on the AWS panel and have a quick look at the properties at the bottom. You should see something like Security groups – launch-wizard-1. view rules. Click on launch-wizard-1. Next choose inbound on the very bottom and edit. Your new rule to insert should look similar like this: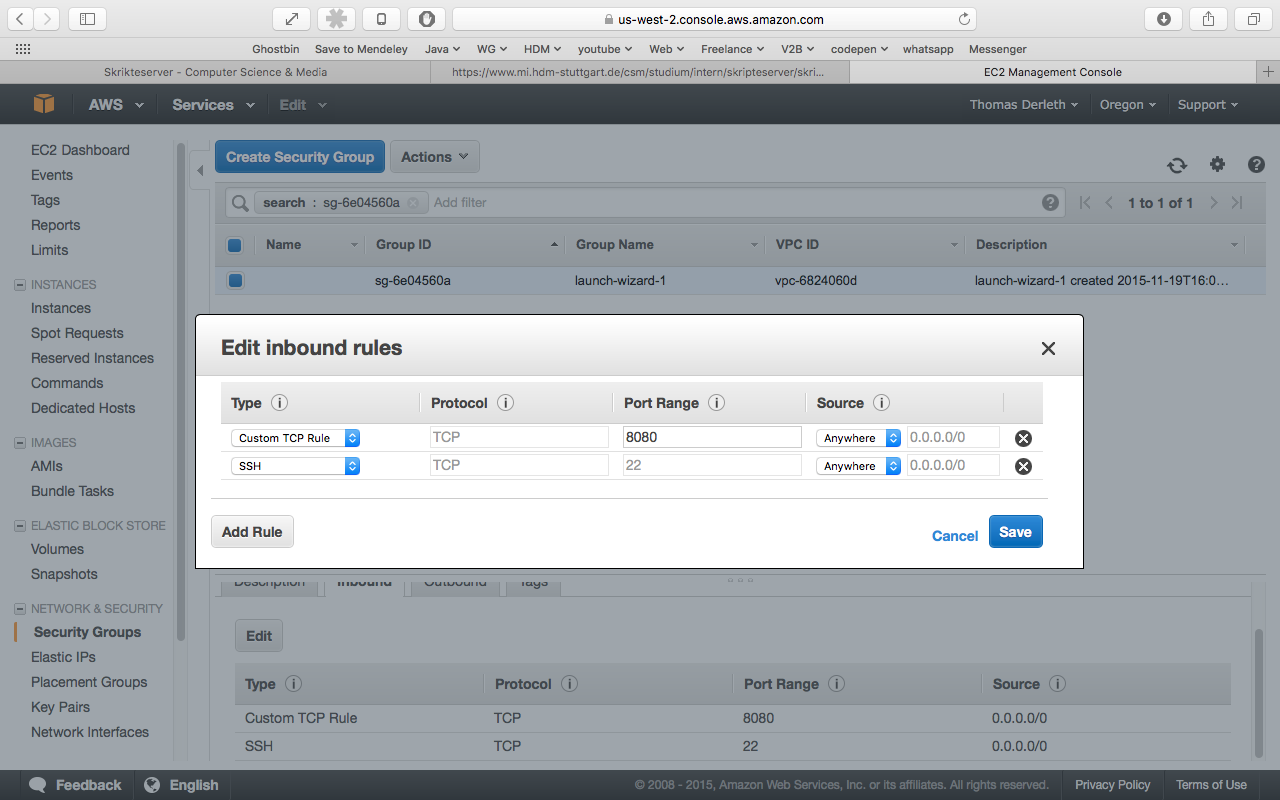
For a better overview:
| Type | Protocol | Port Range | Source |
|---|---|---|---|
| Custom TCP Rule | TCP | 8080 | 0.0.0.0/0 |
Now the only thing left to do is to open a browser and type the following URL:
http://<PUBLIC-IP>:8080.
If you don´t know your public IP don´t despair, you can find it in your instance properties, too.
Securing Jenkins
Although you are the proud owner of a Jenkins instance now, we are not entirely done yet. Right now every person in this dark place called the internet is able to reach and configure your Jenkins, as it doesn’t apply any security restrictions. Therefore add a new user to Jenkins with a login name and a password. A good name might be Ernie or Bert. Thought of a save 64 digit password? Nice, let’s continue!
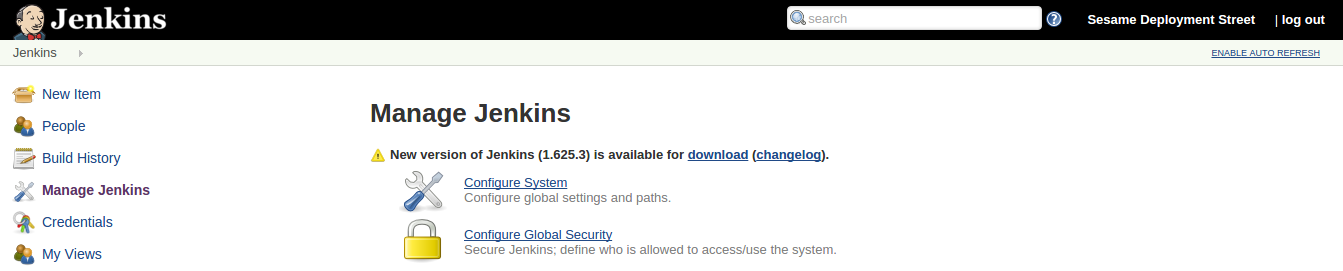
Now we can configure the security aspects of our Jenkins instance. Under Manage Jenkins select Configure global security.
Below Security Realm check the box which says “Jenkins’ own user database”, this enables us to restrict the right of different users.
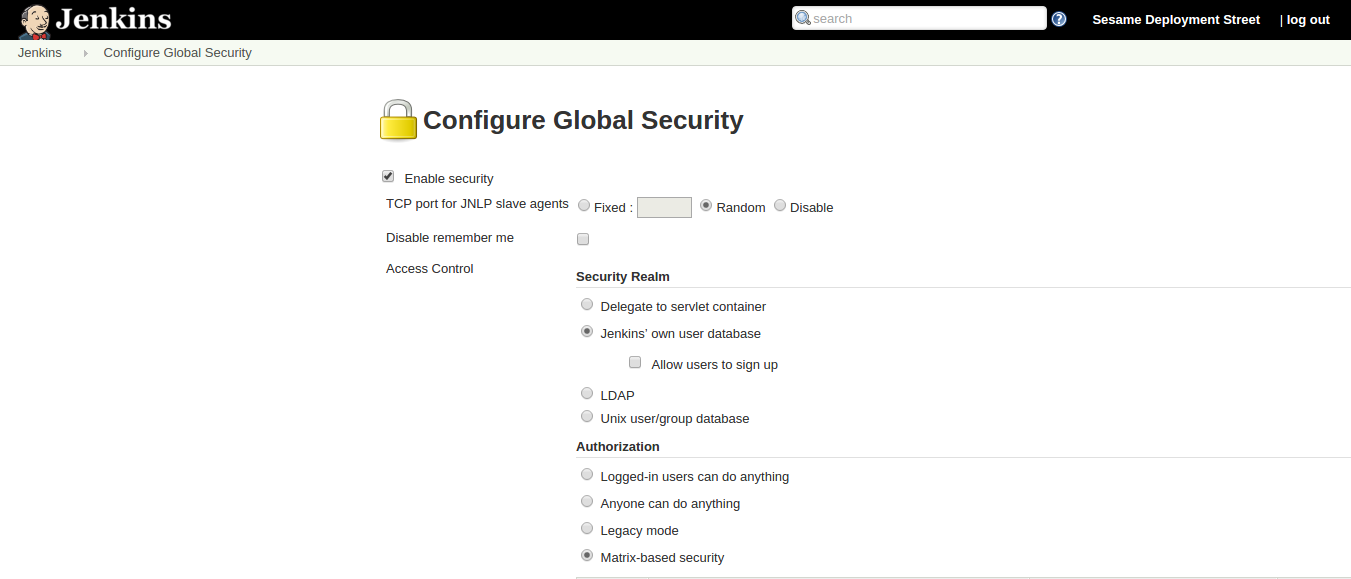
For Authorization we chose Matrix-based security, this gives us full control over every single user that is registered for our Jenkins. Add Ernie (or any other name you chose) to the matrix and choose the rights that suit you the most. We assume he is our superuser, so we give him all available rights. Click Save and it’s done! It is very important to secure your Jenkins, so make sure no one without a valid login can mess around with your system. Also don’t worry if you lock yourself out of your own system, it happens to the best (including the authors of this post).
What’s coming in the next episode?
In this part we set the basis for our Sesame Deployment Street. In the next blog post we will show you how you can set up a deployment pipeline for your project. Farewell folks, see you in the next episode!
Blogpost by Thomas Derleth (td036), Jörg Einfeldt (je051), Marc Stauffer (ms445)
Read more about “how you can set up a deployment pipeline for your project” in our tutorial part 2!
Leave a Reply
You must be logged in to post a comment.