Getting Ideas… write a User Story
When I thought about an idea for a project, part of the lecture “Software Development for Cloud Computing”, I had two related use-cases in mind. So I wrote down those high-level user-stories:
As a user who owns a non-connected car, I want to access some information about my car on my smartphone so that I know about the position of my car and additional information like fuel level, consumption or driving statistics.
As an employee who wants to drive a pool-car, I want to know where the vehicle is parked so that I don’t have to search on different parking spots around the building.
Define a Scope
My goal for this project was to build a functional prototype which meets the expectation of at least one requirement.
It wasn’t easy to define the scope for this project because there are many ideas to expand it.
- Log car telemetry data from OBD-II Interface in 200ms steps.
- Transmit telemetry data every 5 seconds to AWS IoT Backend.
- Telemetry data like geoposition, vehicle speed, engine speed, tank fuel level…
- Store incoming telemetry data on S3 storage.
- Store actual vehicle state on DynamoDB
- Build an iOS App to show vehicle data
- (Additional) Create an Alexa Skill
The Components
The project can be separated into three components. First part is a Datalogger, second the Cloud Backend Infrastructure and third the User-Interfaces. In the following sections I want to go deeper into the single parts:
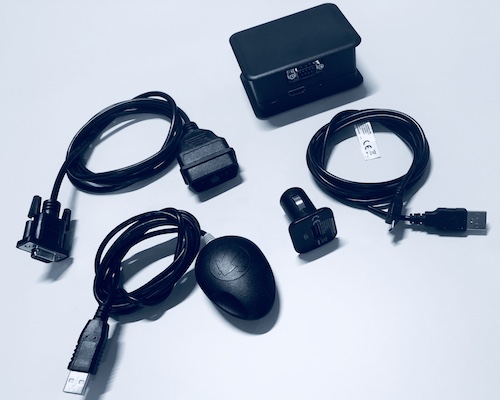
Data Logger
The datalogger should record signals like latitude, longitude, speed, engine-speed, consumption, odometer and tank level. For that, I adopted an existing solution based on a Raspberry Pi and got it to work with the OBD-II Interface of my car and an external GPS Receiver. The datalogger records the data in 200 ms steps transmits it every 5 seconds to the backend using MQTT and the AWS IoT Framework.
The primary solution is directly connected to the CAN-bus of the car which provides a large bunch of signals including all required signals. During my modification for OBD-II I had to realize that OBD-II does not provide all the required signals. This restricts the implementation of the first user-story slightly but covers still the requirement to show the position of the car, which is also the main feature of the second user story.
Material: Raspberry Pi Model 3 PiCAN2 Board Serial to OBD-II Adapter Cable USB GPS Receiver * USB Power Car Adapter + Cable
How it works: The device uses the AWS IoT SDK to publish the data via MQTT to the AWS IoT Endpoint. It publishes to the following topic connectedVehicle/telemetry/[vin] with a frequency of 5 seconds. The message structure is as followed:
{
    "UDID": "",
    "tripId": "",
    "canSnapshotObject": {
        "sensor": {
            "value": 0,
            "timestamp": 0
        }
    }
    "canFrames": {}
}
Cloud Backend Infrastructure
The Main Challenge on this was to design an lightweight but extensible architecture. At first, I searched for examples for my use-case. I wanted to know, how others do that. You can find a lot of examples, tutorials and ready-to-deploy solutions for that. The most cloud providers have example stories with car manufactures or automotive suppliers. Two main examples were helpful for me: The AWS Simple Beer Service (SBS) and the AWS Connected Vehicle Solution. The SBS is a simple example with all important components for an infrastructure like that. It was a good starting point, but as I went further, I found out, that the infrastructure, the picture shows, is a little older. For example, the API Gateway between the Kegerator and the Lambda functions is replaced with the AWS IoT Core part (see Simple Beer Service v5). Also for the visualization part, there is a better solution for mobile devices like AWS AppSync.
The Connected Vehicle Solution of AWS offers a range of features and various sample services such as location-based marketing, push notifications or driver evaluation. It’s easy to implement because Amazon provides a cloud formation template that I have installed on my AWS account. It worked without any problems.
Unfortunately, AWS provides no documentation about how to get data to this solution. It would have been helpful to know which signals in which format and how often are expected. So a lot of investigation was necessary.
In this way, I found a helpful tool to simulate a car. The AWS IoT Device Simulator is based on the AWS Cloud Infrastructure, can also be deployed with cloud formation template and provides an interface to simulate car rides.
The source code of the Simulator showed me how the data is structured. The disadvantage became obviously, that for every sensor in the vehicle a message is published instead of aggregating the data and send it every x seconds. Because of this and the complex infrastructure, I decided to implement an infrastructure on my own.
Why Amazon Web Services?
The Main Requirement for my project was an IoT Cloud Platform. Well-known products are from Google, Microsoft, IBM, and Amazon. Every one of the four has an example and success stories for their IoT Platform with connected vehicles. I decided on Amazon AWS because it is very well documented, I have a basic knowledge of some AWS Services and my colleagues are familiar with this product, so in case I can ask them. It seems for me to be the fastest way to get a result but also a good way to learn a lot about cloud services like IoT Platforms, Serverless Programming, Storage & Database, Infrastructure-, Platform- & Function-as-a-Service, and in deep about AWS.
Set up IoT Infrastructure
In the following, I will explain how I set up the IoT Platform for my requirements:
- First, create a new IoT thing following the wizard. You’ll need to create a certificate, public and private key. Don’t forget to activate the certificate. The policy will be created in the next step.
- Create a new policy. Click on Advanced mode and insert following JSON document:
{
  "Version": "2012-10-17",
  "Statement": [
    {
      "Effect": "Allow",
      "Action": [
        "iot:Publish",
        "iot:Subscribe",
        "iot:Connect",
        "iot:Receive"
      ],
      "Resource": [
        "*"
      ]
    }
  ]
}
Assign the policy to your newly created thing.
- Copy the certificates to the IoT device
- Create a rule for the topic. The rule query statements should look like this:
SELECT * FROM 'connectedcar/telemetry/#' - Add action Invoke a Lambda function passing the message data. Leave the function name empty unless you created the function.
After setup of the IoT Infrastructure, we can continue with storage, database, and Lambda functions.
Create S3 Bucket: All incoming messages will be stored on an S3 Bucket, arranged after vehicle identification number and trip. Create one with named connected-vehicle-data-eu-west-1.
Create DynamoDB Tables: The dynamoDB table will show all vehicles with their current state. Create one named connectedVehicle-vehicle-snapshot with vin as the primary key.
Create Telemetry Lambda Function
- Create a Lambda Function
- Name: ConnectedVehicle-storeTelemetryDataFunction
- Runtime: Node.js 6.10
- Role: Create new role from template(s)
- Create new Role from Template: connectedVehicle-dev-eu-west-1-lambdaRole
- Choose Policy Template Basic Edge Lambda permissions
- Save Lambda Function
- Add a trigger
- Choose AWS IoT from the left
- Go down and configure the trigger
- Select Custom IoT rule and choose your rule (ConnectedVehicleTelematics)
- Click Add
- Edit IAM Role for using DynamoDB and S3
- Go to IAM Console and edit policy
- Choose Add inline policy and add a JSON policy (connectedVehicle-lambda-dynamodb-bucket-policy):
{ "Version": "2012-10-17", "Statement": [ { "Sid": "VisualEditor0", "Effect": "Allow", "Action": [ "dynamodb:PutItem", "dynamodb:DescribeTable", "dynamodb:DeleteItem", "dynamodb:GetItem", "dynamodb:Scan", "dynamodb:Query", "dynamodb:UpdateItem" ], "Resource": "arn:aws:dynamodb:eu-west-1:xxxxxxxxxxx:table/*" }, { "Sid": "VisualEditor1", "Effect": "Allow", "Action": "dynamodb:ListTables", "Resource": "*" } ] } - Add also a Policy for S3 (connectedVehicle-lambda-s3-bucket-policy):
{ "Version": "2012-10-17", "Statement": [ { "Sid": "VisualEditor0", "Effect": "Allow", "Action": "s3:*", "Resource": "arn:aws:s3:::connected-vehicle-data-eu-west-1" } ] } - Save it.
- Add following code to your Lambda function:
var DATA_TABLE = 'connectedVehicle-vehicle-snapshot'; var AWS = require("aws-sdk"); var ddb = new AWS.DynamoDB(); var s3 = new AWS.S3({params: {Bucket: 'connected-vehicle-data-eu-west-1'}}); exports.handler = function(event, context) { if (event.UDID!==undefined) { var rTimestamp = new Date().getTime(); console.log(rTimestamp); var params = { TableName: DATA_TABLE, Item:{ "vin":{"S": event.UDID }, "lat":{"S": event.canSnapshotObject.hasOwnProperty('lat') ? event.canSnapshotObject.lat.value.toString() : '-' }, "long":{"S": event.canSnapshotObject.hasOwnProperty('long') ? event.canSnapshotObject.long.value.toString() : '-' }, "range_in_km":{"S": event.canSnapshotObject.hasOwnProperty('range_in_km') ? event.canSnapshotObject.range_in_km.value.toString() : '-' }, "tank_level_percentage":{"S": event.canSnapshotObject.hasOwnProperty('tank_level_percentage') ? event.canSnapshotObject.tank_level_percentage.value.toString() : '-' }, "canSnapshotObject":{"S": JSON.stringify(event.canSnapshotObject)}, "lastUpdated":{"N": rTimestamp.toString() } } }; ddb.putItem(params, function(err, result) { if(err) console.log("Error in uploading file on dynamodb due to "+ err) else console.log("File successfully uploaded to dynamodb.") }); var params = { Key: event.UDID + '/' + event.tripId + '/vehicle-data-' + rTimestamp, Body: JSON.stringify(event), }; s3.upload(params, function (err, res) { if(err) console.log("Error in uploading file on s3 due to "+ err) else console.log("File successfully uploaded.") }); } else { context.fail("JSON input [UDID] not defined."); } }; - Now your function should work.
Room for Improvement
- IoT Device Rollout. At this point, new IoT devices have to set up and be registered manually. After that, the new created certificates must be copied to the device. This process can be automated and is called “Just-in-Time Provisioning”. The first time the device connects to AWS IoT, a certificate will be created and downloaded to the device. All it needs is the CA certificate.
- Account Linking. One issue is that there is no link between a car and a user account. So every App user can access all cars. Account Linking and Rights Management would solve this. The user of a car should only access information about this car, while the fleet owner should be able to access all cars. This applies also for the Alexa Skill.
- Scriptable Infrastructure. I had set up the AWS Services step-by-step through the web console. This is good for exploring and trying out the services but it causes a high effort to re-deploy or roll back the infrastructure. An approach for this is to use the aws cli, CloudFormation templates or use a tool like terraform.
Further Development
There are many ideas to extend the dashboard in the app about vehicle information. As we get on the /vehicle/trip/[vin] channel a notification on trip start and end, we cloud trigger on this way some analytics on trip ends like a driver safety score or a green score. Looking at the AWS Connected Vehicle Solution there are more ideas for location-based services (geofence, marketing) or predictive maintenance. In addition to the second user story, a web dashboard for the pool-car manager could be possible to monitor all cars.
User Interface
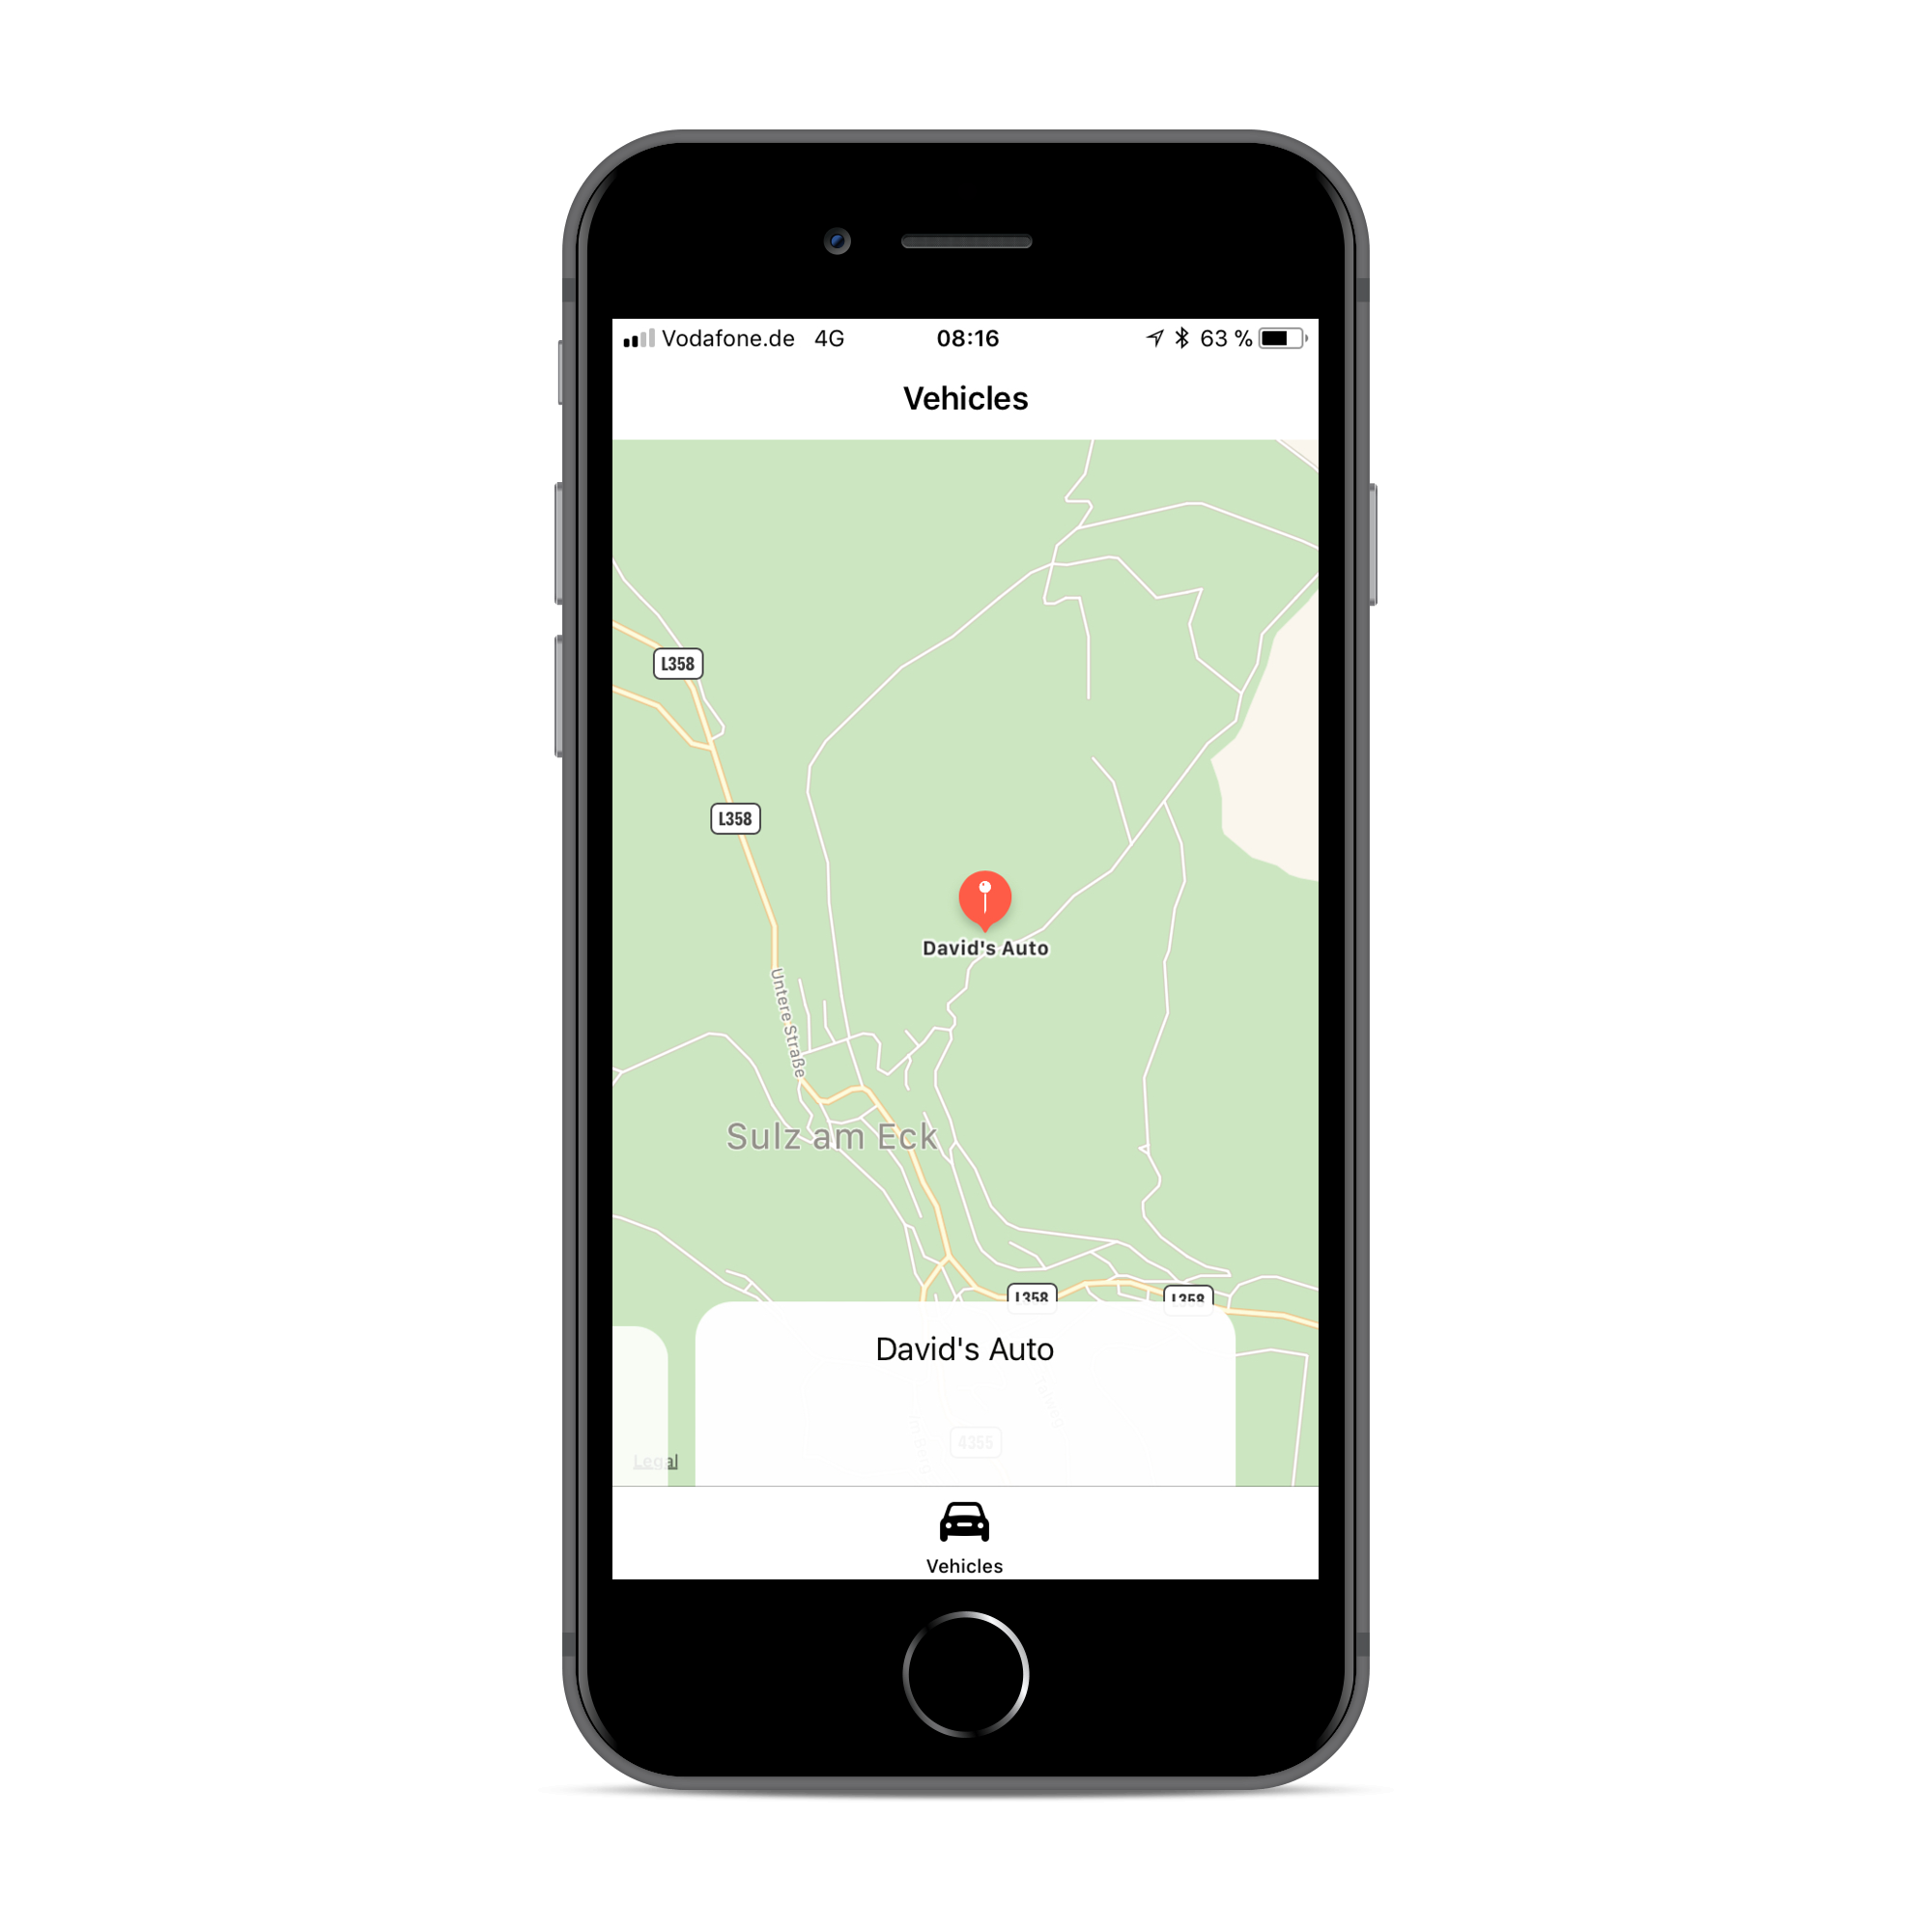
The App
There are two main user touch points to the vehicle cloud infrastructure. First, I build an iOS App for that. The App shows a Map and a card-slider with all vehicles. The card displays the vehicle identification number and owner of the car.
Adjusting the scope (see part data logger) affected the App mainly, so I put the focus on the vehicle position. In this way, the main feature of the app is to show the position of the vehicle.
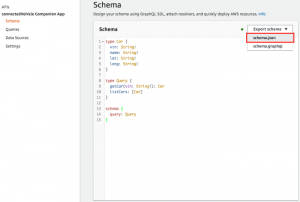
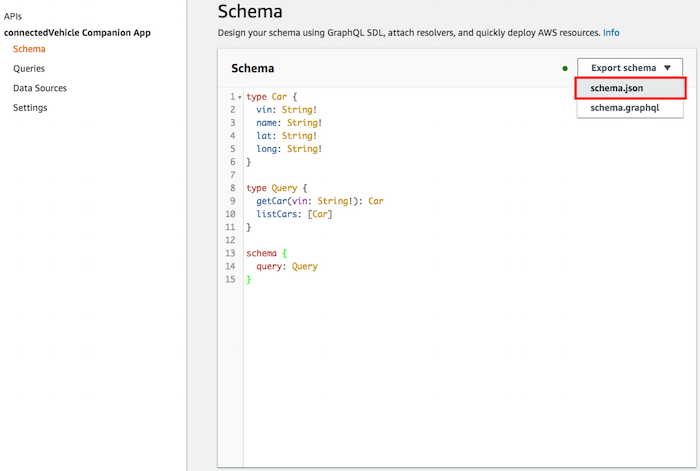
A good starting point for building an app with AWS AppSync is the documentation. The section Code Generation for the API was a little bit unclear for me so I will explain it. AWS provides a tool to generate an API Swift code out of your schema file and queries for you. You need two files to generate the code.
- First, the schema file (schema.json). You can download it on the web interface here:
- Second, you need to create a new file called query.graphql. Put the queries here:
query GetCar($vin: String!) { getCar(vin: $vin) { vin lat long } } query ListCars { listCars { vin lat long } }<span data-mce-type="bookmark" style="display: inline-block; width: 0px; overflow: hidden; line-height: 0;" class="mce_SELRES_start"></span> - Put both files in a folder called GraphQLOperations
- generate the API file with
aws-appsync-codegen generate GraphQLOperations/*.graphql --schema GraphQLOperations/schema.json --output API.swift
App Authentication
With AWS AppSync you have the possibility to decide between four different authentication methods:
- API key
- OIDC (OpenID Connect)
- Amazon Cognito user pools
- AWS IAM (Identity and Access Management)
For simplicity, I decided to use for this Prototype the API key. I had no intention of rolling out the prototype for people other than myself. If planned, I will switch to Cognito Authentication. I know, it is not a good way, even for prototypes. Everyone with that API key and the App can access all vehicles. But for a first demo and proof of concept, it seems to be enough for me. On further development, I will change it. Another disadvantage of the API key Method is that the key expires after one week. So have to generate a new key and rebuild the app.
With Cognito User Pools it is also possible to define user groups to restrict access. So it would be possible that normal user only can access the assigned car but car-pool managers can access all cars.
“Alexa, ask carfinder where is my car”
The Alexa Skill
In addition to the app, I created a simple Alexa Skill. The Alexa skill should answer the following question:
What would be the easiest way for an employee to get to know about the vehicle position of a pool car?
Actually, the employee has to look up in the driver’s log. But sometimes the position is described as inaccurate or incorrect. Alexa can answer this question much better. In addition, if an echo device with a display is used, it shows a map with the location.
A question to a skill is constructed as followed:
[Keyword “Alexa”] [Skill Invocation Name] [Intent, optional with Slots]
A sample question could be:
Alexa, ask carpool where is my car?
“carpool” is the skill invocation name, “my car” is a sample for the intent slot named “car” and “where is {car}” is a sample utterance.
These three things are most important to set up. The Alexa skill is set up by an Amazon developer account (in difference to an AWS business account). After building the model an Endpoint has to be defined. This could be a lambda function or an HTTPS endpoint. I decided to use a lambda function. Using the Skillinator, I generated a code example based on my JSON skill model and modified it for my needs. I implemented the link between the skill and the vehicle-snapshot DynamoDB table so that you can ask for specific cars. With the Here API, the geo-coordinates are translated into addresses. So when you ask for the position you get the street, number, and city and also the name of the next POI. This is helpful when you don’t know the exact address but the next POI like another company or a restaurant.
Leave a Reply
You must be logged in to post a comment.