Introduction
The corresponding repository containing our code can be found publicly on GitHub
Since there are at least a quintillion chat applications out there, we thought that we’d do no harm in releasing another one.
ChatScape is a chat application, designed as a hands-on approach to dive deep into AWS. With the intent of making us familiar with as many AWS services as possible, the application has been designed to ensure scalability, and to not require a fixed set of resources. At the foundation of ChatScape is a strong emphasis on cloud-agnostic Infrastructure as Code (IaC), with a preference for open tools like Terraform/OpenTF over others like CDK to make it possible to switch between cloud providers without too much work. To streamline the deployment process, all deployment, CI, and CD have been integrated into a single, comprehensive monorepo pipeline.
Architecture
During the initial stage of development, our approach for the project was to build a simple chat application and to try to use as many AWS services as possible. We decided to use AWS since it is the cloud provider with the largest marketshare and we had already some experience with AWS from a previous project. The initial plan was to build a complex real-time system utilizing a central messaging broker, a WebSocket and REST API, an endpoint for possible future external integration lambda handers utilizing pub/sub and every possible feature we would discover along the way. The following diagram illustrates our first architecture design:
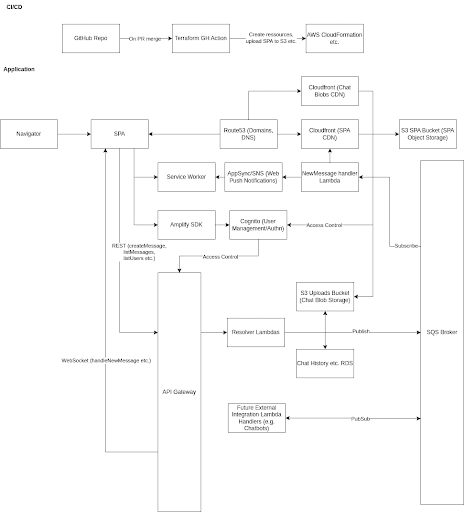
This first approach turned out to be quite unbenefitial since AWS isn’t as approachable as one might think and there is rarely the use-case that a company solely relies on AWS services for its application architecture. Hence, we overhauled our initial decision because the benefit of building such an unnecessarily sophisticated architecture would be diminishingly small.
Instead, we decided to follow the at the playbacks recommended use-case driven approach which did not mean that we had to start from scratch with the system design but that we could comfortably remove unnecessary components from our architecture and add them back later if necessary.
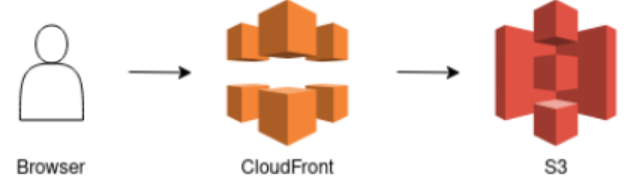
The final use-case driven design turned out to be a lot simpler. The core components can be described as three seperate, simple flow diagrams:
The first flow shows how the frontend gets distributed to our clients. Using S3 to store the page and CloudFront as a CDN, a user can reliably access our frontend with low latency, since the distance between where the content is stored and where it needs to go gets reduced as much as possible. Additionally, CDNs also perform load balancing which leads to better scalability overall.
As mentioned in this blog post, delivering static content can be idiomatically solved using CloudFront and S3. Using S3 in combination with CloudFront has the advantage of automatic scaling of the bucket in case the application gets bigger. Additionally, since we want to use a serverless chat application, using a serverless solution for storing static content is non-negotiable.
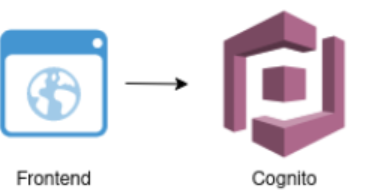
The second flow is responsible for authentication and is realized using AWS Cognito. We decided to use AWS Cognito for our authentication since it has a simple integration with other AWS resources, especially with the API Gateway. Additionally, it provides all the functionality required for OAuth integration and user sessions and authentication tokens are managed automatically. The frontend uses cognito to authenticate and to aquire an authentication token for future requests.
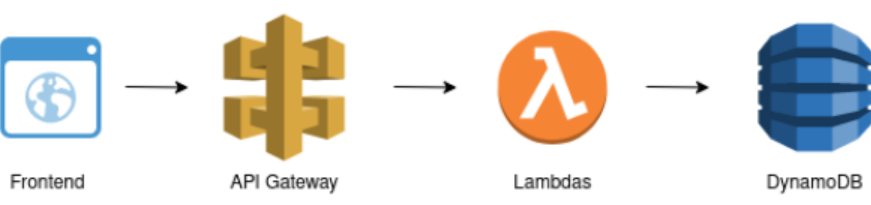
The third flow is concerned with actually handling business logic, is using the API Gateway, AWS Lambda and DynamoDB. Every request originating from the frontend passes the API gateway and triggers one of six lambdas which operate on our DynamoDB instance. The usage of AWS lambda has the big advantage of automatic scaling and of course being a serverless service which removes the effort of managing the application or deploying the application logic on a dedicated server alltogether.
All in all, this architecture felt a lot more managable and fitting for our use-case. Furthermore, we did not want to “waste” our time on configuring all the different AWS services, but we rather wanted to spend our time on developing a well-rounded project instead. This allowed us on focusing on other, equally important aspects such as proper testing, CI/CD and a proper architecture instead.
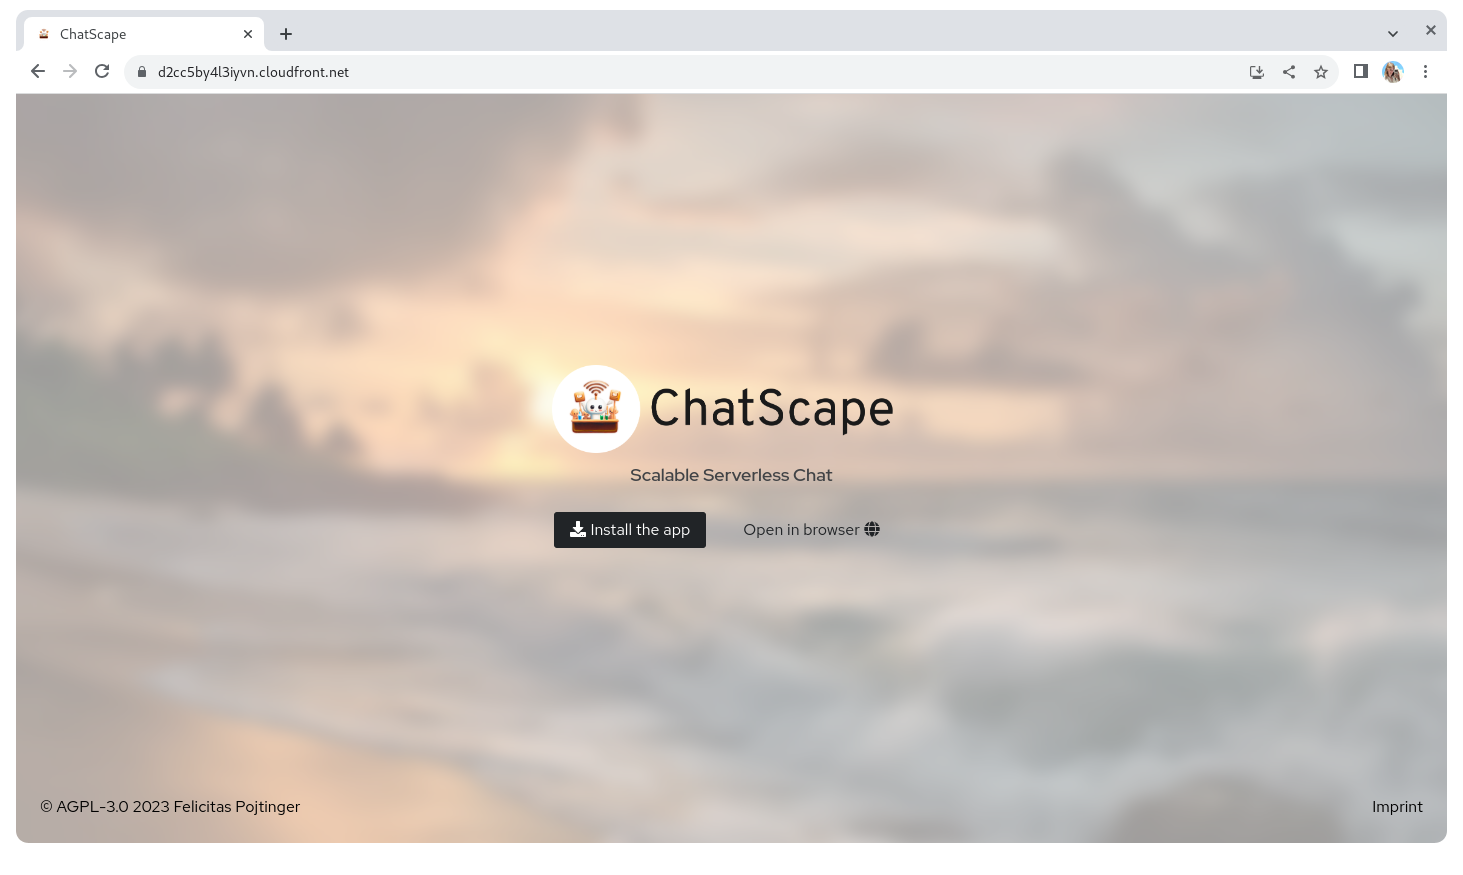
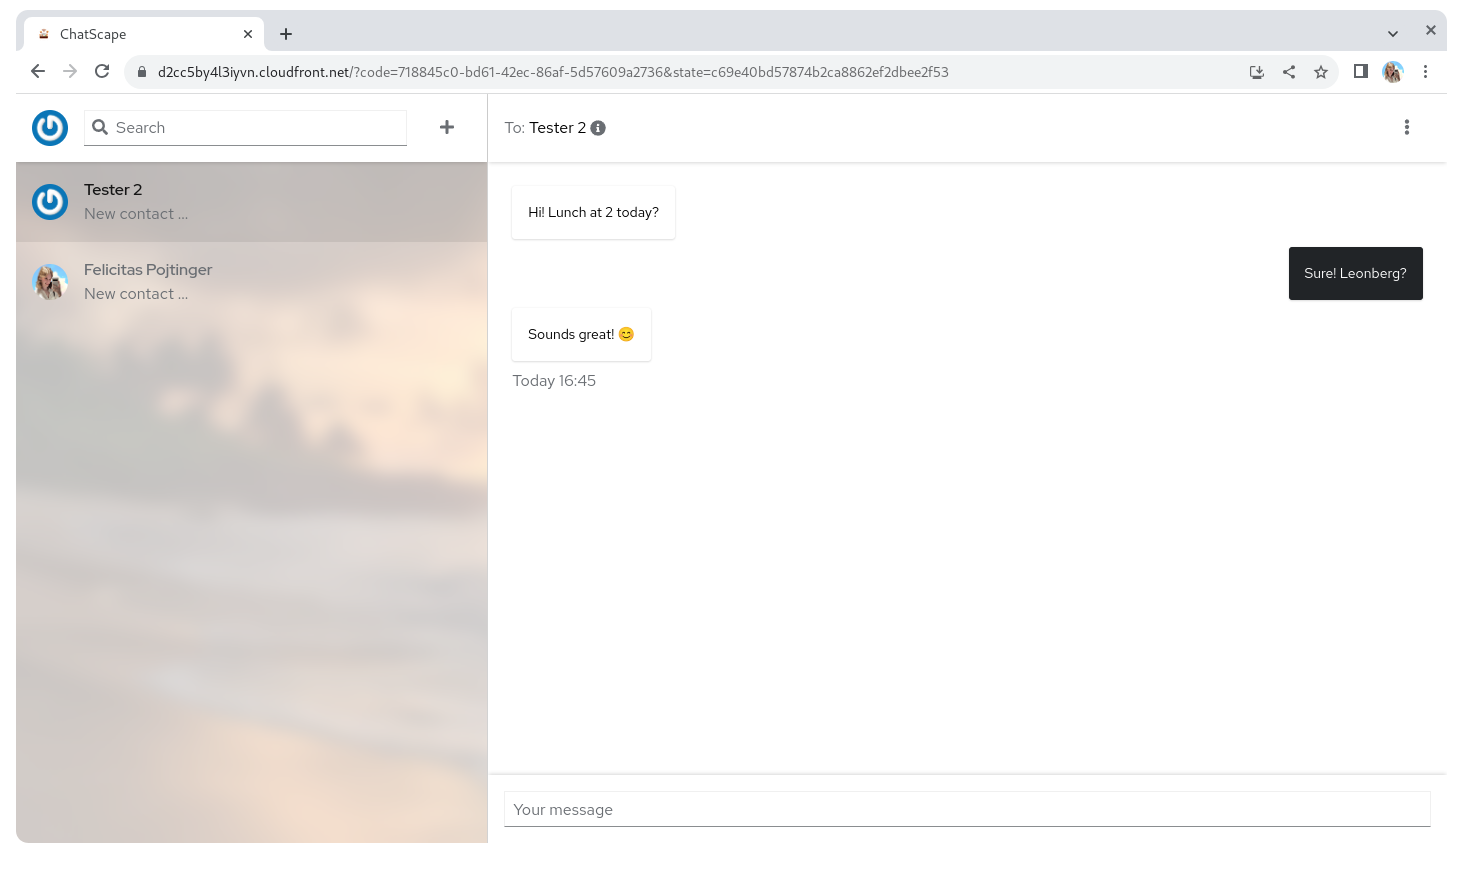
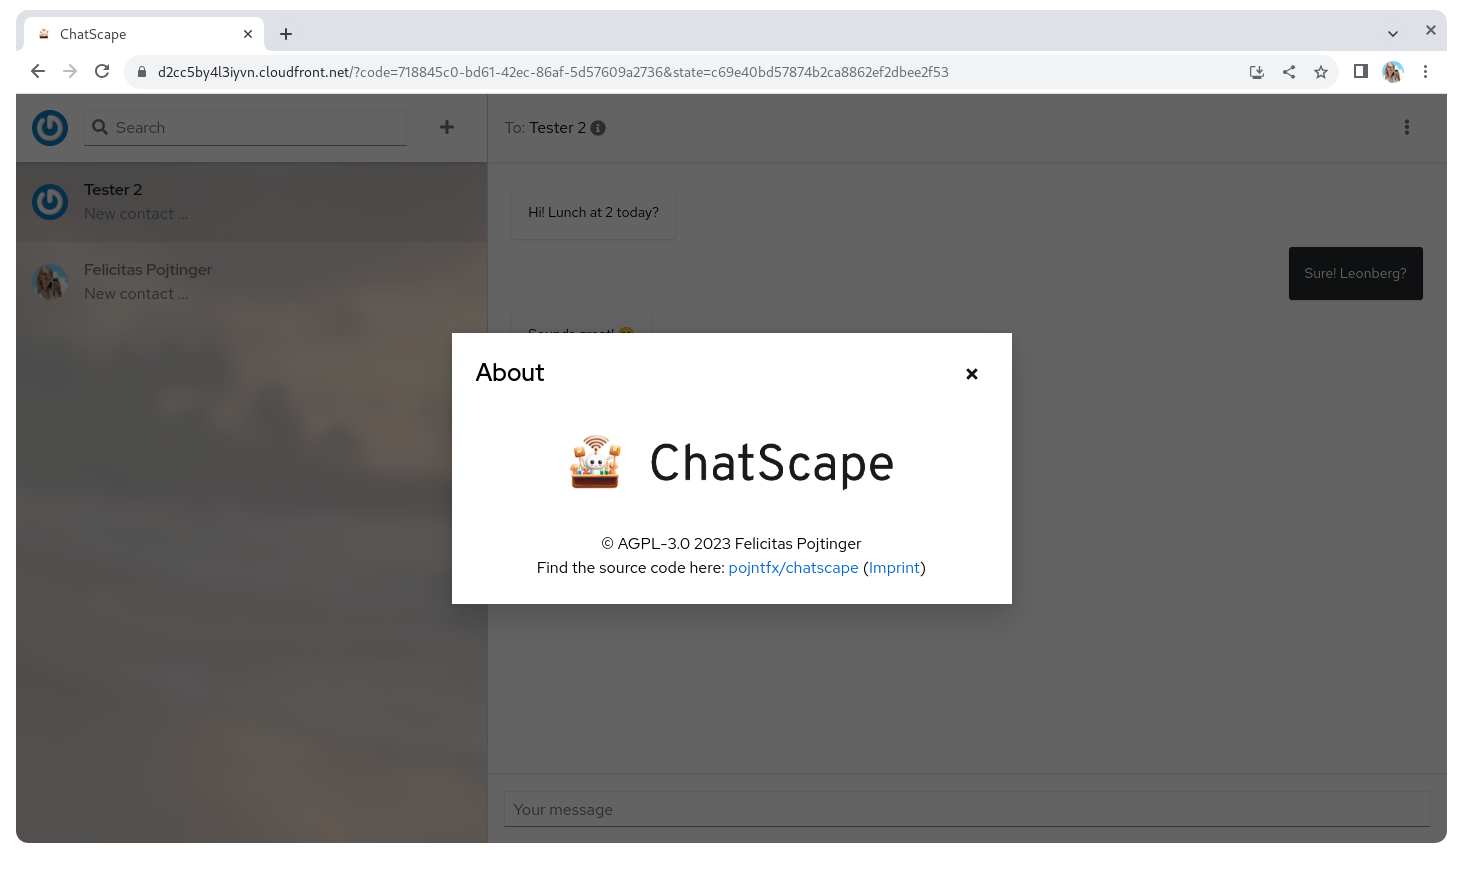
Frontend
Screenshots

Technological Choices
We chose React as our frontend framework/library. The logic behind this choice is the trust and credibility React has had over the years; with a massive community of developers, Meta’s backing and many successful applications built on it, it is reliable choice. Its component-based nature is a perfect fit for hexagonal architecture; this emphasizes the separation of concerns and promotes modularity, and React’s component system aligns with these principles, offering the flexibility to build, test, and scale individual sections of the application without causing to many side effects.
While React provides the foundation, the NextJS framework adds useful abstractions on top of it. We wanted to use Server-Side Rendering (SSR) to ensure our web pages load faster and are SEO optimized. Not only does NextJS support SSR out of the box, but it also brings the added advantage of static site export. This means we can generate static HTML pages in advance, reducing server load and offering faster load times for end users.
For the UI components, we looked for a combination of a UI framework and a styling language that could offer both reliability and customization. Patternfly and SCSS were the perfect fit for this requirement; Patternfly is “boring” – positively, as in “trusted”, “well-maintained”, and “void of unnecessary surprises”. SCSS, on the other hand, allows customization. It’s an extension of CSS that brings variables, mixins, and nested rules, making our stylesheets more maintainable and efficient. Together, Patternfly and SCSS provided us with the tools necessary to design a user experience that’s both consistent and unique.
Component-Based Architecture
The true value of React’s components lies in their independence. Just like LEGO blocks, each component, with its unique functionality, can be assembled in many ways to construct larger, more complex systems. This modular approach enables both development and testing, since they are usually free of dependencies, and can be reused across different sections of the frontend.
We wanted to ensure that these components always displayed and functioned as intended, regardless of where they are used or how they’re integrated – Jest snapshot tests provide this. These tests work by capturing and saving a snapshot of the HTML rendered by a component. Should there be any changes to the component, Jest immediately detects that the stored snapshot doesn’t match the new one.
Take the <AvatarMenu> component: It is designed to offer a dropdown menu that allows users to toggle account actions. Using Jest, we can test how this component appears when it’s in a closed state with the following code:
it("renders in the closed and left state", () => {
  expect(
    render(
      <AvatarMenu
        accountActionsOpen={false}
        toggleAccountActions={jest.fn()}
        avatarURL=""
        logOut={jest.fn()}
        openAboutModal={jest.fn()}
      />
    )
  ).toMatchSnapshot();
});
Here, the toMatchSnapshot() function captures the HTML rendered by the <AvatarMenu> component. The saved snapshot contains the structure and attributes of the component:
exports[`AvatarMenu renders in the closed and left state 1`] = `
{
  ...
  "baseElement": <body>
    ...
      <button
 		 aria-expanded="false"
 		 aria-haspopup="true"
 		 aria-label="Toggle account actions"
 		 ...
 		 type="button"
   	 >
 		 <span>
   		 <img
     		 alt="avatar"
     		 class="pf-c-avatar"
     		 src=""
   		 />
 		 </span>
   	 </button>
      ...
  </body>,
  ...
}
The snapshot presents a clear view of the button with an aria-label of “Toggle account actions” and an embedded image with an alt tag of “avatar”. Now, if there are any modifications to the <AvatarMenu> component, Jest will require the snapshot to be updated. This also significantly reduces the need for extensive writing for tests, esp. for configuration permutations.
Config System
For our config system, we wanted to ensure that there is “no copy-paste required, anywhere, ever” during any part of the deployment.
When many think of configuration for web applications, they imagine a statically compiled file that’s incorporated at the time of application build. However, in our current setup, this is not the case. Rather than relying on a hard coded configuration file, our application waits with configuration until the very moment it is initialized. Once initialized, it retrieves a JSON configuration file from the same S3 bucket where the application itself resides.
This method offers a few benefits:
Flexibility: By loading the configuration at runtime, we ensure that any adjustments made to the environment or infrastructure can be quickly reflected in the configuration without having to rebuild or redeploy the entire application.
Security: Keeping our configuration separate from our frontend build process means sensitive information can be better protected and handled with care, especially if we incorporate encryption or other protective measures on our config files.
Simplicity with Automation: Our JSON config file isn’t written manually; Terraform generates it during the backend’s build phase. This not only minimizes human error but ensures that the configuration is always in sync with the latest state of our infrastructure, and doesn’t need to be copy-pasted into env variables.
Contained within this JSON file are essential configuration details that the application needs to function correctly. For instance, the API URL to which the application needs to connect, the OpenID Connect (OIDC) configuration, among other parameters. A sample configuration for ChatScape looks something like this:
{
  "apiURL": "https://fwohuebd3j.execute-api.eu-north-1.amazonaws.com/test",
  "authority": "https://cognito-idp.eu-north-1.amazonaws.com/eu-north-1_zqBirZPN9",
  "clientID": "b2l5g1ro6ps7akfvjv2pd1tvn"
}
Imperative API Client
At the core of our frontend are the data models. The two primary entities are the Contact and Message; we use TypeScript’s interface declaration to model these entities:
export interface IContact {
  id: string;
  name: string;
  email: string;
  intro: string;
  avatar: string;
}

export interface IMessage {
  them: boolean;
  body: string;
  date: Date;
}
We don’t just need data models, but a way to interact with them. Ideally, we want our frontend to remain as agnostic to the backend implementation as possible. Thus, we create an interface that defines the operations our application needs:
export interface IAPI {
  addContact(name: string, email: string): Promise<IContact>;
  getContacts(): Promise<IContact[]>;
  blockContact(email: string): Promise<void>;
  reportContact(email: string, context: string): Promise<void>;
  addMessage(email: string, body: string): Promise<void>;
  getMessages(email: string): Promise<IMessage[]>;
}
Having this abstraction gives us a structured blueprint. Depending on the backend or the environment, we can create various implementations.
As an example, for a development environment where we don’t want to spam our real server or database, we mock API calls using LocalStorage:
export class LocalStorageAPI implements IAPI {
  ...
  async addContact(name: string, email: string): Promise<IContact> {
	...
	localStorage.setItem("contacts", JSON.stringify(contacts));
	...
  }
}
While this is perfect for offline development or testing, real-world applications demand more complex interactions. When it’s time to connect to a live backend, our interface remains consistent, but our implementation can now use REST endpoints:
export class RESTAPI implements IAPI {
  ...
  async addContact(name: string, email: string): Promise<IContact> {
	const response = await fetch(`${this.apiURL}/add-contact`, {
	...
	});
  }
}
Functional API Hook
A React hook is a function that lets you “hook into” React state and lifecycle features from function components. We use such a hook for accessing the imperative API in a functional way.
The hook is independent of any view, meaning it can be rendered in any way the developer desire; this ensures that the business logic does not depend on the presentation layer, providing flexibility for UI changes without affecting the functionality.
The useAPI hook handles optimistic UI. Optimistic UI is a pattern where changes are assumed to be successful without waiting for an API response; the hook achieves this by pre-computing changes locally before syncing them up with the REST API. This ensures that users perceive the system as responsive, as they’re not kept waiting for server confirmation.
The hook also manages various other states like contacts, messages, and the active contact ID. Multiple useEffect hooks are deployed to handle different side effects. For example, when the apiURL or the authentication state changes, the API mode sets itself to REST, integrating with the provided authentication token.
Authentication
OpenID Connect, or OIDC for short, is a simple identity layer built on top of the OAuth 2.0 protocol. At its core, OIDC allows clients to request and receive information about authenticated sessions and end-users. The protocol returns identity information (the OpenID token) and also typically returns an OAuth 2.0 token for accessing resources.
Amazon Cognito, a service by AWS (AWS), offers a robust interface for OIDC. By using Cognito’s OIDC interface, we don’t need to hard code with the Cognito SDK, but can in theory swap Cognito for any other OIDC-compliant authentication provider. One popular JavaScript library to use OIDC is oidc-react. This library offers hooks and components to easily integrate OIDC into React applications:
import { useAuth } from "oidc-react";
const auth = useAuth();
useEffect(() => {
    if (!auth.userData?.profile["cognito:username"]) {
      return;
    }
    setAvatarURL(
      `https://www.gravatar.com/avatar/${md5(
   	 auth.userData?.profile["cognito:username"] as string
      )}?s=300`
    );
}, [auth]);
Here, the useAuth hook from oidc-react provides an interface to the authenticated user’s data. This data is then used to fetch an avatar for the user from Gravatar using their Cognito username. The presence of the cognito:username key in the user profile acts as a check; if the username exists, the avatar URL is set; otherwise, the function returns and waits until auth is changed again.
PWA Support
Progressive Web Apps (PWAs) offer the promise of offline functionality, quick loading times, and a near-native app feel on the web. It is essentially a web app that employs modern web capabilities to deliver an app-like experience to its users. Through the use of service workers, PWAs can function offline and provide a seamless user experience, even when the internet connection is unstable or non-existent.
To understand better, consider the manifest file for ChatScape:
{
  "short_name": "ChatScape",
  "name": "ChatScape",
  "description": "Scalable serverless chat.",
  "icons": [
    {
      "src": "/icon-light-small.png",
      "type": "image/png",
      "sizes": "192x192"
    },
    {
      "src": "/icon-light.png",
      "type": "image/png",
      "sizes": "512x512"
    }
  ],
  "scope": "/",
  "start_url": "/",
  "background_color": "#151515",
  "theme_color": "#151515",
  "display": "standalone"
}
It serves as the metadata of the PWA, providing browsers with essential information. For instance, the short name ChatScape is what you’d see under the app icon on a phone’s home screen. The “icons” property defines the app’s icon in varying sizes to be used in different contexts. Other properties like background_color and theme_color play a role in the app’s visual appearance, ensuring a consistent branding. The display property set to standalone ensures that the app will open in full screen, just like a native app, without any browser UI.
What truly sets PWAs apart, however, is their ability to provide offline support. This is made possible through service workers – scripts that your browser runs in the background, separate from a web page. With @imbios/next-pwa, a simple configuration allows developers to ensure that the app works offline. By setting the “disable” property conditionally for development environments, one can make sure that the PWA features are activated only in production and don’t interfere with usual development.
Updating a PWA is another crucial aspect. Just as mobile apps provide updates, PWAs need to ensure their users receive the most recent version. The usePWAInstaller hook demonstrates the handling of installation and updates for a PWA. It listens for the beforeinstallprompt event of the window, which enables users to add the PWA to their home screen. The hook also monitors for the app’s installation with the appinstalled event. The updatePWA function leverages window.workbox, a set of libraries from Google, to facilitate PWA development, to handle updates, ensuring that users always have the most up-to-date version without needing to clear cache or take any additional steps.
Frontend Learnings
One major learning during the frontend’s development was the practicality of the hexagonal architecture for frontend development. When most people think of this architecture, they often confine it to backend systems. However, we found it to be useful on the frontend, too – by adhering to its basic principles, we were able to isolate components with precision, without having too many unintended dependencies. This allowed for a modular approach, letting us inject logic only where necessary.
For authentication, OIDC is known for its security and standardization, but it’s not without its complexities. Several unforeseen problems occured, such as redirect loops that can trap browsers until they manually clear the URL, and the intricacies involved in handling authorization code exchanges, which required handling quite a bit of the actual OIDC flow in the application without being able just use the library, like fetching OIDC parameters from the URL.
We decided to also use Terraform to release the frontend. On paper, it sounded promising, but in execution, it caused a few problems. One primary concern was managing file uploads, which was much more complicated than anticipated. Terraform and AWS services in general also weren’t optimized for SSR, requiring us to instead use static exports.
Additionally, since we integrated AWS Lambda functions into our system, we were quickly introduced to the concept of cold starts. These are the times when a function hasn’t been invoked for a while, causing it to sometimes taking up to a second for a response. This required implementing loading states, handling them with skeletons, and an optimistic UI in order to still ensure that our users get a good user experience.
Backend
AWS Lambda
During the planning phase of our project, we chose AWS Lambda to handle the logic of our backend. This decision was driven by our intent to implement a highly scalable solution based on the Hexagonal Architecture. Given these requirements and the inherent characteristics of AWS Lambda — being serverless and event-driven — it became a preferable choice over using a virtual machine with AWS EC2.
One of our primary considerations was to focus on the core of our application, allocating resources for configuration and management only where essential. In contrast to AWS EC2, which would have required us to oversee the entire lifecycle of the instance (from configuration and monitoring to shutdown), AWS Lambda abstracts a significant portion of these administrative tasks.
While AWS Lambda is tailored for smaller, event-driven tasks, EC2 offers comprehensive virtual machines suitable for a wide range of workloads, including more extensive applications.
With AWS Lambda, we ensured flexible scalability in our serverless architecture. AWS automatically adds or removes resources as needed. An important point to note with Lambda is the so-called cold start: if a Lambda instance remains inactive for a specific period and a new request is made, a fresh instance is initialized.
Various strategies can prevent or minimize cold starts. For instance, dummy requests can be sent to keep the Lambda function “warm”. Additionally, assigning more memory to the function can reduce cold start durations, as it proportionally boosts CPU and other resources.
At this point, we haven’t implemented any of these strategies. Nonetheless, it’s worth mentioning that there are ways to alleviate the effects of cold starts without resorting to different technologies.
Cost was another crucial factor in our decision-making. Whereas EC2, by its structure, incurs continuous costs since an instance always needs to be running, AWS Lambda operates on a “pay-as-you-go” principle. This means you only pay for the actual compute time used, making it financially attractive during a project’s initial phases.
The modularity of our Lambdas was designed such that no Lambda function has dependencies on another, and each maintains its unique dependencies for imports. This allows us to flexibly add or remove functionality to the backend without the need to adjust additional modules.
This design fosters clarity and structure, facilitating a swift onboarding process for newcomers to the project, and enables independent development.
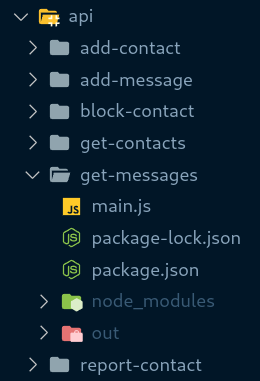
The implementation of our most concise Lambda function get-contacts can be seen below:
- Path: /contacts
- Method: GET
- Functionality:
- Read namespace from token
- Query the
Contactstable for all contacts with the namespace - Return the list of contacts.
const AWS = require("aws-sdk");

const dynamoDb = new AWS.DynamoDB.DocumentClient();
const SPA_URL = process.env.SPA_URL;
const CONTACTS_TABLE_NAME = process.env.CONTACTS_TABLE_NAME;

module.exports.handler = async (event) => {
  const namespace = event.requestContext.authorizer.claims["cognito:username"];
  if (!namespace) {
    return {
      statusCode: 403,
      headers: {
        "Access-Control-Allow-Origin": SPA_URL,
      },
      body: "missing namespace",
    };
  }

  const params = {
    TableName: CONTACTS_TABLE_NAME,
    IndexName: "NamespaceIndex",
    KeyConditionExpression: "#ns = :namespaceValue",
    ExpressionAttributeValues: {
      ":namespaceValue": namespace,
    },
    ExpressionAttributeNames: {
      "#ns": "namespace",
    },
  };

  try {
    const result = await dynamoDb.query(params).promise();
    return {
      statusCode: 200,
      headers: {
        "Access-Control-Allow-Origin": SPA_URL,
      },
      body: JSON.stringify(result.Items),
    };
  } catch (error) {
    console.error(error);

    return {
      statusCode: 500,
      headers: {
        "Access-Control-Allow-Origin": SPA_URL,
      },
      body: JSON.stringify("could not retrieve contacts"),
    };
  }
};
Valibot
To validate the data from the frontend, we employed the schema library Valibot. Validating frontend data is imperative, even when validation has already taken place on the frontend. This precaution is necessary as data can be manipulated post frontend validation, for instance, via a proxy.
In our case, we utilized the Valibot schema library. For implementation, we constructed a data object for validation. Within this object, we determined the exact validation criteria and included custom error messages for each potential violation.
const BodySchema = vali.object(
  {
    recipientNamespace: vali.string("recipientNamespace not provided", [
      vali.custom((input) => !input.includes(":::"), "contains invalid string"),
    ]),
    message: vali.string("message not provided", [
      vali.toTrimmed(),
      vali.minLength(1, "message is empty"),
    ]),
  },
  "invalid request body"
);
We then parsed our received data against this defined object.
let body;
try {
  body = vali.parse(BodySchema, JSON.parse(event.body));
} catch (error) {
  return {
    statusCode: 400,
    headers: {
      "Access-Control-Allow-Origin": SPA_URL,
    },
    body: JSON.stringify(
      error instanceof vali.ValiError ? error.message : "invalid request body"
    ),
  };
}
Thanks to the clearly defined object, the validation points are evident and straightforward. Another factor that led us to select this particular schema library is its relatively small bundle size. This size contributes to minimizing Lambda cold starts and offers above-average performance during validation.
AWS DynamoDB
Defining the data structure and application requirements from the outset is crucial. This early clarification simplifies the decision between NoSQL and SQL. For our project, NoSQL, and specifically DynamoDB, stood out as the perfect fit, with our main focus on high performance and scalability. However, DynamoDB, like every technology, has its limitations. The absence of a fixed schema means we won’t need to conduct schema migrations. Yet, this freedom also comes with the downside of restricted query capabilities. For instance, direct OR queries aren’t possible. Instead, you have to rely on two separate queries.
Why Queries Over Scans?
Choosing queries over scans was a deliberate decision when working with DynamoDB. A scan sifts through the entire table, which can be inefficient and expensive, especially when dealing with vast amounts of data. In contrast, queries utilize the strengths of primary and sort keys, allowing for more targeted data searches. This approach is both performance and cost-efficient.
DynamoDB Table Structure: Contacts and Messages
Within our application, there are two main entities: Contacts and Messages.
For Contacts, our structure incorporates:
id: A unique UUID for the contact.name: Name of the contact.email: Email address of the contact.avatar: URL or key to the avatar image.blocked: A Boolean indicating if the contact is blocked.namespace: User namespace.report: Text reported by a user for the contact.
For Messages, our structure is as follows:
id: A unique UUID for the message.date: Timestamp of the message.body: Content of the message.compositeNamespace: Combined namespace of the message sender and recipient.
Keys, Indexes, and Their Importance
When discussing DynamoDB, keys and indexes are essential topics. They are foundational to every table, playing a crucial role in determining performance and ensuring efficient data access.
For our primary table Messages, the message ID, abbreviated as id, serves as the primary or hash key. This primary key uniquely identifies each entry in the table, distributing the data across DynamoDB’s various storage partitions.
In addition to the id, we’ve introduced date as the sort key. This sort key not only facilitates efficient retrieval of messages by their ID but also allows for chronological sorting. It’s particularly useful when, like in our scenario, you want to display message histories for specific periods, as entries are stored in order on each partition.
To also support access based on attributes other than the primary and sort keys, there are indexes. We opted for a Global Secondary Index (GSI) using compositeNamespace as its key attribute. A GSI lets us query the DynamoDB table as if compositeNamespace were our primary attribute, without altering the original table structure. This approach offers immense flexibility since we can now efficiently execute queries based on the compositeNamespace attribute.
Local Secondary Indexes (LSI) are another option besides GSI. Choosing between them depends heavily on the specific application needs. While LSIs use the same primary key as the main table and can only query within that primary key, GSIs allow for the use of entirely different key attributes. LSIs weren’t suitable for our requirements since we wanted to run queries on compositeNamespace beyond the primary id attribute.
Backend Learnings
Both AWS Lambdas and the Hexagonal Architecture greatly facilitated backend development compared to previous university projects. This was largely attributed to the clear structure offered by the modular approach and the minimal to non-existent dependencies. After a brief orientation with the project, we were able to work on it independently without constant coordination with other team members.
Schema libraries are an outstanding tool for data validation. They not only save us from writing additional code but also make the code considerably clearer for others. When choosing a schema library, it’s important to consider aspects crucial for the application and its development, such as bundle size, tooling, and performance.
Terraform proved to be an invaluable tool. The declarative approach utilizing infrastructure as code is far more transparent and straightforward than making configurations via the AWS UI. The AWS UI can be overwhelming at the outset, given its inconsistent design and the fact that some module documentations aren’t up-to-date.
Working with AWS DynamoDB and AWS Lambdas was a pleasure because it required minimal configuration, allowing us to focus on the core of our application. Initially, there was a learning curve to understand how NoSQL contrasts with SQL and how DynamoDB implements these concepts. However, once we grasped these principles, our interactions with DynamoDB became quite direct and hassle-free.
One aspect we didn’t explore due to time constraints, but would be interesting to know, is whether it’s more efficient to use the CompositeNamespace as a sorting key in the Messages Table instead of the date. Given that DynamoDB determines partitioning solely based on the partition key, it would be a compromise in either scenario since you can’t assign two sorting keys to a single table.
Deployment
Infrastructure as Code (IaC)
One of the only design decisions that remained the same throughout the whole system design process other than the usage of AWS lambda was that we wanted to rely on an infrastructure as code (IaC) approach as a declarative way of managing our infrastructure.
This early design decision of using infrastructure as code was benefitial since we never had to migrate from having a manually set up infrastructure on AWS to having a declarative infrastructure defined using Terraform.
Below, you can see our terraform graph that represents all resources we created and their dependencies on each other – it’s quite unusable in this kind on manner but provides a nice way of showing how many resources are required to build a fairly simple application using AWS:
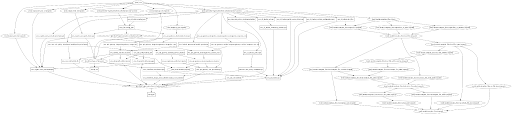
We decided to use Terraform because it has the benefit of being cloud agnostic. Hence, we always had the option to switch cloud providers if it had turned out that the approach we wanted to take would not work utilizing AWS. This was also the main reason why we decided to not use AWS CloudFormation. Some other reasons for using Terraform is the larger community and the ability to provision resources in parallel.
We are using the AWS provider since it is the idiomatic way of working with AWS combined with Terraform and every relevant resource type we required was supported for this project, which makes terraform easier to use than in previous projects, where several components e.g. AWS iot-events are not yet integrated into the AWS provider. This resulted in us having to use a CloudFormation resource inside of Terraform to configure AWS iot-events using CloudFormation. Without this hurdle, configuration was fairly convenient this time.
We deployed our Terraform shared state using tfstate.dev. CloudFormation would have managed the state automatically, but setting up a shared state in Terraform, especially with tfstate.dev, was quite easy to achieve. The only thing we had to do was to create a GitHub access token for the repository and to create a HTTP backend in our Terraofrm configuration:
terraform {
    backend "http" {
        address        = "https://api.tfstate.dev/github/v1"
        lock_address   = "https://api.tfstate.dev/github/v1/lock"
        unlock_address = "https://api.tfstate.dev/github/v1/lock"
        lock_method    = "PUT"
        unlock_method  = "DELETE"
        username       = "pojntfx/chatscape"
    }
}

provider "aws" {
    region = var.region
}
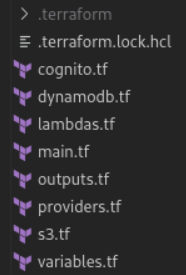
We organized our Terraform definitions in resource-specific files since a single Terraform file with more that 1000 lines of code was quite unmanagable and confusing to work with. Especially if a team member who wasn’t responsible for the Terraform configuration had to change certain parts. Using the more organized approach, working and changing ressources on a whim was very easy.
A big learning was that resources generated in a Terraform module can’t be accessed directly from outside the module. The initial motivation for using a module was that we wanted to avoid code duplication inside of Terraform as much as possible. Hence, we considered using a Terraform module for our lambda configuration. Each lambda requires around 200 lines of configuration in Terraform which we could deduplicate easily by using a module.
The main problem with this approach was that the aws_api_gateway_deployment resource had to reference the aws_api_gateway_integration resources directly. This however is not possible in terraform (by design). The only thing accessible from outside the module are outputs like e.g. an ARN or a name of a resource.
But there is still another approach that is almost equally convenient – the for_each feature. All lambda related resources that would be inside of the module are now equipped with the for_each keyword looping over the lambdas array we defined in our local variables inside of the main.tf:
lambdas = {
    "add-contact"    = "POST",
    "get-contacts"   = "GET",
    "block-contact"  = "POST",
    "report-contact" = "POST",
    "add-message"    = "POST",
    "get-messages"   = "GET"
  }
As an example, the definition of the aws_api_gateway_integration using for_each looks like this:
resource "aws_api_gateway_integration" "gateway_integration" {
  for_each                = local.lambdas
  type                    = "AWS_PROXY"
  integration_http_method = "POST"
  uri                     = aws_lambda_function.function[each.key].invoke_arn
  rest_api_id             = aws_api_gateway_rest_api.chatscape.id
  resource_id             = aws_api_gateway_resource.gateway_resource[each.key].id
  http_method             = aws_api_gateway_method.gateway_method[each.key].http_method
}
And this is what the aws_api_gateway_deployment looks like using the for_each approach:
resource "aws_api_gateway_deployment" "chatscape" {
  stage_name = "test"

  rest_api_id = aws_api_gateway_rest_api.chatscape.id

  # We need this because otherwise the stage itself would not be deployed when we add new lambdas
  triggers = {
    redeployment = sha1(jsonencode([
      aws_api_gateway_integration.gateway_integration[*],
      aws_api_gateway_integration.gateway_integration_cors[*]
    ]))
  }

  lifecycle {
    create_before_destroy = true
  }
}
By using this approach of configuring lambdas, a developer just has to add the name of the lambda they want to add to the system to the lambda array inside of the main.tf. All other components can be left untouched. This was done intentionally to make development of additionall features as convenient as possible.
The deployment of our Terraform resources can be done manually using our Makefile or will be handled on push events by our CI/CD pipeline.
Continuous Integration & Continuous Deployment (CI/CD)
Our CI/CD pipeline was realized using GitHub Actions. The pipeline comprises two workflows, the first one handling building and testing the application, while the second workflow handles the Terraform deployment.
The build workflow triggers by push events or on a cron-based schedule while the deployment workflow triggers on push events and pull_requests. For illustration purposes, here is the trigger definition of the build workflow:
on:
  push:
  schedule:
    - cron: "0 0 * * 0"
Both workflows use a tool called hydrun to a different extent. Hydrun is an additional abstraction layer that allows to execute commands on different processor architectures and operating systems and to e.g. run build pipelines locally to build artifacts. It is based on Docker buildx and qemu-user-static.
The steps hydrun should perform can be defined using the so-called Hydrunfile which is essentially just a bash script:
#!/bin/bash

set -e

# Test
if [ "$1" = "test" ]; then
    # Configure Git
    git config --global --add safe.directory '*'

    # Generate dependencies
    make depend

    # Run tests
    make test

    exit 0
fi

# Build
if [ "$1" = "build" ]; then
    # Configure Git
    git config --global --add safe.directory '*'

    # Add external dependencies
    apt update
    apt install -y zip

    # Generate dependencies
    make depend

    # Run tests
    make

    exit 0
fi
As can be seen above, the process is very simple and everything we need to do is to run the necessary make commands.
In the first workflow, we essentially just execute make build and make test. In the second workflow, we utilize hydrun to build the application to have the build artifacts which are necessary for the creation of the lambda functions using Terraform:
steps:
  - name: Checkout
    uses: actions/checkout@v3
  - name: Setup Terraform
    uses: hashicorp/setup-terraform@v2
  - name: Configure aws credentials
    uses: aws-actions/configure-aws-credentials@v1
    with:
      aws-access-key-id: ${{ secrets.AWS_ACCESS_KEY }}
      aws-secret-access-key: ${{ secrets.AWS_SECRET_ACCESS_KEY }}
      aws-region: eu-north-1
  - name: Test AWS CLI
    run: aws sts get-caller-identity
  - name: Set up hydrun
    run: |
      curl -L -o /tmp/hydrun "https://github.com/pojntfx/hydrun/releases/latest/download/hydrun.linux-$(uname -m)"
      sudo install /tmp/hydrun /usr/local/bin
  - name: Build with hydrun
    working-directory: .
    run: hydrun -o node:bookworm "./Hydrunfile build"
  - name: Fix permissions for output
    run: sudo chown -R $USER .
  - name: Terraform Init
    run: terraform init --backend-config="password=${{ secrets.GITHUB_TOKEN }}"
  - name: Terraform Plan
    run: terraform plan
  - name: Terraform Apply
    if: ${{ github.ref == 'refs/heads/main' }}
    run: terraform apply --auto-approve
Despite that the AWS authentication using configure-aws-credentials was a bit of a hurdle at first, the deployment using GitHub’s CI was fairly convenient. Ideally, we would have used OIDC but we settled on using an access token for the sake of simplicity instead. In comparison, GitLab provided an even better experience though with GitLab providing an integration for terraform shared state out of the box.
Finally, the satisfying look of a passing pipeline:

Testing – Our TDD Aventure
Another design decision that turned out to be very useful was to rely on test-driven development to a healthy extent. As mentioned earlier, we tried to implement the hexagonal architecture which meant that we had a very modular system, including multiple interchangable implementations of the backend. Having tests to implement against was very useful in this case, since we knew exactly what we wanted for the final backend so tests could be written very comfortably. Our development lifecycle also massively sped up since we now had tests running in the pipeline verifying that a pull requests did not break the API and we had tests that we could run locally to verify that we did not introduce any bugs when making changes to the code.
We relied on two kinds of testing: Snapshot testing and unit testing.
Snapshot testing is defined as recording the characteristics of a system and later comparing the snapshot to the current value and characteristics of the application. The benefits of snapshot testing include that they are simple to use and to implement and that updating the snapshots is very convenient. Snapshot testing could be implemented comfortably using jest.
Our unit tests were also implemented using jest. Since we needed to mock certain parts of the application like e.g. DynamoDB, jest provided a comfortable way of doing so. For example, a simple unit test for our get_contacts lambda looks like this:
it("should return 200 with query results", async () => {
  const mockQueryResult = {
    Items: [
      { id: "1", name: "Contact 1" },
      { id: "2", name: "Contact 2" },
    ],
  };

  AWS.DynamoDB.DocumentClient()
    .query()
    .promise.mockResolvedValue(mockQueryResult);

  const result = await handler(mockEvent, mockContext);

  expect(result.statusCode).toBe(200);
  expect(result.body).toBe(JSON.stringify(mockQueryResult.Items));
});
As can be seen above, the query results of the DynamoDB client can be mocked in advance so our lambda can be invoked without requiring any additional dependencies. The second-to-last line asserts the response of the request while the last line handles the snapshot testing inside of the lambda functions.
As mentioned above, a test-drive approach allowed for a straight-forward error-identification process and a faster iteration cycle which is why we decided to try and use TDD more often in the future, if applicable.
Summary
The development process for ChatScape on AWS presented a steeper learning curve than anticipated. Throughout the development, there were significant architectural changes, and simpler designs were often more effective, especially for the MVP implementation. It was also beneficial to have CI/CD processes that were locally reproducible without requiring pushes for pipeline testing, and incorporating Valibot and other reusable validation software has also proved valuable. Despite all of these challenges – some expected, some unexpected – that we faced during ChatScape’s development, the project helped successfully build the cloud experience of all members.
And since the half-life of most chat applications is very short, ChatScape will probably not make the cut either. Still, the project taught us enough that building it was worth it in the end.
Leave a Reply
You must be logged in to post a comment.