“Big Brother is watching you”, “data kraken” or “the transparent man” are often used as catchwords, when talking about the shrinking privacy on the internet. This blog post will how a possible way of protecting the anonymity and privacy of the users in the internet. A possible way to do so, is to access the web through a safe, universally usable, live-environment. This becomes especially important in the more mysterious and hidden parts of the web, namely the so called “dark web”.
It’s important to ke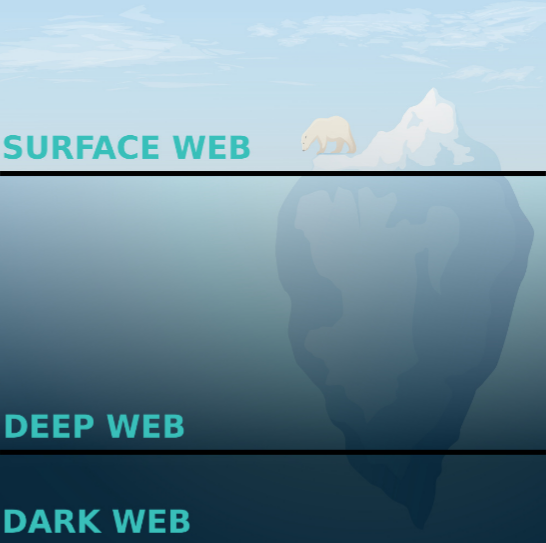 ep in mind, that this guide is nothing more than a beginning. To keep the anonymity up and improve it in the digital world, it’s important to plunge into this matter further. As this post focuses on an inexperienced reader, there are surely more detailed or technical guides on the web.
1. Shopping list
In order to follow this blog post you will need some devices and software, which will be used in the following guide:
- 2x USB flash drives (USB#1 and USB#2)
- 1x device to boot from the stick (laptop, computer)
- 1x current Tails Version, downloadable at https://tails.boum.org/download/index.en.html
- 1x universal USB Installer, downloadable at http://www.pendrivelinux.com/universal-usb-installer-easy-as-1-2-3
2. What is Tails?
“The amnesic incognito live system” and is a debian-based Linux distribution, which offers tools and functions to support the user in terms of privacy and anonymity. It can be booted from any USB stick, leading to a great mobility of the system as a whole. A user can have his own installation in his pocket at all time and is able to use it whenever and wherever he likes to. This way it won’t leave any traces on the host machine and the user can’t be connected to this physical location.
One elementary part of achieving the anonymity is the Tor network, that is used extensively by Tails. “The onion router” is used for every outgoing network connection of Tails, so a user has the possibility to surf on the web anonymously. It prevents the tracing of communication by sending the data not directly to the recipient, but bouncing it around between randomly chosen servers, which causes an indirect arrival. The recipient only has information about the last server in the chosen route. By using Tor for every outgoing network connection, the strong focus of Tails on anonymity becomes clear.
3. Installation of TAILS
The installation of Tails is easily done in a few minutes. The following guide will explain every step to create a customized USB device with an own distribution of Tails. Before starting, it’s obligatory to download the current version of Tails from its website and connect USB#1 to your computer.
Step 1: Start the downloaded Universal USB Installer to begin the installation of Tails.
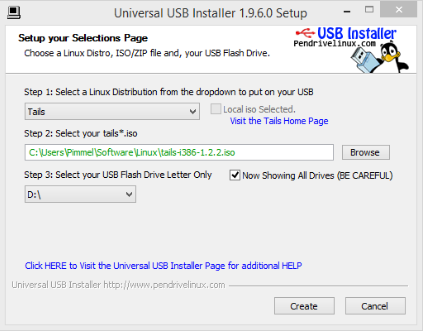
Step 2: The screenshot above shows the installation window of the Universal USB Installer. Use the dropdown menu to select “Tails” and add the path to your downloaded Tails installation file. Lastly select the connected USB#1 and start the installation by clicking on the create button. The installation can take a couple of minutes, so grab a cup of tea and enjoy your time.
Step 3: Connect the prepared USB#1 to a machine and boot it.
Step 4: When the system has booted a menu window appears. Choose “live” to start the live system on this device.
Step 5: You’ll see the welcome screen of Tails showing the login button you need to use in order to start the system completely.
4. Create a persistent partition
Because we don’t want to leave any traces on the host machine, we can’t save any data on it. That’s where we need a persistent partition, which saves our data for the next Tails session. Because Tails will delete the data on USB#1 after every shutdown of the system, USB#2 will save our data.
You will need a running Tails for the following steps, so USB#1 has to be connected to your computer. USB#2 must also be connected in order to link those two flash drives.
Step 1: In the top left menu choose Applications > Tails > Tails Installer to start the creation of the persistent partition.
Step 2: The first option “Clone & Install” will trigger the creation. Follow the wizard and choose USB#2 when you will be asked for it. This installation will also take some time, so you can drink another cup of tea. Don’t worry if the installation takes a while for the last step from 99 to 100% – this is completely normal.
Step 3: Shut down your running Tails and start Tails from USB#2 again.
Step 4: In the top left menu choose Applications > Tails > Configure persistent volume to start the configuration of the persistent volume.
Step 5: Choose a good, long and safe password – so grab another cup of tea and think about something better than “abc123”.
Step 6: Now you can choose the features you want to save for the next Tails session. We would recommend “Personal Data”, “GnuPG”, “Pidgin”, “network connections” and your “browser bookmarks”. If you want to save any further data you can select it now.
Step 7: After restarting the system on USB#1 you have to enter your password and can start using the persistent volume on USB#2.
5. Set up the Tor Browser
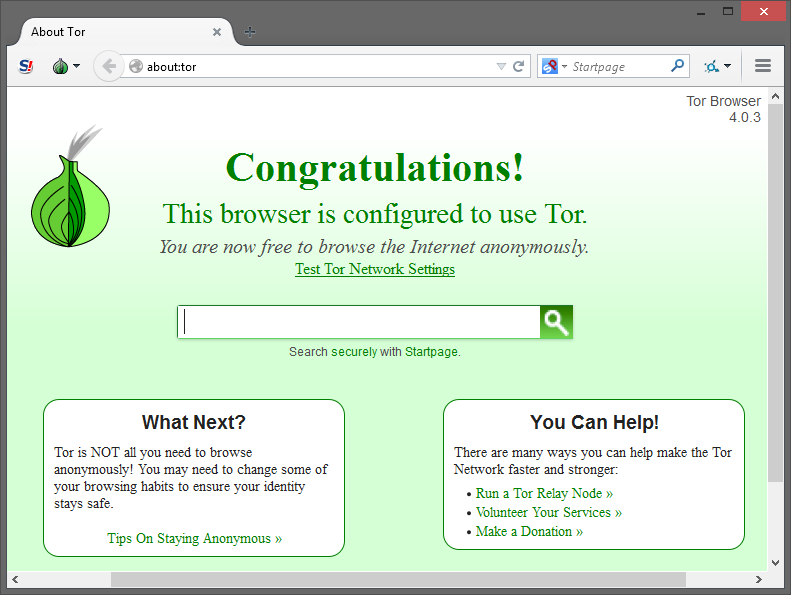
After the start up Tails will initialize the Tor connection automatically and will prompt an info dialog if it’s set up completely. At this point we can use the Tor browser to surf on the internet, which can be launched with the globe at the top left of the screen. Last but not least we have to deactivate the execution of JavaScript in the browser, because this could be a major anonymity issue when used to track user data.
Beware: The following steps have to be done after every startup of Tails!
Step 1: In the browser click on the S! Icon on the top left to activate the NoScript plugin.
Step 2: Select the option to forbid all scripts by default.
Step 3: Open the settings and activate the following options in the embedded objects section:
- forbid Java
- forbid Adobe Flash
- forbid Microsoft Silverlight
- forbid other plugins
- forbid <IFRAME>
- forbid <Audio/Video>
- forbid <Frame>
- forbid @font-face
Step 4: Close the settings with the “ok”-button and start surfing!
6. Create a backup of Tails
Because USB#1 is free again, we can put a fresh Tails installation connected to a persistent partition to it (chapter 4). To get a complete copy of the persistent folders and settings, we follow the steps described in this guide: https://tails.boum.org/doc/first_steps/ … ex.en.html
Important: Make sure to create a Tails flash drive because you can’t add a persistent drive to it otherwise.
Now we have two identical USB flash drives, each of them being a possible backup of the other one. To be completely safe you can bury it in your garden – but to do updates you will have to dig it out again…
7. PGP encryption
Pretty Good Privacy is a software to encrypt your private messages. The major feature is, that only the original receiver of a message is able to decrypt it again. This is not only important for your sensitive banking data but also for every message you sent to your friends. Privacy starts with every bit of data you want to keep save and PGP helps you reaching this goal. This becomes especially important in the dark web, when the anonymity is an essential part of the user experience. It’s a good idea to send everything encrypted, that shouldn’t be read by others.
Tails offers the possibility to use PGP in an easy way:
Create keys:
Step 1: Click on the clipboard on the top right of the screen to manage your keys.
Step 2: Select File > New > PGP key to create a new key.
Step 3: Your own public key can be drag&dropped out of the section GnuPG keys into any textfield.
Encrypt texts:
Step 1: Select the complete PGP message and click on the clipboard, which should be showing a yellow lock now.
Step 2: Select encrypt clipboard.
Step 3: Enter the password of your PGP key.
Encrypt messages:
Step 1: Select and copy a text with the context menu (right click on the mouse).
Step 2: Click on the clipboard and select encrypt clipbard with public key.
Step 3: Select the receiver of the message and submit the popup.
Step 4: Paste the encrypted message to the textfield of the application you use to send your messages.
8. Dead Man’s Switch
Tails is running on the memory (RAM) of the host machine, which is a major feature of it. To prevent a cold boot attack, Tails also offers a functionality to delete the memory of the machine. If Tails is shut down, the memory erasure script will delete all data currently saved in the memory of the flash drive. In this way an attacker can’t read out the memory to get sensitive data such as cryptographic keys.
If you’re really paranoid and you want to make sure, that nobody can get access to your devices information, the so called dead man’s switch is your choice. You can connect your wrist to the flash drive running Tails with a strong line. The memory erasure script will also start, if the drive is pulled out of the machine abruptly. If you get surprised when using your Tails flash drive, you can easily start the erasure script by pulling the stick out of the machine with your wrist. You don’t even have to be dead – but even if this would happen, the stick will be removed and your data is saved.
9. Conclusion
This short guide should be a good starting point for you if you want to surf anonymously through the internet – especially the dark web. But even if Tails oversteps the mark for you, we hope that the blog post made you aware of digital privacy in general.
The recent development shows that we have to fight for our privacy in the digital world as we already do in the real one. Apparently you wouldn’t let strangers read your letters or look inside your closet – so why should you accept this with your email or data in the cloud?
The usage of Tails appears to be costly in the beginning. But if you want to hide your traces and keep your data safe, you should give Tails a shot. In times of Edward Snowden and the NSA, we have to aim for the digital anonymity more than ever.
Leave a Reply
You must be logged in to post a comment.