![]()
Mirror, mirror on the wall, who is the fairest of all? It’s you, Albert.
How Albert, our smart mirror, has grown – you can read it here.
[written by Roman Kollatschny and Matthias Schmidt]
Last time we started with the general idea and the multiple drafts. This time we talk about the realization and how we developed the software and hardware. Additional we describe some of our problems during the realization stage and how we fixed or circumvented them.
Interface
In the first phase of our development process, we started with first mockups for our different interfaces. We had to design an interface for the mirror itself and an interface for the us to configure the mirror.
Mirror interface and widgets
For the smartmirror interface we thought of an interface that consists of multiple single widgets like the full screen start menu with its tiles in windows 8 but without its background colors and show only the data and information.
We had several different widgets in mind e.g. a widget that shows you social feeds, plays music, displays mails or messages, shows a an analog or digital clock, give you a weather forecast or a widgets that can show the data from the sensors and many more.
We planned that the widgets should be responsive so that the user can scale it to different sizes and position it on a grid.
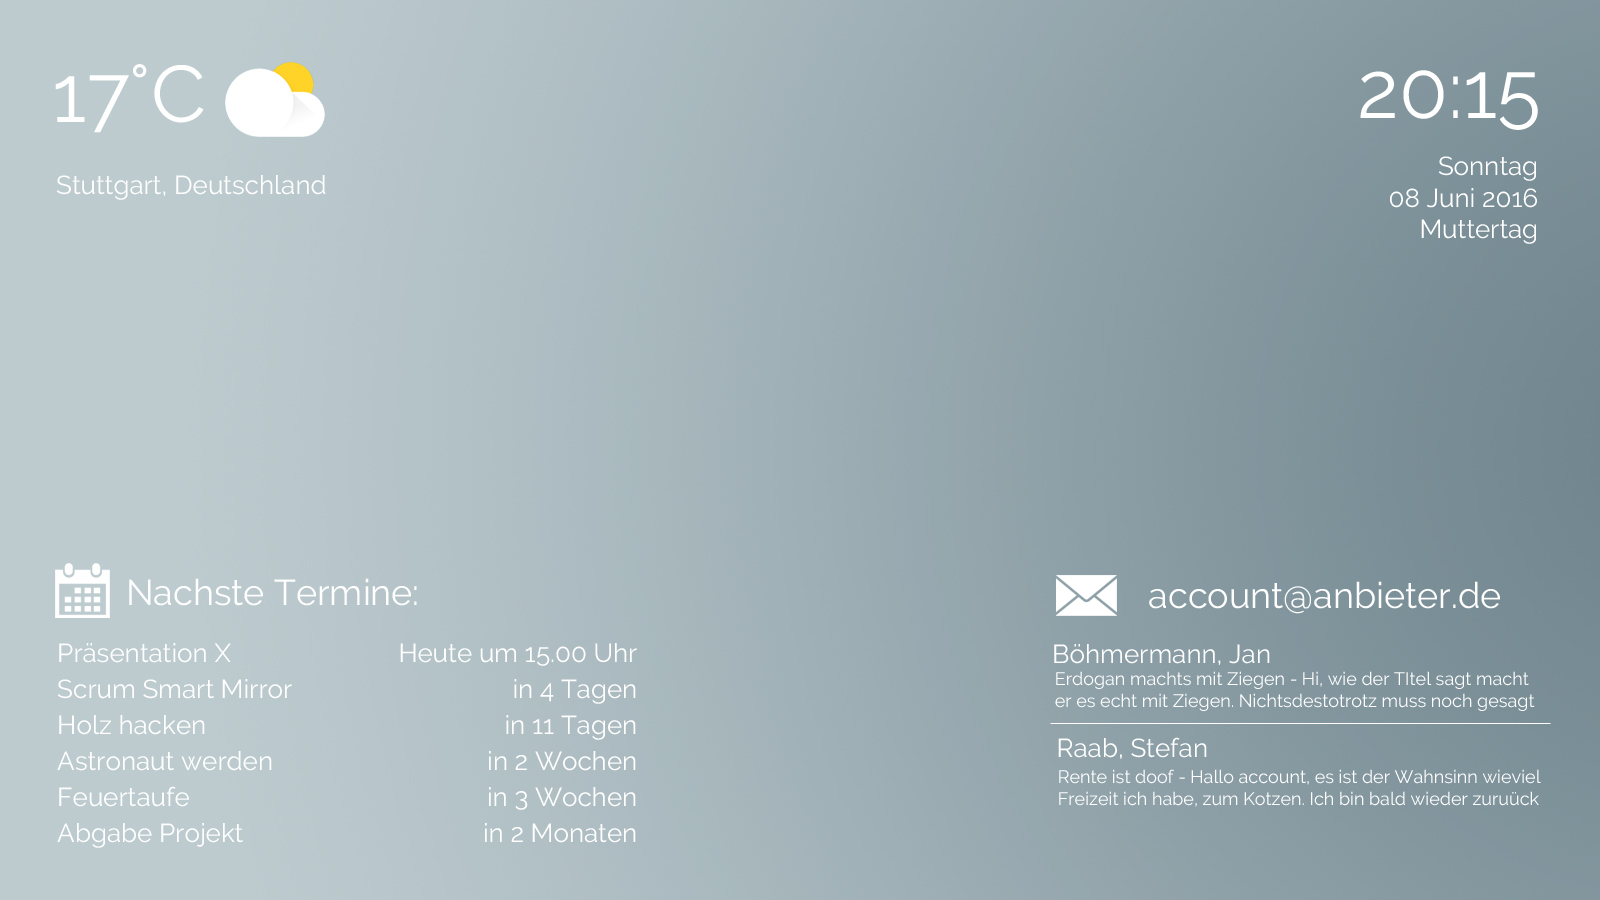
Our first screen design looked as followed: (The screen design was created as it would look with the mirror glass in front of our panel)
We added a survey to find the most valuable functions and evaluate how and why people would love Albert. We had 172 participants from all age groups but most were in undergraduates age.
To control and interact with the mirror voice and touch control were more popular than gesture control. We were surprised from the fact that people could imagine to use touch control on a mirror. After talking to some of the participants it turned out that they thought of the way controlling a smartphone and wanted the same comfortable way of controlling a mirror – the disadvantages like fingerprints on the surface got obvious to the participants so they revoked their vote on this. You can take a look at the complete survey results here (pdf in german).
Because we were behind the schedule, we had to trim back our requirements. We canceled to implement our widgets responsive and implemented only some of them in a predefined size. Thus we were able to implement the following widgets:
- A digital and analog clock widget
- A rss feed widget
- A video news widget
- A weather forecast widget
- A gmail widget
- A traffic widget
- A ical calendar widget
- A todo widget
- A widget for the implemented sensors
The selection of widgets and functions based on the results of the previous mentioned survey.
Backend interface
As explained in earlier, we didn’t want to have a static interface. The users should be able to configure their interfaces for their own needs. Therefore, we wanted to have an interface where the users can select and position the available widgets on a grid. Besides the configuration interface we also needed interfaces where the users can download and install modules (the difference between widget and module is explained later in this article), create a widget from a module, administrate users and modify system settings.
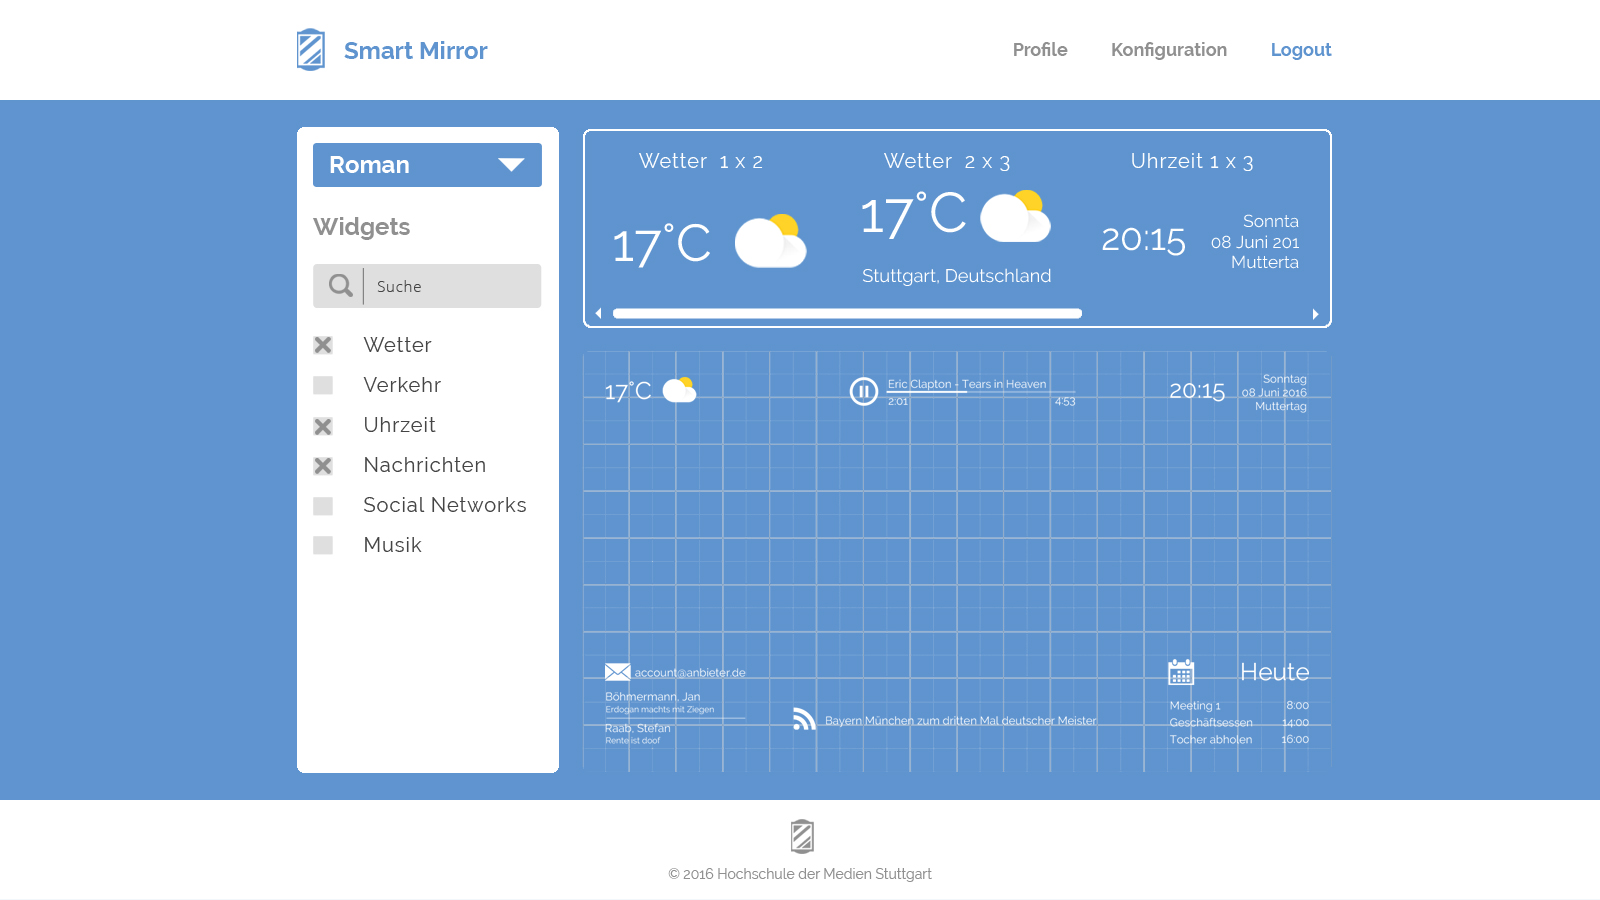
A first concept for the backend design looked as followed. The screen design was for the mirror configuration interface; on the left side the user could choose the widgets he wanted to have and on the top he could chose a style and position it on the grid below.
Development
The whole smart mirror is developed using web technologies. We decided to use the JavaScript framework node.js and the database MongoDB as our basis. We all had already made some experience in the development with these technologies and the lightweight of node.js also fits perfectly to the restricted resources of our Raspberry Pi 3 and ensures a well and fast working mirror including both interfaces.
Backend
For the development of the server infrastructure, we extended the Node.js installation with the web framework express and its dependencies like body-parser etc. We built the application with the MVC (model-view-controller) pattern and extended the architectural pattern by a router, that handled all the request of our application. In this way we were able to reuse single function on several parts of the application.
The following directory tree shows our application model:
smartmirror/app
├─── controllers
│   └─── modules
├─── models
├─── public
│   ├─── font
│   ├─── images
│   ├─── javascripts
│   │   └─── libs
│   └───stylesheets
│       └─── fonts
├─── routes
└─── views
    ├─── backend
    └─── modules
The model contains all mongoose schemas for the modules, widgets, users and other settings. The view contains all jade templating files that are rendered to html files. The routes contains all the routes for the backend and the mirror interface and the controller contains finally all functions that are used for data handling.
Frontend
For the development of the frontend interfaces, we used the templating engine jade. The engine supports variables and different function to e.g. iterate over arrays of data. For the styling of the interface we used the framework Twitter Bootstrap and extended it to our needs. To simplify our development process, we used the build system gulp, that starts our server, compiles our scss files and reloads the browsers after file changes.
The whole application code is versioned with GIT and hosted on GitHub and will be released to the public once our university project is finished (sometimes in the near future)
Module server
We differentiate between the words module and widget. We defined modules to be the installable and function-extending code which can be developed by other users too and is hosted on GitHub. A widget indeed is an instance of a module. It’s created in the configuration backend and contains a name, size and some additional configuration parameters like user credentials. So different users may use e.g. different mail widgets due to their personal mail account.
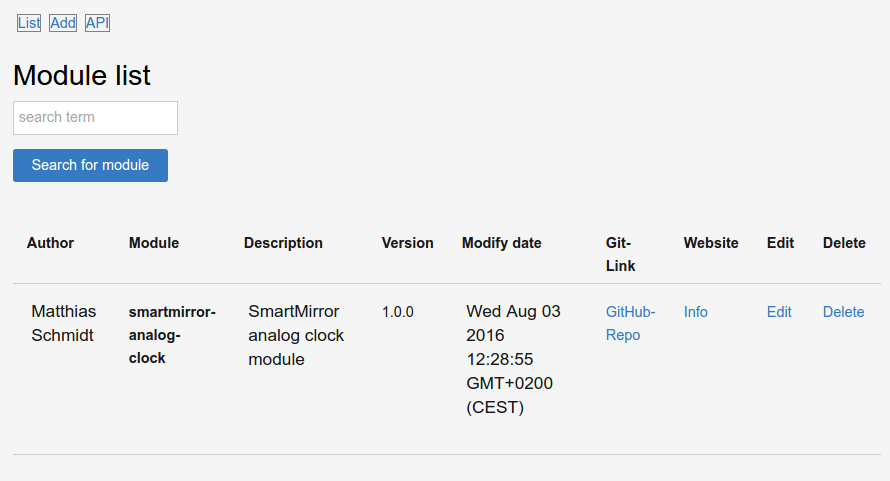
The module server therefore is a central point, also written with Node.js. It holds links and descriptions for every added module. It has a small API to fetch details in JSON format. Currently it offers only fundamental functionality of adding, editing and listing entries by everyone.
Problems and solutions
During the development of this projects we faced multiple problems and so we also had to deal with some of them.
Dynamic npm install
Due to the fact that additional modules are also written in JavaScript and running on Node.js they may need additional functionality provided by npm packets. Going through the package.json file of any module and installing missing packages shouldn’t be that hard.
We recognized that depending on the development operating system – Windows or Linux – the install process in some sub project directory works different. On some systems the node modules were installed into ./lib/node_modules – always relative to the command execution path – instead of ./node_modules which broke some packet dependencies from mirror modules. Trial and error fixed our problem at some point – we really don’t know that in detail.
The magic comma
We use a own script to download various files from the module’s repo onto the mirror to include them and their functionality. Every module is stored as own public github repository. Due to the structure of our modules only some of the containing files need to be copied to the mirror to work. The script therefore fetches the file content via raw.githubcontent.com interface and stores them in the mirrors folder structure.
Problem: sometimes the script produced corrupted files. A magic and mysterious comma emerged on some line starts. Take a look on the following screenshot which shows the github hosted code and the code received and built by the download script.

Solution: instead of pushing elements to and joining an array together we now concat the received data chunks directly. It seems that the bug is gone. And: it’s faster.
Old code:
const body = [];

// On every content chunk, push it to the data array
response.on('data', (chunk) => {
  body.push(chunk);
});

// We are done, resolve promise with those joined chunks
response.on('end', () => {
  let data = body.join();
  resolve(data);
});
New code:
var file = '';

// On every content chunk, push it to the data array
response.on('data', data => {
    file += data;
});

// We are done, resolve promise with those joined chunks
response.on('end', () => {
    resolve(file);
});
Responsive widgets
The installable modules and the customizable user widgets resulting from, are one of our main features. Our conception contains some form of customization in size.
At some point we realized that responsive would be too hard to realize. We decided to only implement one or multiple fix sizes per widget. The size can be defined on widget creation in configuration backend.
Building the frame
At the beginning, we planned that the frame of our mirror is built by a carpenter. However, since we could not find any carpenter who wanted to build us the frame, we had to build it ourself. Fortunately, we got help from the in-house carpenter of our university, who supported us in the construction of the frame.
As materials for the frame we used osb plates. As we found out later, this kind of sheets were not particularly good for our frame because its surface was very uneven and full of little holes. To resolve this issue, we had to fill in and sand the frame additionally before we could paint it. In addition, by using 2.2 cm and 1.5 cm thick plates, our frame weighs more than 15kg with all the components.
Since we had the frame completely self-produced, our scheduling and project management was put to test again. From initially scheduled a few hours, we resulted in several working days for the construction of the frame.
In our next article we will show you our finished project.
Leave a Reply
You must be logged in to post a comment.