Part 1: Tool Setup
This series of blog entries describes a student project focused on developing an application by using methods like pair programming, test driven development and deployment pipelines.
Welcome to the next part our project, on its way to become the Snake game with the very best underlying code base ever. (If you somehow missed the introduction to our project, you may want to give it a read: Click ) Today, we’ll take a look at the most important tools we use for building and versioning our code: Eclipse, Gradle and Github.
Chances are very high that you already have some amount of experience or contact with the Eclipse development environment, if you have a background with software development in general or Java in particular, so it’s probably unnecessary to talk much about it. For now, the important thing is, that Eclipse provides plug-ins for Gradle projects, as well as integration for JUnit from the get-go. (We will need JUnit later on, during the actual development.) And of course, we wanted to use the newest Java version (which is Java 8, at the time of writing).

Before we dive into the installation, a quick overview of Gradle and Github:
Gradle is a tool used for build automation, mainly for large projects comprising many components which may take a long time to build. It allows to configure the build process, for example building only certain parts of the entire project, and supports parallel and even distributed build processes on multiple CPUs or computers.
As for the installation, the complete instructions can be found here and here.
Github allows you to host your project files online, using the code versioning software Git (surprise!). Chances are high that you’ve already used Github for downloading projects or code during your software developer-career. With it, you can back up your code remotely, create different development branches, and revert to earlier code versions, among others. Git can become extremely complex, especially when the merge conflicts appear in distributed projects, but with some luck, we won’t have to deal with that.
The process for setting up Gradle with a Github Repository:
- If you haven’t already, first install Java (JVM, JDK or JRE. Check the gradle instructions for the exact required versions, as those might change in the future)
- If you’re on Windows, install Git (if you’re on Linux, it’s already pre-installed, yay 😀 )
- Install Gradle (Setting the correct environment variables is important if you want anything to work, take note that the exact process is dependent on your OS. )
- Create a repository on Github
- Clone the repository into your local destination folder by navigating to it with the command shell, then execute git clone https://github.com/”path-to-repo”.git
- Create a new Java project with Gradle:
Navigate to destination folder, again using the command shell
Execute gradle init –type java-library - Create an initial build: gradle build
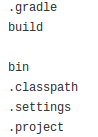
- Still in the destination directory, create a .gitignore file, so that you can specify files that you don’t want to add to the repository. For now, add “.gradle” and “build”
- Commit the current state of the project with git:
Execute git add . (in order to add all files, for single files use git add “filename”)
Commit with git commit -a -m “initial commit” - Push the commit to GitHub: git push origin master
Integrating the Gradle-project with Eclipse:
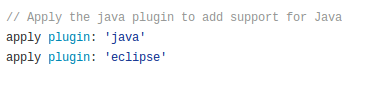
- Open the “build.gradle” file, search for the line apply plugin: ‘java’ and add apply plugin: ‘eclipse’ :
- Use the shell, navigate to the project directory and execute gradle eclipse
- Open Eclipse, choose a workspace, then select File -> Import -> Existing Projects into Workspace
Select the project folder as root archive
Click finish - Similar to the process above, add the following files to the existing .gitignore:
- .classpath
- .project
- .settings
- bin
The final content of the .gitignore should look like this:
- Execute git add .gitignore build.gradle and git commit -a -m “commit message” (-a is the argument for all files)
- Finally, execute git push master origin
The .gitignore is important in order not to push platform specific files to the repository. If you download the project from GitHub, you have to execute gradle eclipse in the project directory before you can use it as an Eclipse project and proceed as described above.
That’s it, now we have wriggled through the initial setup for our project. If you want to take a look at our repository, and especially the “.gitignore” and “build.gradle” files, you can find it at here.
In the next blog entry, we will start with coding, and describe the concept and application of unit tests and test-driven development.
Leave a Reply
You must be logged in to post a comment.