Part 4: Jenkins and Wrap Up
This series of blog entries describes a student project focused on developing an application by using methods like pair programming, test driven development and deployment pipelines.
Our first blog entry for this year will at the same time be the final one for this project as well, but to ease your pain of separation, we saved a highlight for the very end: Jenkins integration!
Starting with a short introduction to Jenkins, in this entry we’ll guide you through installation and configuration.
We already introduced automation in an earlier blog entry with Gradle, so what’s Jenkins now exactly?
Basically, it is a server-based automation engine for managing and realizing continuous development and integration. Similar to Gradle, Jenkins is in large parts written in Java and easily extensible by a multitude of plugins. Jenkins is free and open software, and as such is itself further developed and improved continuously. It supports integration with other build, testing and code versioning tools, in our case especially Gradle, JUnit and Github.
Regarding programming languages, of course you can use Jenkins not only for Java, but also for many others, depending on which plugins are installed by the user.
As a quick side note: An aspect of Jenkins which is extremely important in practice is its security concept. The security entry on the Jenkins website (https://jenkins.io/security/) offers ways to receive security notifications in mailing lists or as RSS feed and offers users a way of participating in improving security through the dedicated SECURITY project.
However, first things first: How do you even install and configure Jenkins initially?
We installed Jenkins locally on Windows 10 as follows:
- First, download the needed files from https://jenkins.io/ (there’s also lots of additional information and documentation on the website).
- With the shell, navigate to the location of the jenkins.war file and execute:
java -jar jenkins.war
This command should run the actual installation. - As soon as Jenkins is running, use a browser and access localhost:8080
You’ll see the Jenkins login page (the password can be found in /.jenkins/secrets/initialAdminPassword). - Change the port used by Jenkins with:
java -jar jenkins.war –httpPort=9090 - Selecting “Install suggested Plugins” sets up the default environment.
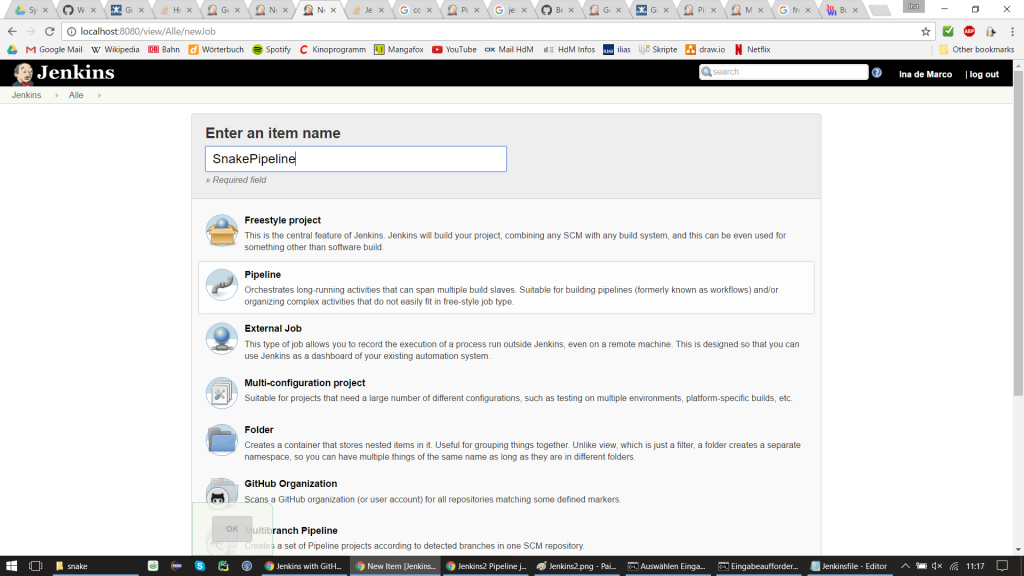
“Jenkins> New Element>Pipeline Project” allows you to create a new project including project name, description, etc.:
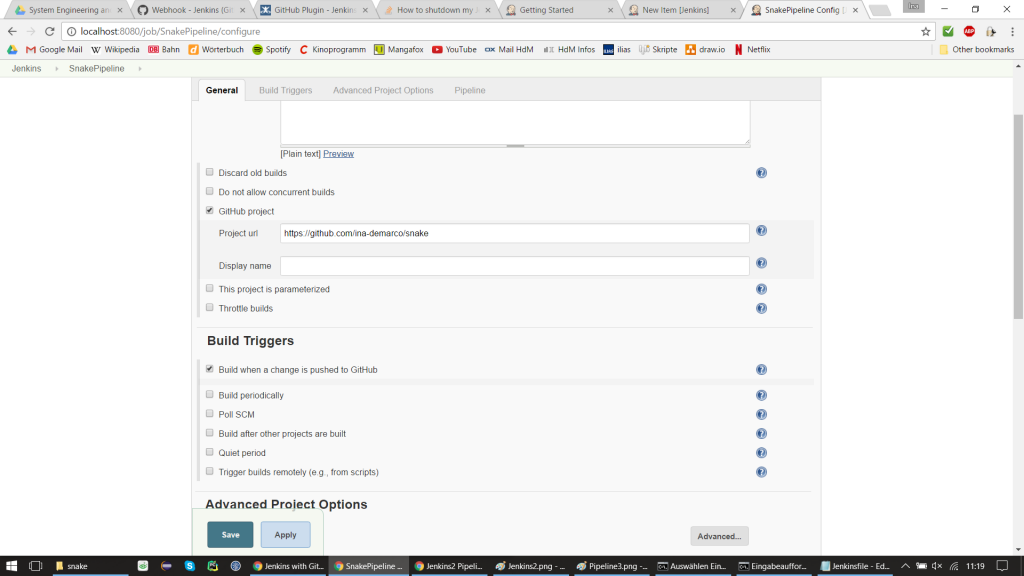
- Remember to tick “Github Project” during this step, if you want to use it. You have to specify the respective URLs, SSH keys or user credentials. (Alternatively to Github, you can also specify a local repository.)
- Specify the event when the build should be triggered.
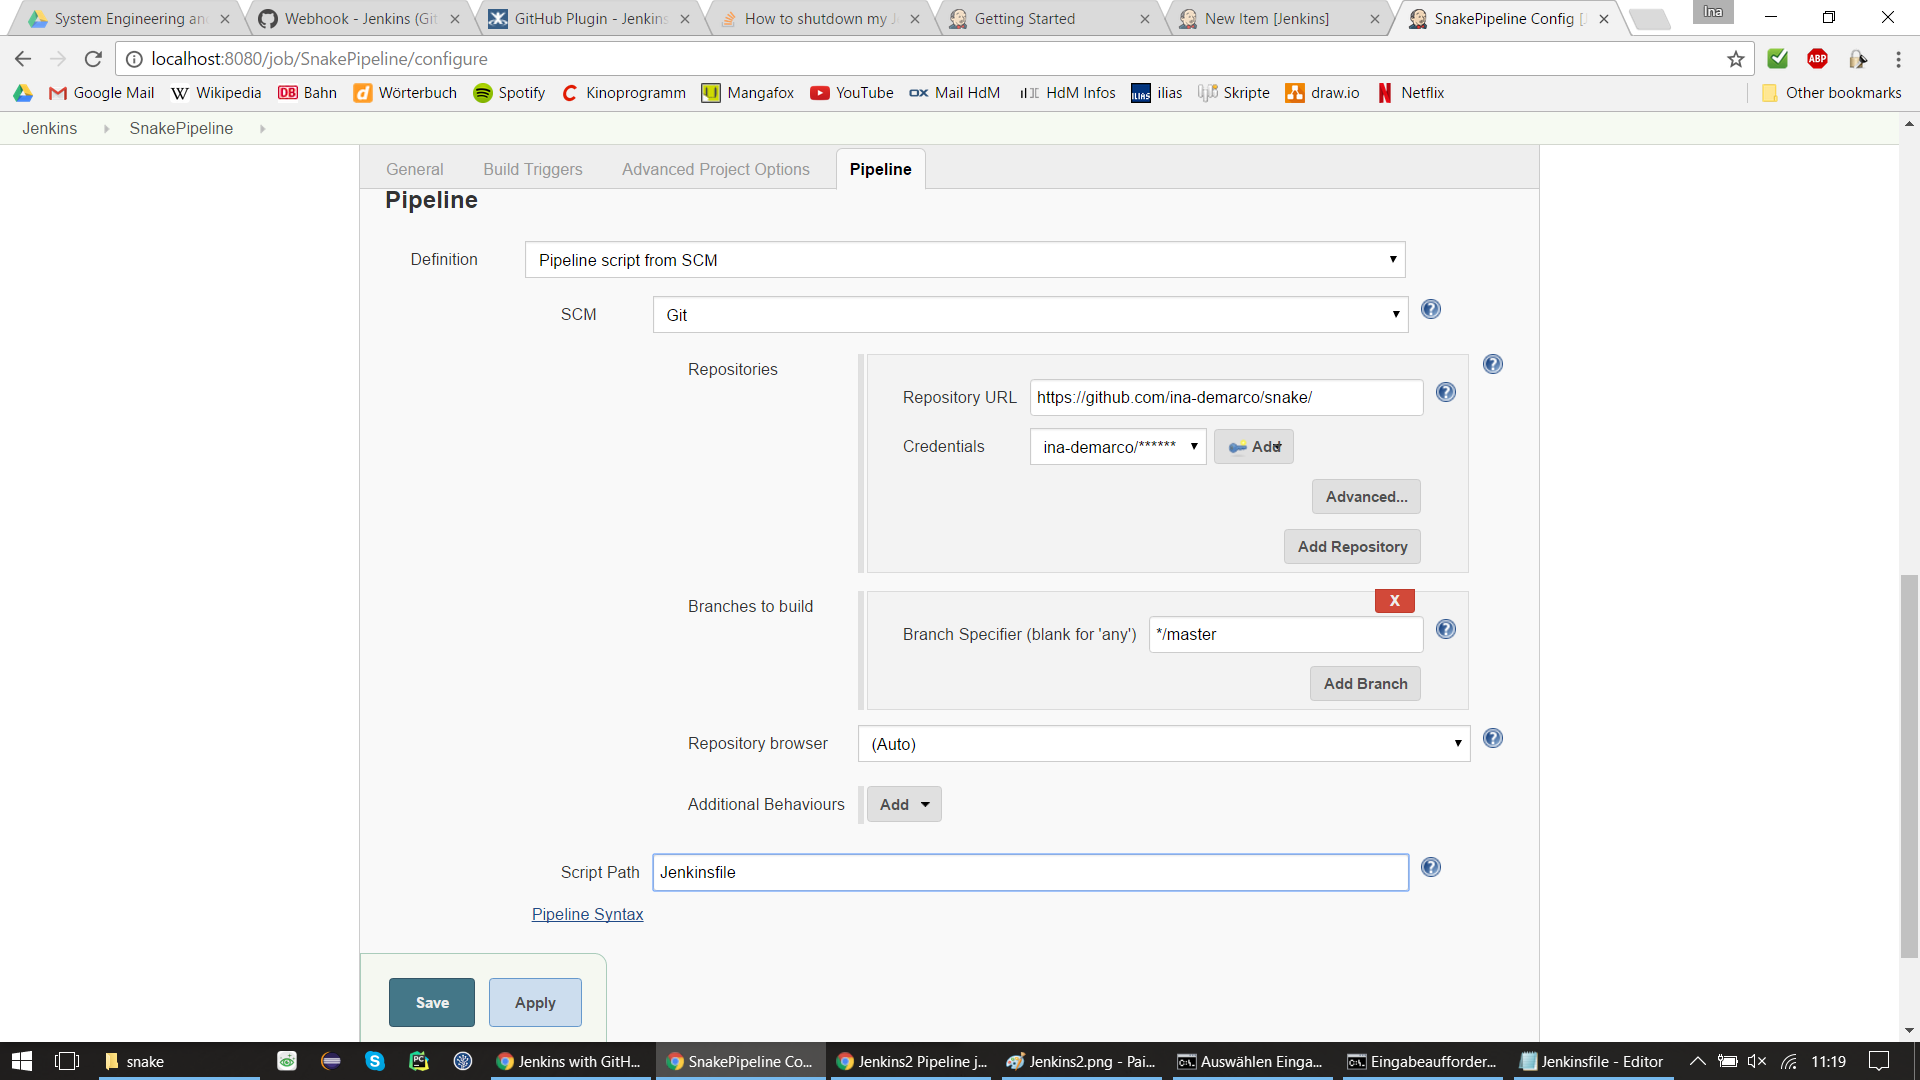
- Create the Pipeline definition:

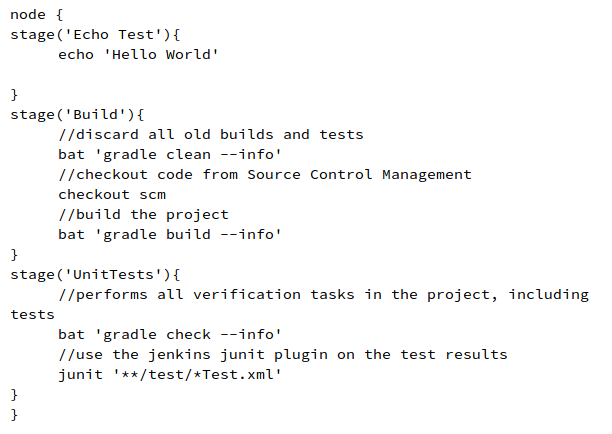
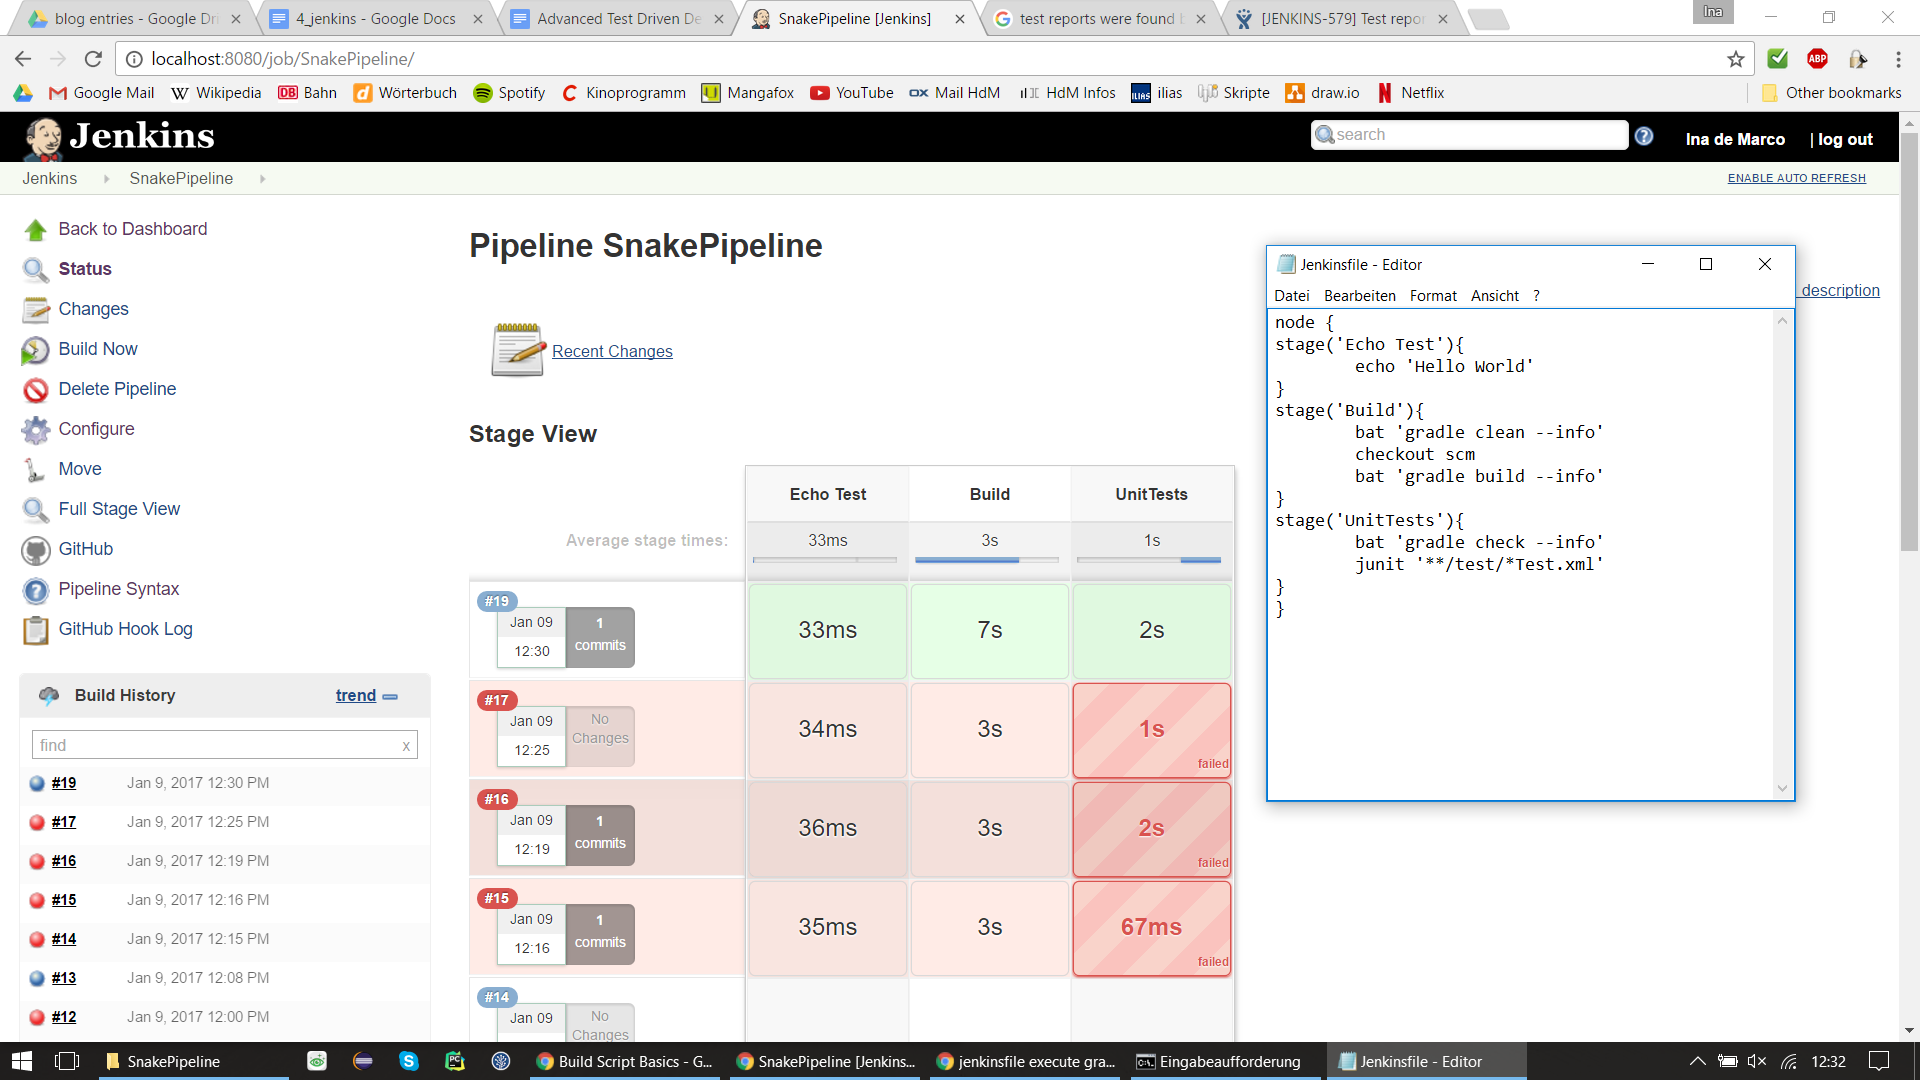
- Create a Jenkinsfile in the project folder to specify how to test and run the project:
- After commiting and pushing the Jenkinsfile, the commands in it will run each time when selecting “Build now” in the Jenkins user interface. The result of a successful (and some less successful) run can be seen here:

- The results of the unit tests can be viewed when clicking on the build. Install a plugin like Test Results Analyzer to view the results in nice colours.


This concludes this blog entry and our series. On our journey, we’ve dealt with a lot of tools and topics surrounding software development pipelines, from designing the an application over setting up our build and code versioning tools, applying pair programming and code guidelines, and setting up the environment for the holy grail of the development process: Continuous integration. In case you missed one entry, here’s a complete list:
Part 0: Introduction
Part 1: Tool Setup
Part 2: Initial Coding
Part 3: Coding Guidelines
Part 4: Jenkins and Wrap Up (This one here)
We hope that our blog series was informative for you, fun to read, and that you learned one thing or two about snakes.
Happy (continuous) coding! 🙂

Leave a Reply
You must be logged in to post a comment.