Abstract
Discord was once just a tool for gamers to communicate and socialize with each other, but since the pandemic started, discord gained a lot of popularity and is now used by so many other people, me included, who don’t necessarily have any interest in video gaming. So after exploring the various channels on discord, I found that most of them have some kind of rules that users have to adhere to. But with channels that have more than 100 members, moderating becomes really tedious. The idea behind this project, which is a part of the lecture Software Development for Cloud Computing, is to automate this process by creating a discord monitoring system.
Features
With this system, an admin can add words that they want to be prohibited in the chat. These words are then used to delete messages that don’t adhere to the rules or to flag these messages for an admin to review when the system is not 100% certain that the message contains harmful content.
Architecture

Frontend
The client side is fairly simple, it is built with React.js and only has two sections. The first is flagged messages, where a moderator is able to review messages the system has flagged.

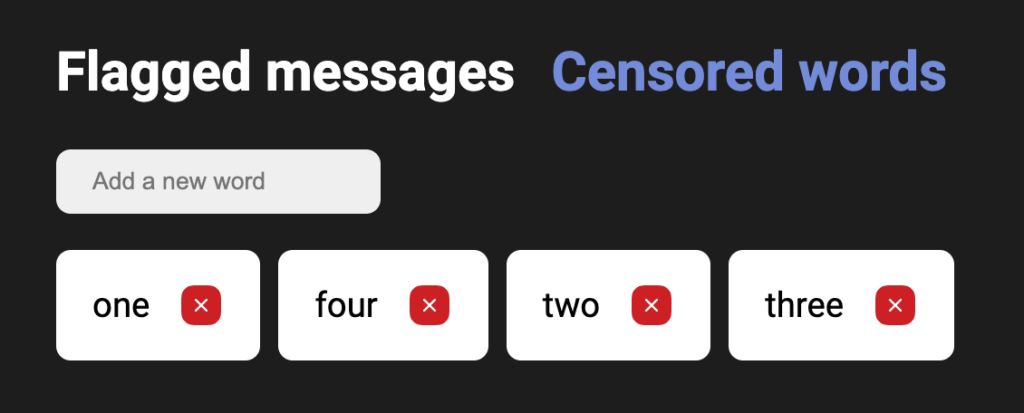
The second is where a moderator can add or remove censored words as shown below.

Backend
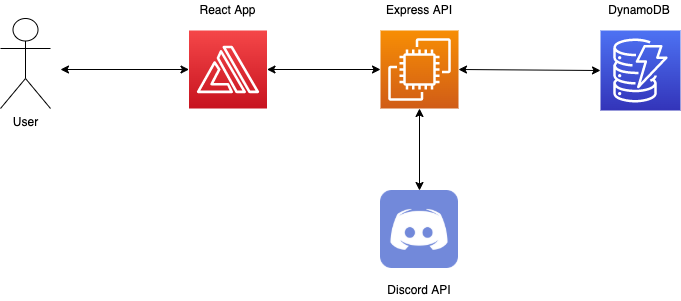
The server side of this monitoring system is built using express.js. The library discord.js was used to communicate with the discord api, and for the database I used dynamoDB.
The main part of the app is the following code:
discord.client.on("ready", () => {
  console.log(`Logged in as ${discord.client.user?.tag}!`);
  discord.client.on("message", (msg) => {
    const status = monitorSys.getScannedMessageStatus(msg.content);
    if (status === "FLAG") {
      flaggedMessagesController.addFlaggedMessage(msg);
    } else if (status === "HARMFUL") {
      messagesController.deleteHarmfulMessage(msg.id);
    } else {
      console.log("SAFE");
    }
  });
});
start();
discord.client.login(process.env.DISCORD_KEY);
Here the bot goes online and starts scanning every message that goes into the chat. With a helper method the system then either flags a message or deletes it right away if it contains harmful content.
EC2
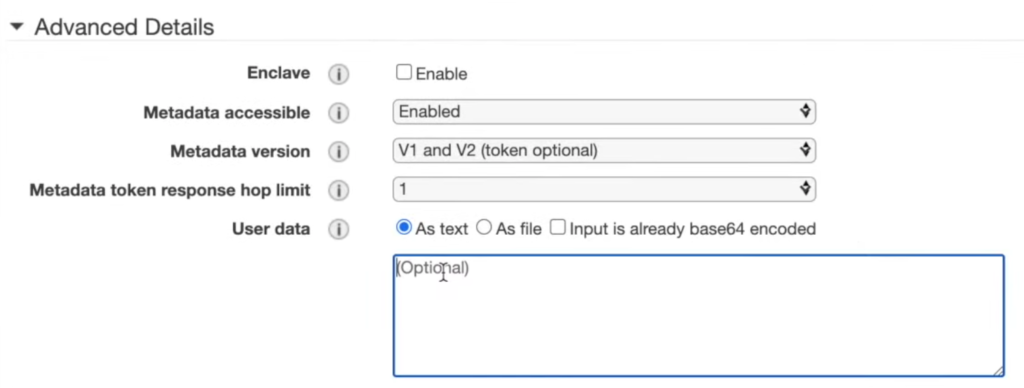
The backend is deployed on an ec2 instance that is based on an Amazon Linux image. When creating this instance we add a script, as shown below, to install the CodeDeploy Agent that we are going to use later for the CI/CD.
#!/bin/bash
sudo yum -y update
sudo yum -y install ruby
sudo yum -y install wget
cd /home/ec2-user
wget https://aws-codedeploy-us-east-1.s3.amazonaws.com/latest/install
sudo chmod +x ./install
sudo ./install auto
Then we need to add these rules as shown below. The one with port 80 is necessary to be able to download data from the internet and the one with port 3000 is for the client to have access to our server.

CI/CD
Frontend
CI/CD On the frontend was done using GitHub actions and amplify. With GitHub I created an action that runs whenever a branch gets pushed. This pipeline runs our tests first and checks if all succeed. If one or more tests fail, this branch can’t be merged to main. This restrictions can be activated directly from the settings of our repository on GitHub. To create this action, create a file ./.github/workflows/tests.yml with the following:
name: Node.js CI
on:
  pull_request:
    branches: [ main ]
jobs:
  test:
    runs-on: ubuntu-latest
    strategy:
      matrix:
        node-version: [16.x]
    steps:
    - uses: actions/checkout@v2
    - name: Use Node.js ${{ matrix.node-version }}
      uses: actions/setup-node@v1
      with:
        node-version: ${{ matrix.node-version }}
    - run: npm ci
    - run: npm install
    - run: npm test
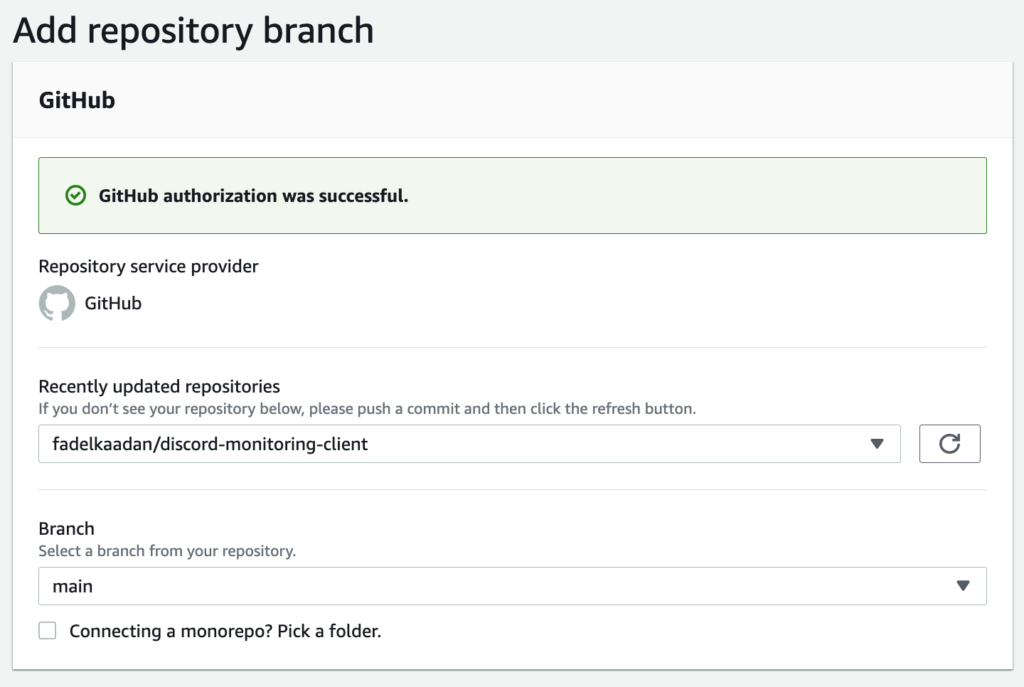
After a branch gets merged with main, Amplify builds the new version and deploys the app when the build is ready. Amplify provides a really straightforward way to deploy a React app. We just have to create a new app on Amplify and connects it with a specific branch on GitHub.

Amplify then detects the Javascript library that’s being used e.g. React, Vue or Angular and adjust the settings accordingly. Environments variables can be added directly on Amplify.
Backend
Here I used CodeDeploy to deploy the newest version of our backend whenever it’s pushed to the main branch. To achieve this, we need to first create a pipeline on CodeDeploy and connect it to our repository on GitHub, which is similar to what we did on Amplify. After that we need to add some scripts to our project for CodeDeploy. These files should be stored inside of ./scripts.
The first script file we need is called before_install.sh
#!/bin/bash

curl -o- https://raw.githubusercontent.com/nvm-sh/nvm/v0.34.0/install.sh | bash
. ~/.nvm/nvm.sh
nvm install node

DIR="/home/ec2-user/discord-monitoring-server"
if [ -d "$DIR" ]; then
  echo "${DIR} exists"
else
  echo "Creating ${DIR} directory"
  mkdir ${DIR}
fi
With that we first download node and npm and then we create a working directory if it does not already exist.
Then we create a file called application_start.sh
#!/bin/bash
#give permission for everything in the discord-monitoring-server directory
sudo chmod -R 777 /home/ec2-user/discord-monitoring-server
#navigate into our working directory where we have all our github files
cd /home/ec2-user/discord-monitoring-server
#add npm and node to path
export NVM_DIR="$HOME/.nvm"
[ -s "$NVM_DIR/nvm.sh" ] && \. "$NVM_DIR/nvm.sh"  # loads nvm
[ -s "$NVM_DIR/bash_completion" ] && \. "$NVM_DIR/bash_completion"  # loads nvm bash_completion (node is in path now)
#install node modules
npm install
#start our node app in the background
npm start > app.out.log 2> app.err.log < /dev/null &
And lastly, we have application_stop.sh:
#!/bin/bash
#Stopping existing node servers
echo "Stopping any existing node servers"
pkill node
After creating these scripts we also need to add the appspec.yml file, which specifies the target folder in our ec2 instance and 3 hooks, each with its respective script file we created earlier.
version: 0.0
os: linux
files:
  - source: /
    destination: /home/ec2-user/discord-monitoring-server
hooks:
  ApplicationStop:
    - location: scripts/application_stop.sh
      timeout: 300
      runas: ec2-user
  BeforeInstall:
    - location: scripts/before_install.sh
      timeout: 300
      runas: ec2-user
  ApplicationStart:
    - location: scripts/application_start.sh
      timeout: 300
      runas: ec2-user
Conclusion
During the Software Development for Cloud Computing lecture, we learned a lot of theory about cloud computing and the different services Amazon and IBM provides. We also got to see some examples on the different subjects that were discussed during the semester. But with this project I was only able to implement and work on some of these topics. The first and main one was deploying the app on Amplify and EC2 and the second, which I personally found very interesting, is continuous integration and continuous delivery. This lecture gave me a really good overview on what can be achieved with cloud computing and I am hoping to learn way more about the topic in the near future.

Leave a Reply
You must be logged in to post a comment.