In our Software Development for Cloud Computing course, we were tasked with building something, anything, using the cloud. After various discarded ideas, our team decided to create a platform aimed at automatically generating short-form videos. In this blog post, we will go over our development journey, the architectural decisions we made, the technologies we chose (and why), the challenges we encountered and the (many) lessons we learned.
Introduction
Short-form video content has enjoyed a massive rise in popularity in recent years, with platforms like YouTube and Instagram, inspired by TikTok, building their own versions of an algorithmically generated feed of short looping videos.
As avid consumers of short-form videos ourselves, we chose to focus on this topic for our project. We found a common pattern amongst the videos we watched, where a text-to-speech (TTS) voice would read a reddit story on top of some kind of background video.
What if we could automatically generate these types of videos, upload them to various platforms using their APIs, and use the creator monetization of the platforms to get rich? All we would need to do is find stories, narrate them using TTS, and generate an accompanying video. Our plan was foolproof!
We didn’t quite end up fully realizing our vision (or we’d be sitting on a yacht instead of writing this blog post), but here’s what we came up with:
How does it work?
Let’s walk through each of the steps a user needs to make in order to generate a finished video.
Getting a story
Our initial goal was to automatically scrape stories from Reddit and use them in our videos. Unfortunately, Reddit has been fighting against this type of use and their API is increasingly difficult for developers to use. Instead, we decided to automatically generate stories using OpenAI’s ChatGPT 4o model.
After experimentation with various prompts, we started getting good results with this one:
You’re a bot for the project TikTok Money Glitch.
Your goal is to generate text for a TikTok video, given a prompt.
The videos are in the style of reddit posts.
Your goal is to generate content that is in some way interesting and would fit for a TikTok audience.
You can either generate a Reddit post’s body, or one or multiple replies to a Reddit post.
If you are generating a post, only generate the body of the post. Don’t include the title anywhere and don’t use Markdown.
If you are generating replies, include the title without any formatting. Then, generate the body of the replies without any formatting.
If your prompt is invalid, reply with I cannot generate a post from this prompt
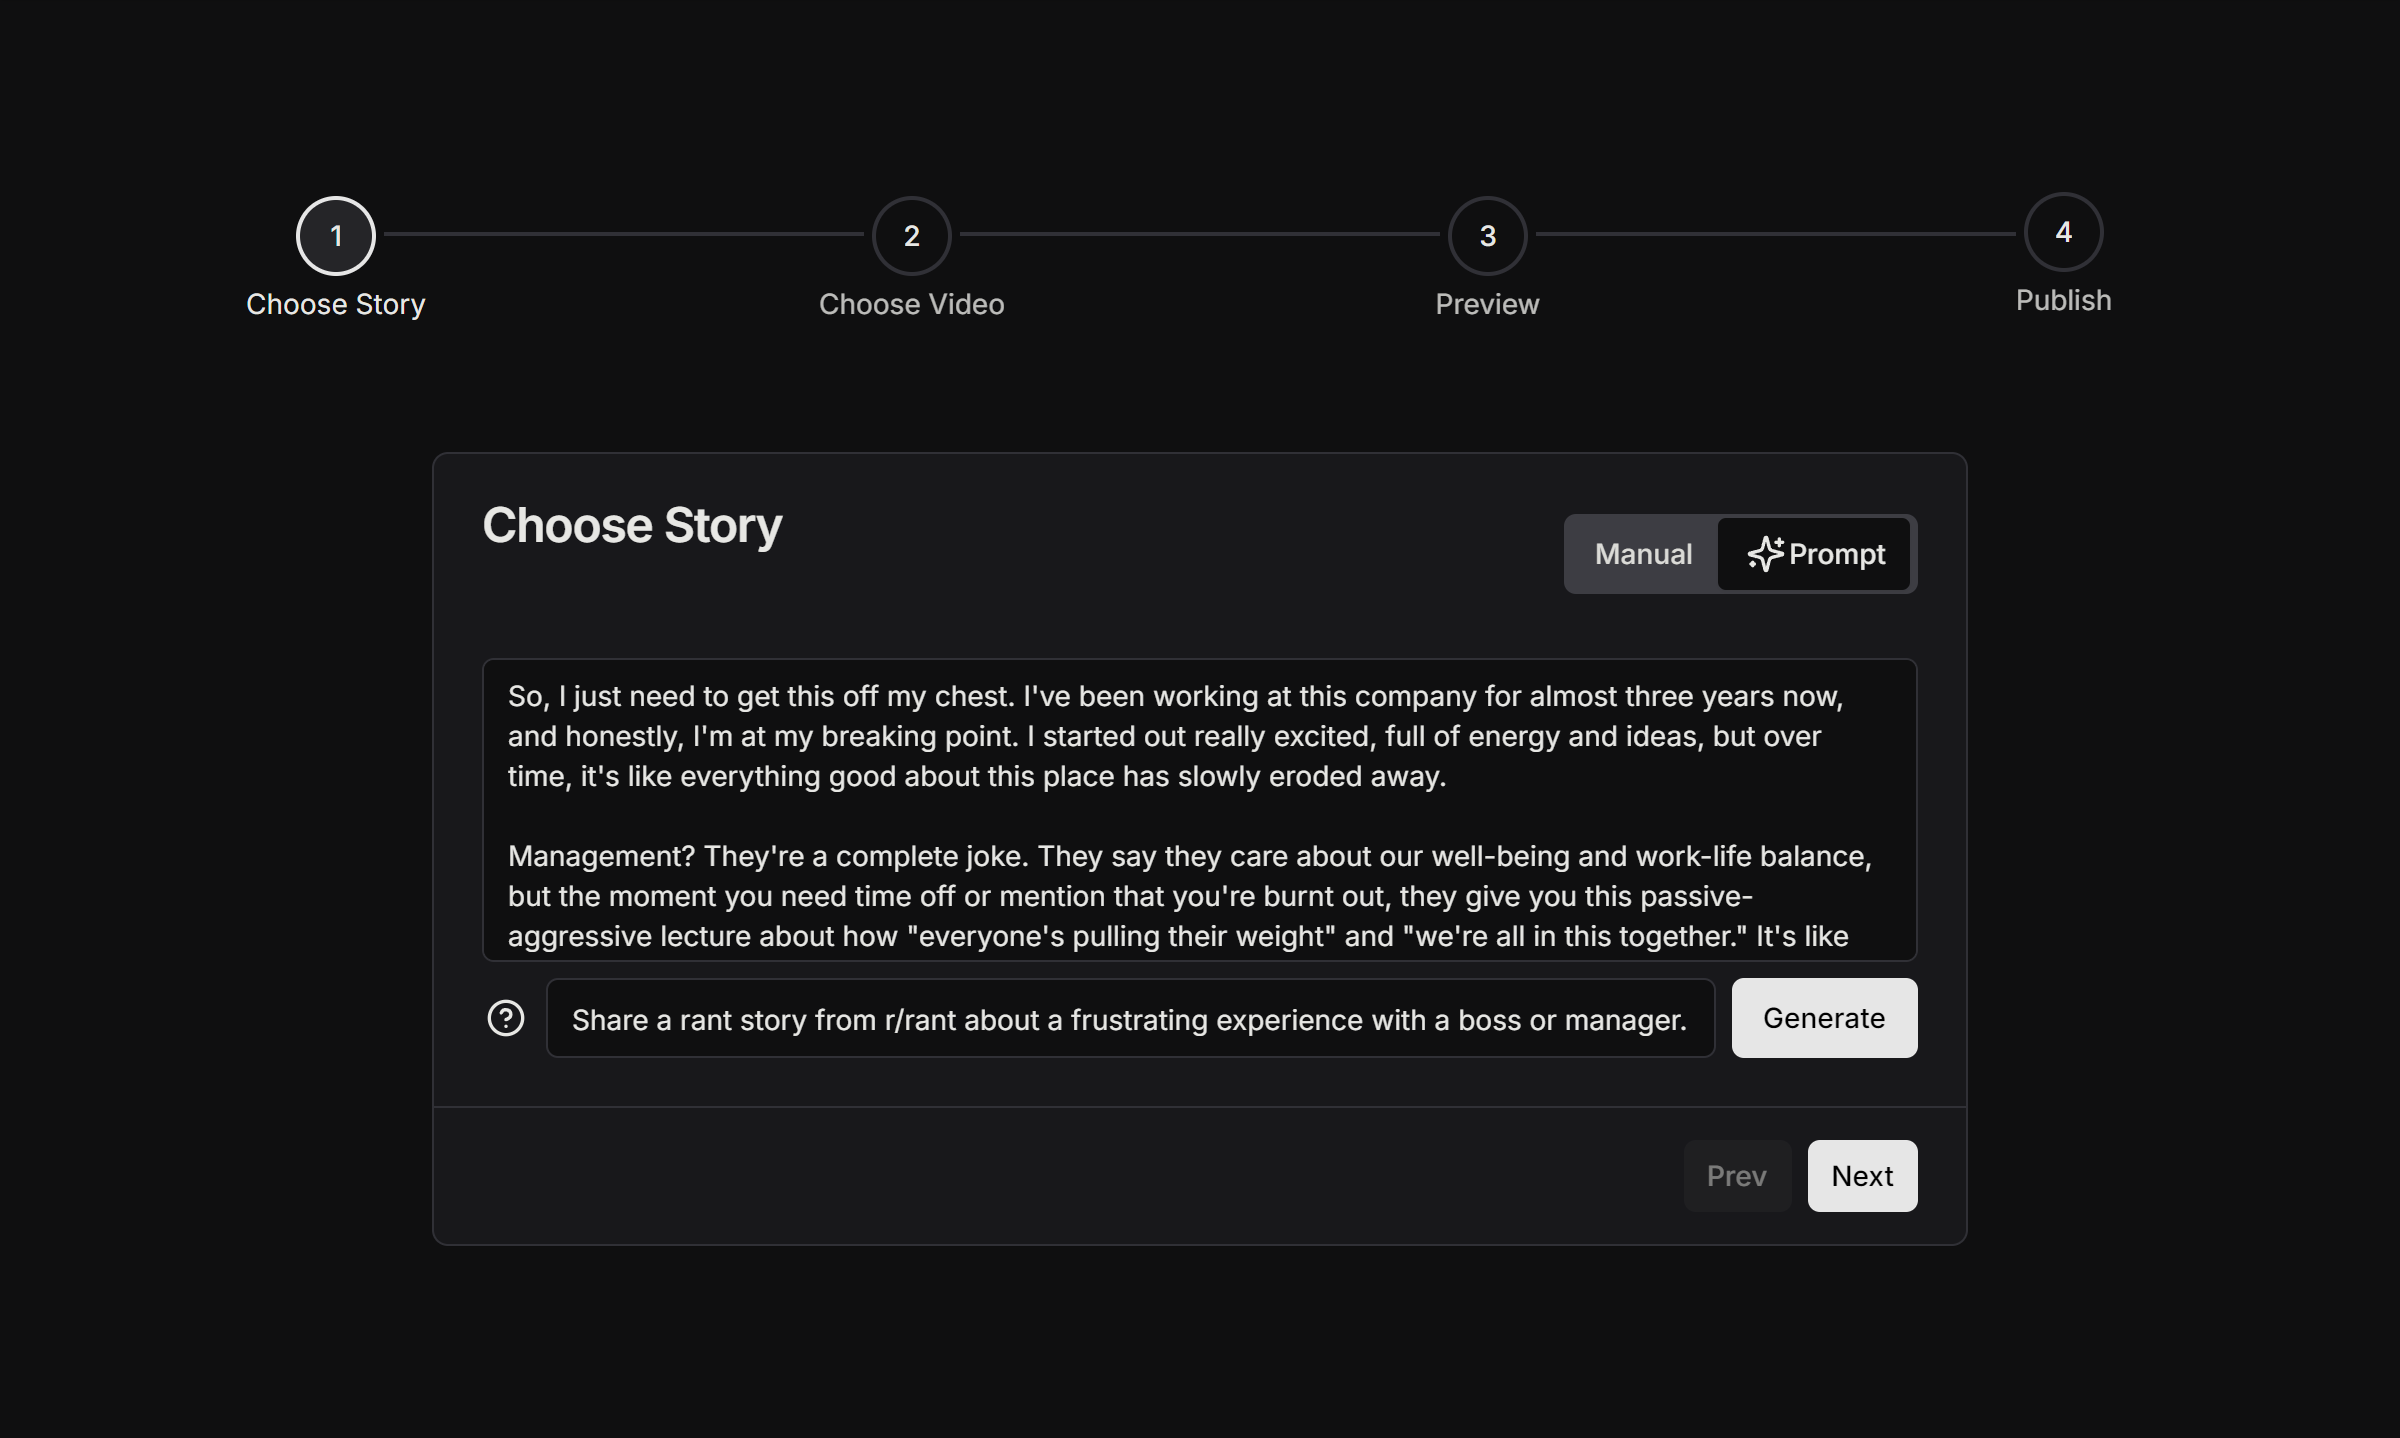
Users tell the AI what kind of story they would like, at which point the story input will get automatically filled with a story that the user can edit if they would like to make any adjustments. We’re using Next.js’ streaming feature to load the generated text into user’s browsers as it’s being generated, similar to the UI for tools like ChatGPT.
Background Video

The videos we aim to generate are characterized by video game footage in the background, typically featuring Minecraft Parkour or Subway Surfers. Users can upload this type of footage through a dedicated backgrounds route, where they can manage their library of background videos – uploading new footage or deleting old clips as needed.
Once users have added their desired videos to their library, they can access these videos during the video creation process. Here, they can select the background video they want to pair with their story.
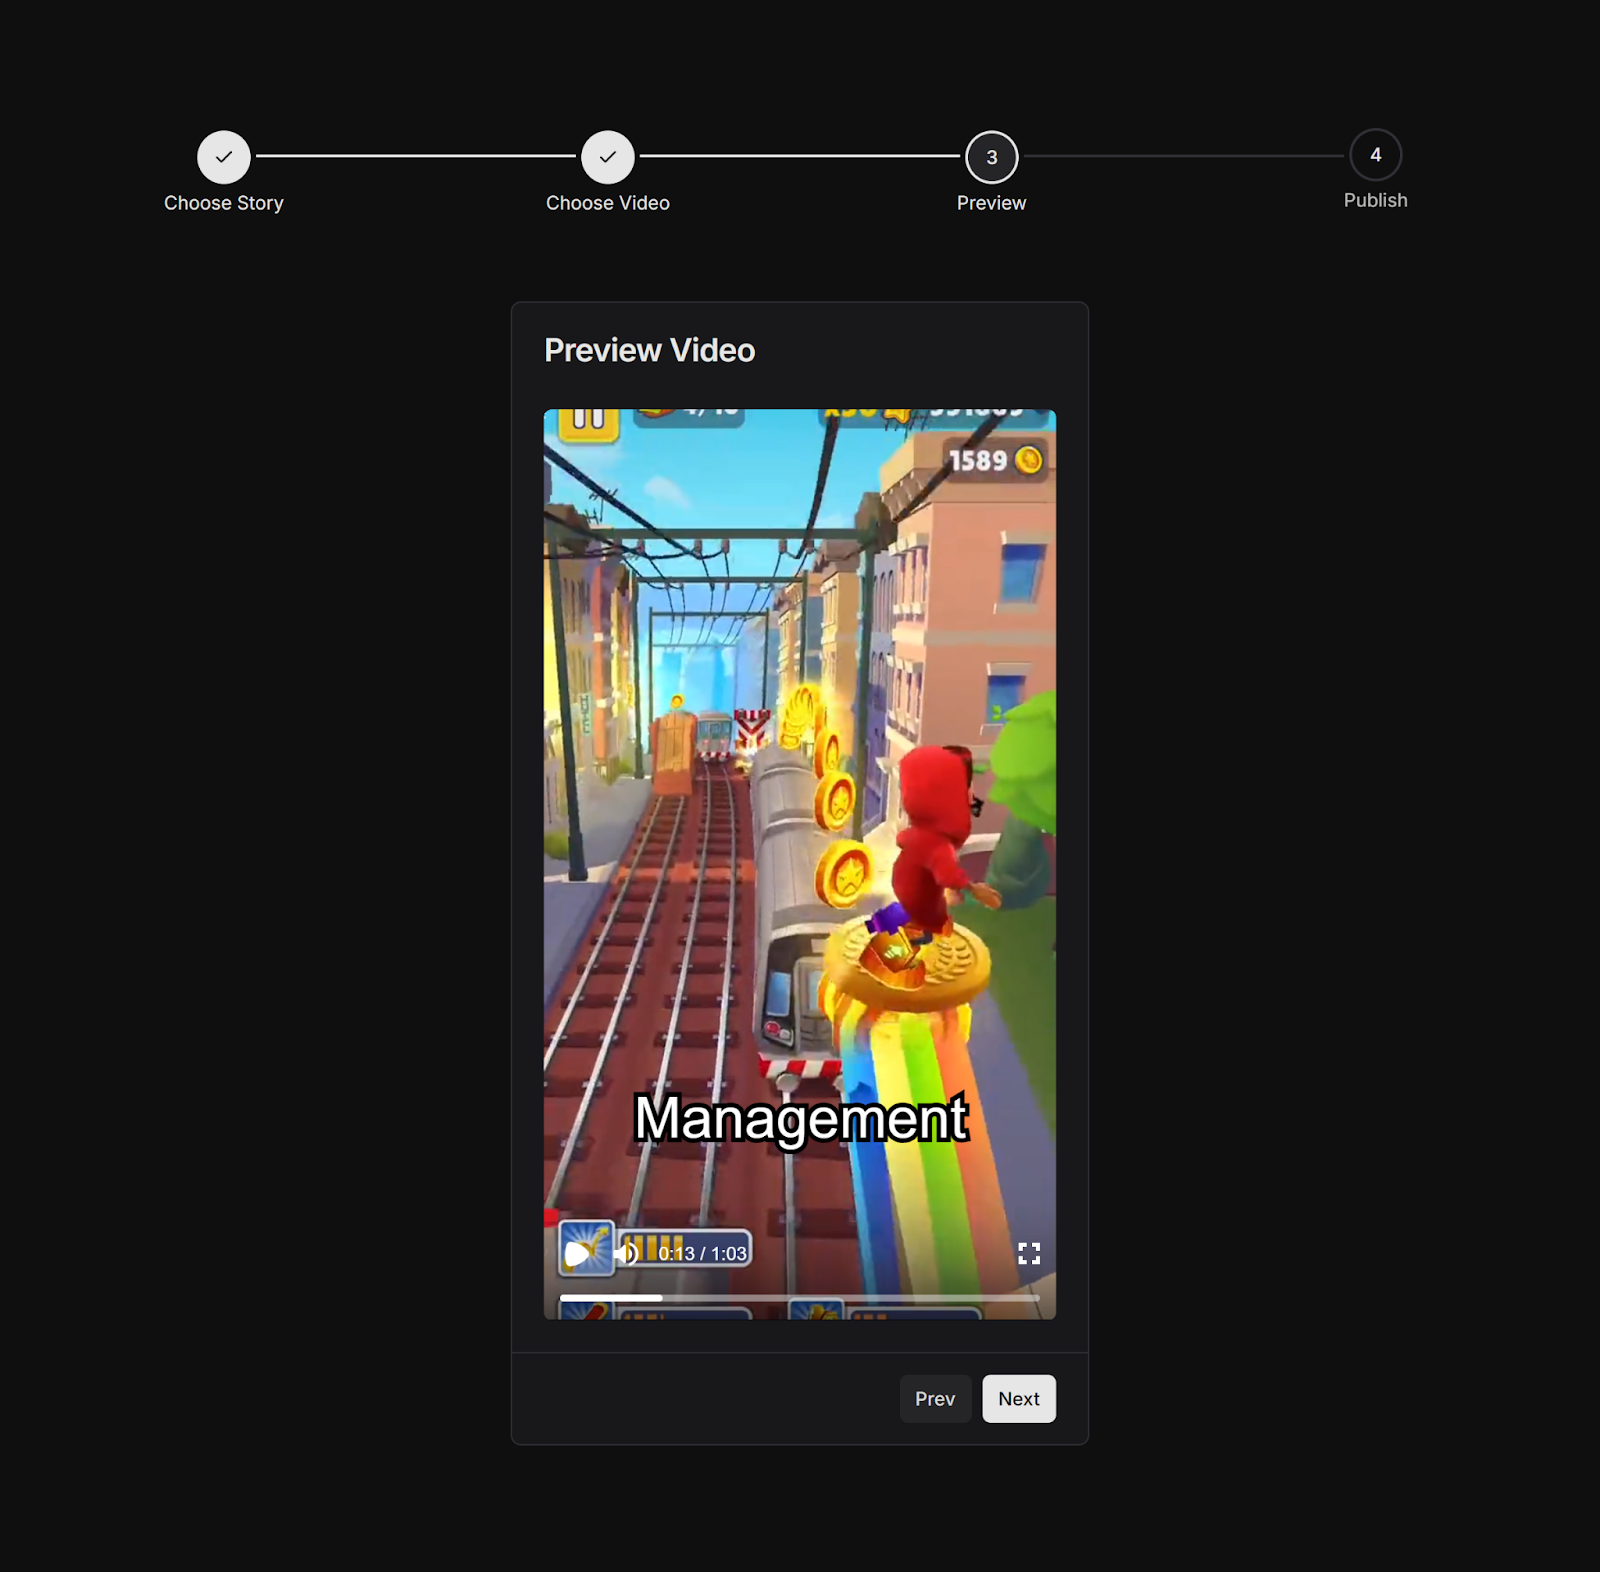
Preview
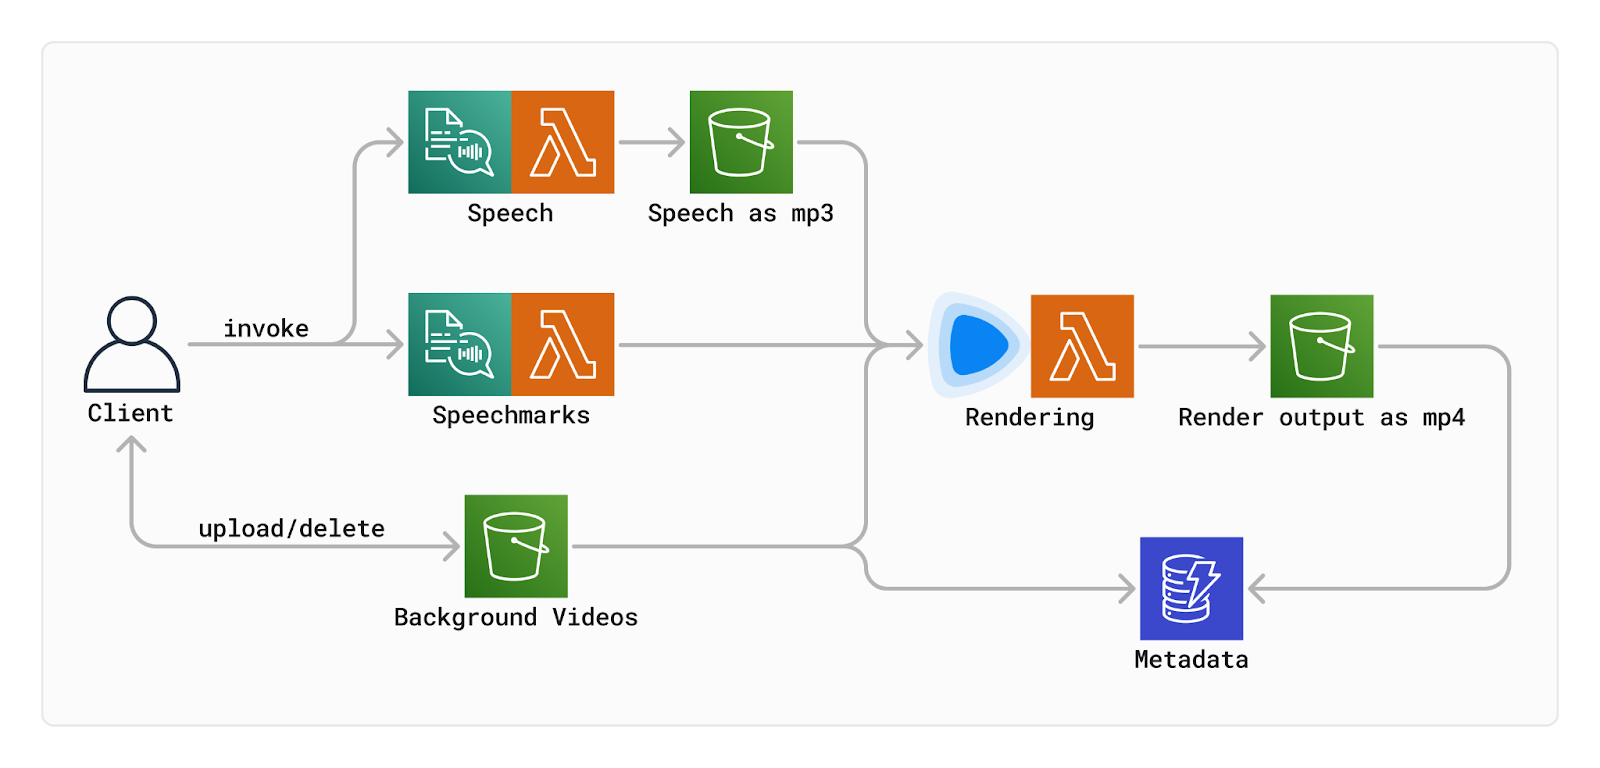
After a story and background video are provided, a preview is generated following a brief loading time. Behind the scenes, a Next.js API route handler on /api/lambda/polly is triggered. This handler invokes two AWS Lambda functions: one for generating the audio and another for creating the speech marks from the provided story.
The Polly responses are returned as Audio Stream objects. The audio stream is directly stored as a blob in an S3 bucket, while the speech marks stream is parsed into a JSON object array. Each object in the array represents one word with metadata, including start and end times, necessary for displaying subtitles.
At this point all necessary parts have been collected: audio, speech marks, text, and background video. We use Remotion, a tool for programmatically generating video, to turn all these parts into a single video. Remotion has a feature called Remotion Player, which we use to preview the video to our users before continuing to the next step. At this point the finished video can already be viewed, although it’s not actually a video yet. Instead, it’s a collection of HTML-elements just being animated to look like a video.
Rendering
If the user is happy with the preview, it can be turned into an actual encoded video. Remotion supports distributing these rendering workloads on AWS lambda using @remotion/lambda. Each lambda gets a configurable amount of frames to render (in our case 10), and after all the tasks have completed, the frames get merged together into one video, which is uploaded to S3.
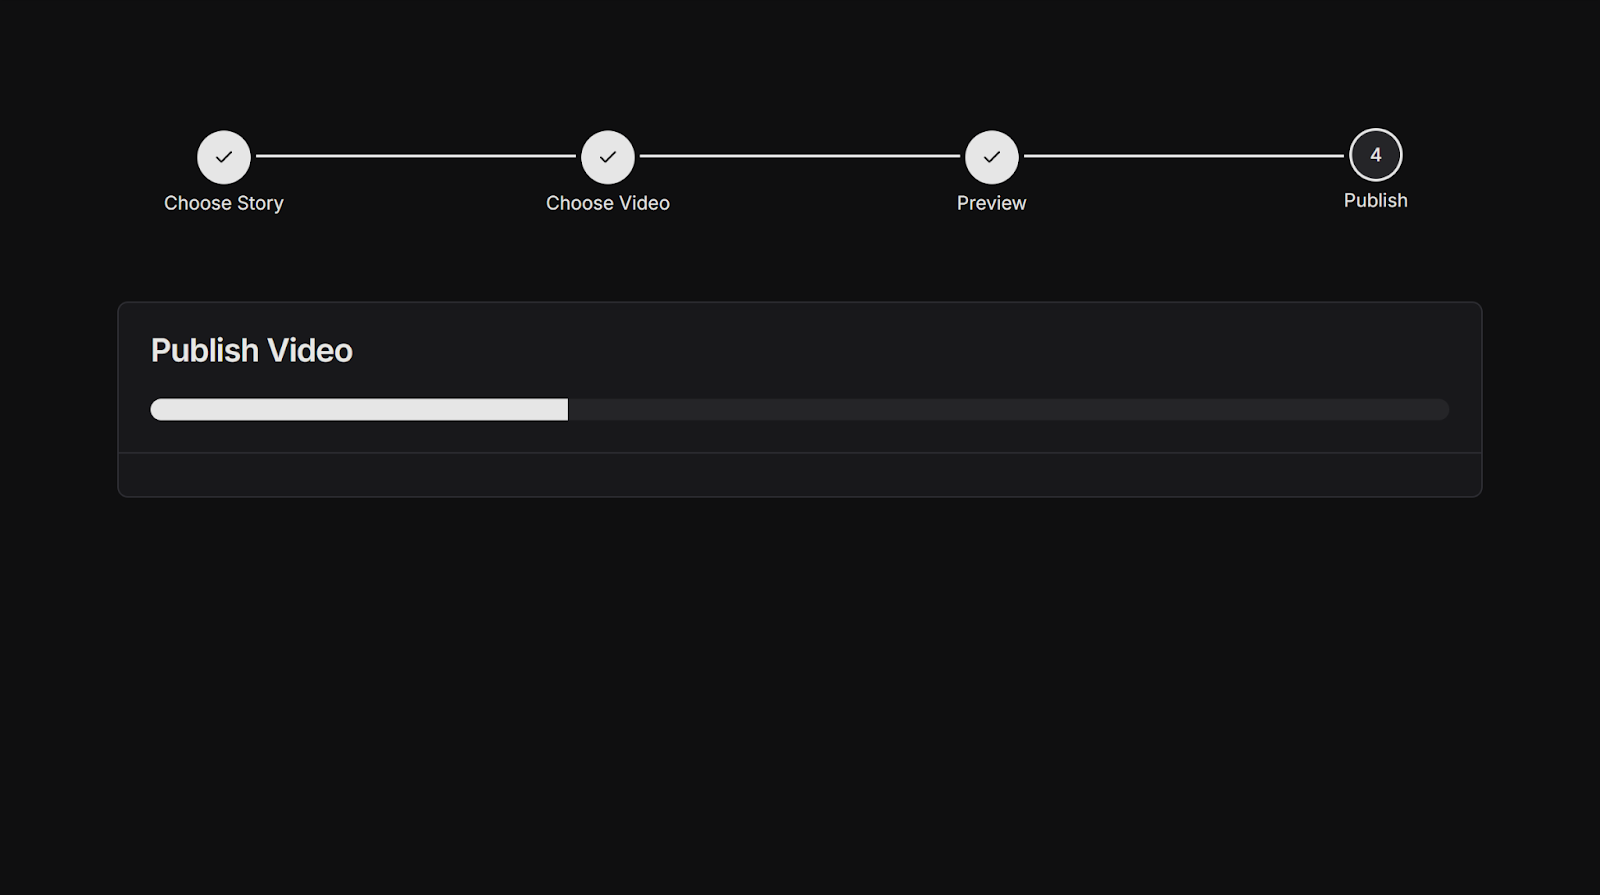
Publishing
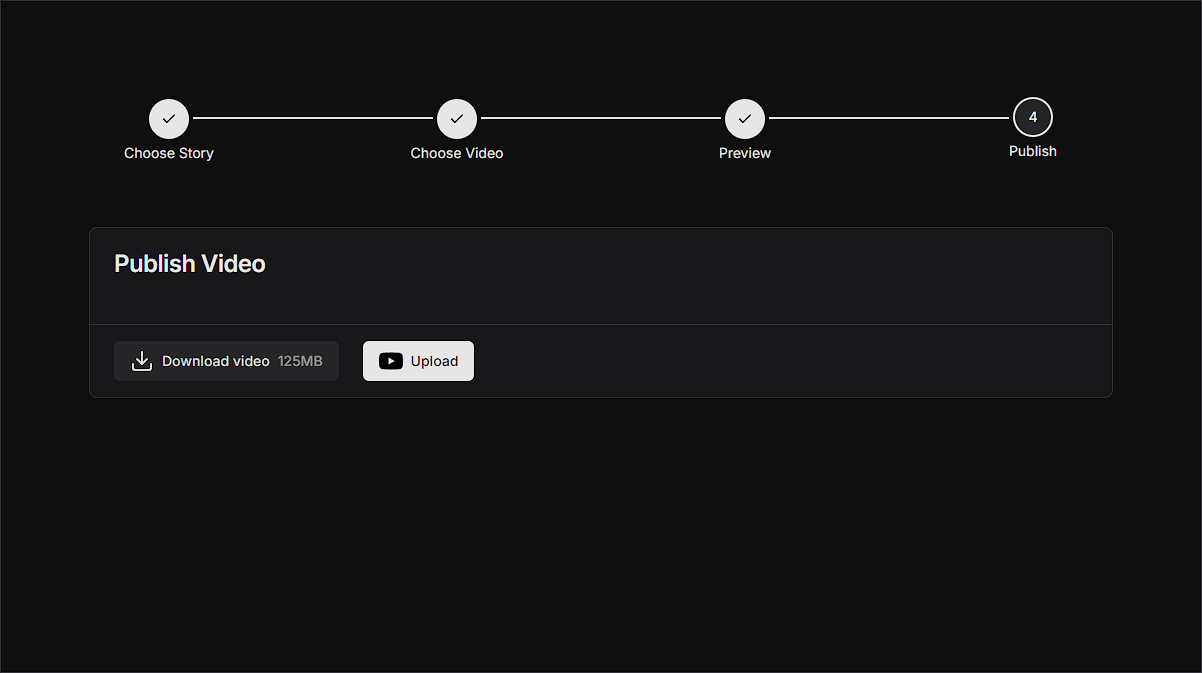
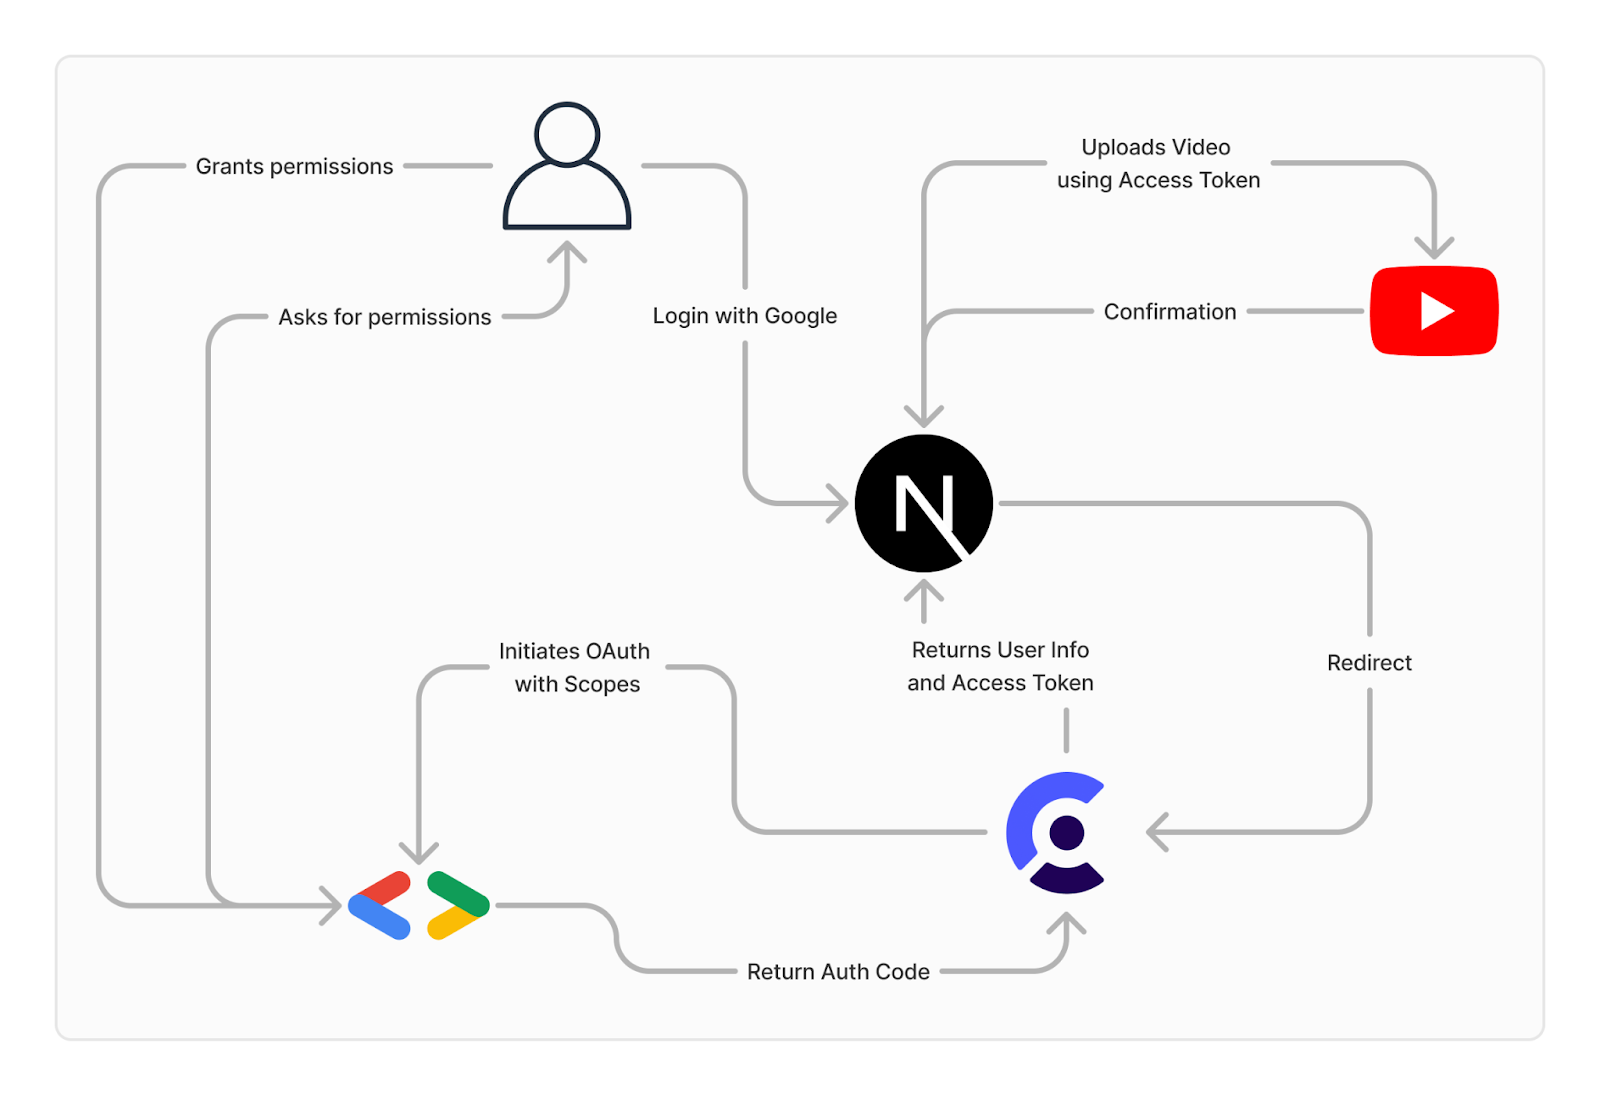
Finally, in the publishing step, users have the choice of either simply downloading the video directly from the S3 bucket with a pre-signed URL, or automatically uploading it to YouTube. Here, we use a Next.js server action that lives entirely on the server side, communicates with Clerk, gets the user’s access token and uploads the video directly to the signed in Google account as a YouTube short via a call to the YouTube API. This is all based on the use of an extended OAuth provider in Clerk, which initiates the necessary Scopes to upload videos.
Technology Stack
We’d like to spend some time explaining how we made our tech stack choices. We considered several factors while making these decisions like our personal experience, popularity, and fit for the project.
Rendering Videos: Remotion (and its consequences)
Generating videos was the most central part of our project, and we decided to go with Remotion for it. Remotion can generate videos using templates defined in code (more specifically React). As there is not a lot of competition in this field and Remotion is free to use at our scale, it was an obvious choice.
Because Remotion has direct support for rendering videos on AWS Lambda concurrently (which is faster and more efficient than using a VPS), this locked us in to using AWS as well.
And due to Remotion being React-based, it was an obvious choice to use a React-based framework for the rest of our frontend as well.
This tight integration between Remotion and the rest of our stack made development far quicker and easier, but also came with some disadvantages. If we hadn’t chosen Remotion, we could’ve tried out a framework based on a different library (like Vue or Svelte), but as this would’ve led to us separating our video rendering and application code, we decided to stick with React. We probably would have also decided to use AWS as our cloud provider without Remotion, but we did not spend much time evaluating the alternatives due to Remotion only supporting AWS.
Framework Choice: Next.js Ecosystem
The two most popular React-based frameworks are Next.js and Remix. They have a similar feature-set with both of them supporting server-side rendering, file-based routing and having integrations for SST.
We ended up choosing Next.js ecosystem primarily because our team was already familiar with React from previous lectures and projects. This allowed us to use our existing knowledge, making our development process faster, with the benefit of letting us focus more on the actual cloud infrastructure and less on building the web app. Remotion also provides templates for integrating with Next.js which made starting out far quicker.
Authentication: AWS Cognito vs NextAuth vs Clerk
As we wanted to use AWS for everything, our initial thought was to use AWS Cognito for authentication. In initial testing, we struggled with this though, and it quickly became clear that this would require significant effort on our part to get working. As authentication is not a central part of our app, we wanted to minimize the time spent working on it.
Instead, we considered using NextAuth, as we had also used this in previous projects. In those projects we had a fair share of issues with it though, and had actually considered switching those projects to use Clerk instead. As we were starting from scratch, we decided this was the way to go.
Clerk is an auth-as-a-service platform that has specific integrations for Next.js which made it extremely simple to set up for our use case. Later on, we needed our users to grant us access to their YouTube accounts. Clerk allowed us to integrate this into their authentication flow by changing a single setting in their admin portal, which reduced the time we had to work on the YouTube integration significantly.
Database: DynamoDB vs AWS RDS with Drizzle ORM
The SST documentation has a tutorial for integrating AWS RDS with SST while using the Drizzle ORM to talk to the database. As we wanted to try out Drizzle, we tested this as an option. Despite following the tutorial, we never actually got the integration between the database and Drizzle to work. As discussed later on, we also ran into some very significant cost issues though, due to the very high price of AWS RDS.
As we still needed a database and didn’t want to have a repeat of the cost issue, we chose DynamoDB, primarily due to its simplicity and low cost. We quickly got set up with it and had no further issues, so we stayed with it for the rest of the project.
E2E-Testing Framework: Cypress vs Playwright
For E2E-Testing frameworks there are two popular options that integrate well with our stack: Cypress and Playwright
Clerk’s Cypress integration has several helper methods which can authenticate the test client by calling a method with provided credentials. Unfortunately, Playwright lacks such an integration.
However, as a group, we had no experience using Cypress, and Playwright had also been described as a more modern alternative to it. We decided to go ahead with Playwright’s weaker integration, which forced us to manually write the authentication part of our tests. We ended up finding an example from Clerk that helped with this though and had no further struggles getting our E2E tests to work together with Clerk.
We tried setting up our continuous integration to run our E2E-tests automatically, but this turned out to be too challenging due to the required infrastructure needed in the background for our app to work. Instead, we chose to run our E2E-tests manually to validate that our app still worked as intended when refactoring parts behind the scenes.
Storage: AWS S3 for Video Storage
We needed a way to store files for various parts of the app, and as we had been using AWS for most parts of the app, S3 was the obvious choice.
More specifically, we used S3 for three different parts of our app:
- We needed to store audio generated from Polly so that it could be accessed in the browser. An automatic expiration date for speech audio is set to avoid cluttering storage, because speech audio is generated during video creation and does not need to be accessed at a later point.
- Users are able to upload background videos which can be used for the generated videos. In addition to uploading the videos to S3, we also store metadata for those files in DynamoDB, with the filename (a randomly generated UUID) linking the file and metadata. This enhances user experience by sorting the way data is viewed in the web app and making files searchable.
- The generated videos are uploaded to an S3 bucket by remotion, at which point they can be downloaded by the user or uploaded directly to YouTube.
How to get our stuff into the Cloud?
Deploying our app to the cloud manually would be quite complicated and unpleasant. Ideally, we should use an Infrastructure-as-Code (IaC) tool like Terraform or Pulumi to automate the process and make it repeatable. Since we’re using Next.js, it would be ideal to deploy it in a serverless way, as this is cheaper and can be faster.
Vercel, the creators of Next.js, offer a service which hosts Next.js apps using AWS Lambda behind the scenes. We had good experiences with using them in the past, but as Vercel does not work properly with IaC and is designed to work with no additional configuration, using it would’ve gone against the spirit of learning about the cloud in this lecture.
AWS offers a service called Amplify which is similar to Vercel, so we decided to test it out with our app. We ran into some compatibility issues though, and our goal was still to deploy “closer to the metal” than with a service like Vercel. As Amplify is a very close copy of Vercel, this wouldn’t work either.
Open Next is an open-source project that turns Next.js’ build output into a format that can be deployed on AWS Lambda. This sounded like it would work great for our use case, so we started exploring its documentation. Their Get Started section mentions that “The easiest way to deploy OpenNext to AWS is with SST” so we looked into that.
We were immediately surprised by the simplicity of the example on their landing page.
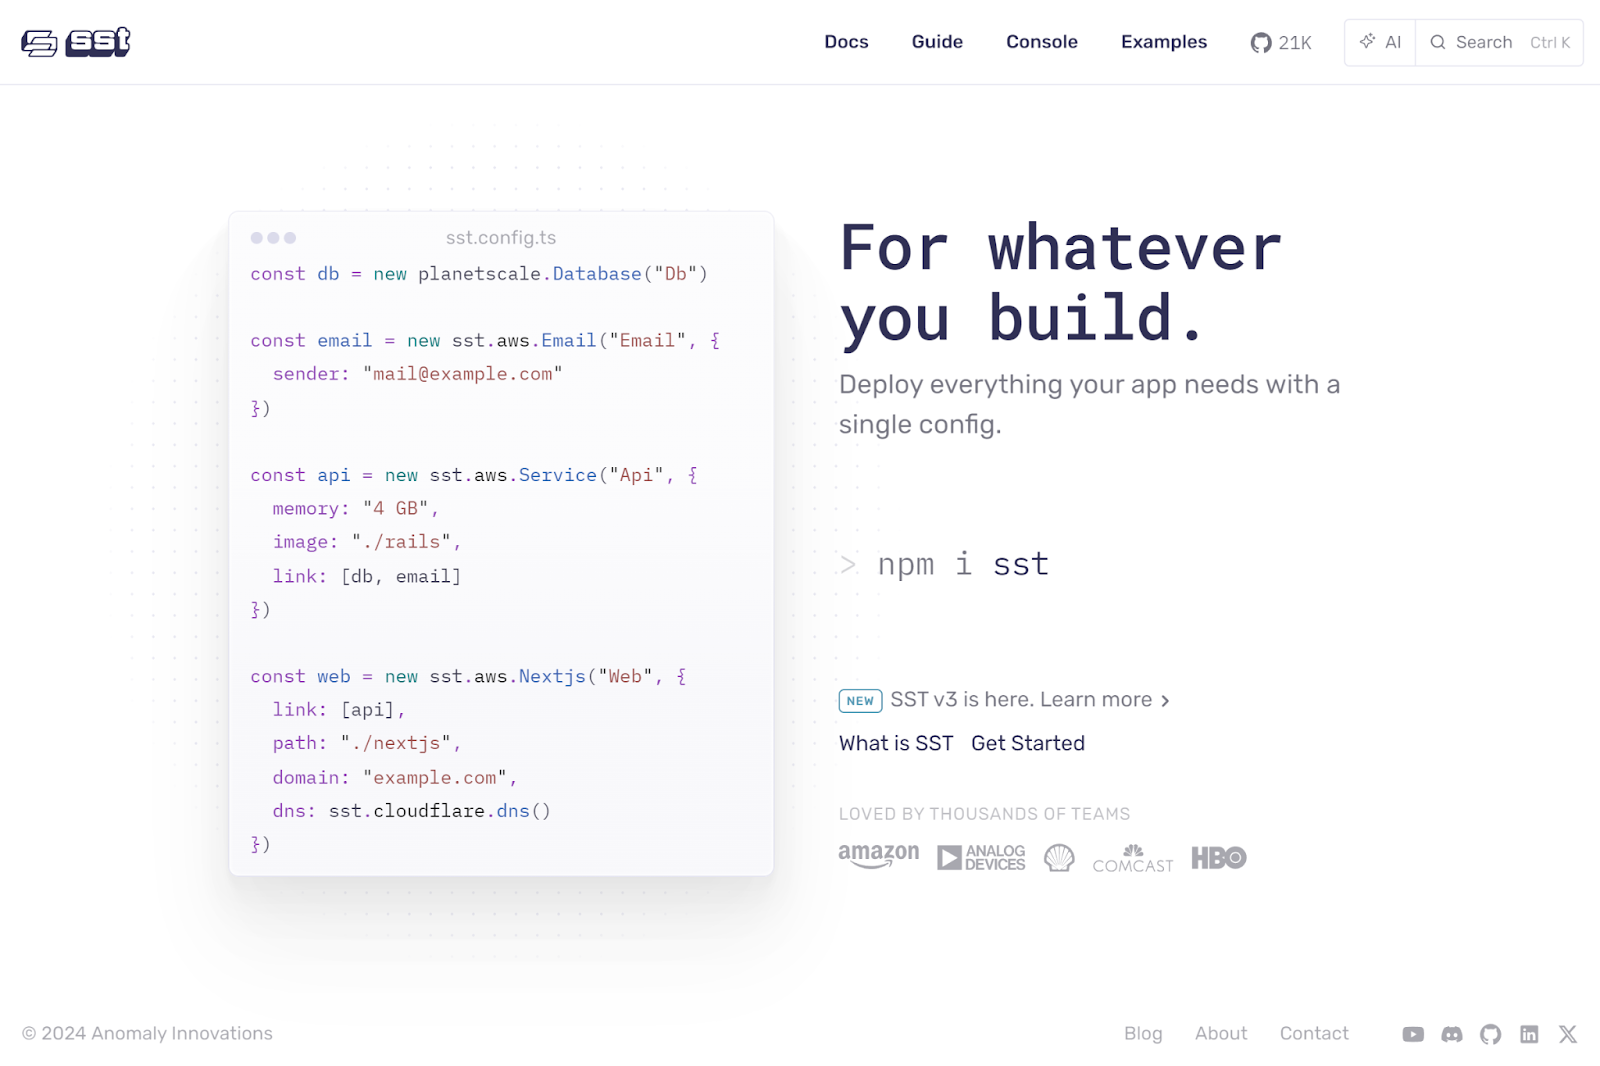
After some testing with SST, we quickly made the decision to use it for this project. Let’s take a look at how it works, why we made the decision to use it, and what our experience with it was like during the project.
Infrastructure Management with SST
SST is an IaC tool, similar to Terraform, Pulumi, and CloudFormation. Infrastructure can be provisioned by creating various objects in TypeScript (called components by SST). Unlike those tools though, the components in SST abstract the lower-level infrastructure primitives to a level that is much nicer to work with.
Why not Pulumi/Terraform
Pulumi and Terraform provide many different low-level primitives for infrastructure. Unfortunately, these are often too low-level to comfortably work with.
As an example, this is the amount of code required to create an AWS Lambda function using Pulumi:
import * as pulumi from "@pulumi/pulumi";
import * as archive from "@pulumi/archive";
import * as aws from "@pulumi/aws";

const assumeRole = aws.iam.getPolicyDocument({
    statements: [{
        effect: "Allow",
        principals: [{
            type: "Service",
            identifiers: ["lambda.amazonaws.com"],
        }],
        actions: ["sts:AssumeRole"],
    }],
});
const iamForLambda = new aws.iam.Role("iam_for_lambda", {
    name: "iam_for_lambda",
    assumeRolePolicy: assumeRole.then(assumeRole => assumeRole.json),
});
const lambda = archive.getFile({
    type: "zip",
    sourceFile: "lambda.js",
    outputPath: "lambda_function_payload.zip",
});
const testLambda = new aws.lambda.Function("test_lambda", {
    code: new pulumi.asset.FileArchive("lambda_function_payload.zip"),
    name: "lambda_function_name",
    role: iamForLambda.arn,
    handler: "index.test",
    sourceCodeHash: lambda.then(lambda => lambda.outputBase64sha256),
    runtime: aws.lambda.Runtime.NodeJS18dX,
    environment: {
        variables: {
            foo: "bar",
        },
    },
});
That’s a lot
The tasks of setting IAM Permissions, creating an archive with the code, and setting it up to be run all have to be done in separate steps. And this example doesn’t even contain potentially having to compile code from TypeScript to Javascript.
Once infrastructure has been provisioned using a regular IaC tool, actually interacting with it from code is not a great experience either. Infrastructure also can’t be easily duplicated, in case multiple developers want to work on a project simultaneously. And using these primitives to deploy something like a Next.js app is difficult, even with a module that integrates with OpenNext.
What makes SST so nice?
SST is different. Deploying a Next.js app is as simple as using the sst.aws.Nextjs component. That infrastructure is deployed separately for every developer working with the app, and it can access other infrastructure that is linked to it automatically. Behind the scenes, SST is actually based on Pulumi which means that it’s still possible to use the low-level primitives it provides, if necessary.
SST Components
SST has built-in support for components from various cloud providers, but we only used the AWS-specific ones. Specifically, we used Bucket (creates an S3 Bucket), Dynamo (sets up a DynamoDB behind the scenes), Function (creates a serverless AWS Lambda function), Secret (synchronizes secrets across the app), and of course Nextjs (uses Open Next to deploy a Next.js app on AWS Lambda). As mentioned, these components require much less boilerplate. For example, let’s try to create an AWS Lambda function like the previous example, but using SST:
new sst.aws.Function("MyFunction", {
  handler: "src/lambda.handler"
});
That’s a lot less, eh?
All the previous boilerplate necessary to set the correct permissions, compile TypeScript to JavaScript zip the result, and upload it is automatically handled behind the scenes. Because of the unique name generated for each component deployment, it’s not possible for two developers to have conflicting deployments either.
The community can also make their own components, which was very helpful in the case of Remotion SST. The Remotion documentation only explains how to manually deploy and update the AWS Lambda function responsible for rendering out videos. This can cause issues when Remotion versions are out of sync between the Lambda and App, and is also just annoying to do manually. Remotion SST can be used as a component like any other component and handles the deployment and updating of the required Lambda automatically.
SST Linking
When two different components are intended to work together, like a Next.js app accessing an S3 bucket, they can be linked together.
const bucket = new sst.aws.Bucket("MyBucket");

new sst.aws.Nextjs("MyWeb", {
  link: [bucket],
});
Internally, SST will modify the IAM permissions of the bucket so that the Next.js app can interact with it without needing any further authentication. At the same time, the SST SDK is notified about the resource, which means that it can be imported using the name defined in the SST config.
import { Resource } from "sst";

console.log(Resource.MyBucket.name);
There’s full type-safety for this (very nice)
Not having to think about authenticating different services with each other and instead things “just working” made our development experience significantly better. As Remotion SST from earlier also supports linking, we no longer had to worry about setting the correct permissions for remotion either (something we struggled with previously).
SST Live
One of the standout features of SST is SST Live. It makes it possible to test changes made to SST Components almost instantly, without having to redeploy the entire application.
SST Live uses IoT over WebSocket to bridge communication between a developer’s local machine and the remote Lambda function. When starting the app with sst dev, SST swaps out the standard Lambda functions with stub versions. At the same time, a WebSocket client on the developer’s machine connects to their AWS accounts’ IoT endpoint.
When a Lambda function is triggered, it sends an event with the request data. This event is then captured by the local WebSocket client, which then processes the function locally using a Node.js Worker. The result is finally sent back as an event, which the stub Lambda receives and returns as the function’s response.
All this setup may seem complicated, but it happens automatically in the background, and has several big advantages:
- It’s possible to debug apps using breakpoints
- The same IAM permissions are used in development and production, making it less likely to suddenly get surprised with permission issues after deploying
- Webhooks “just work”, unlike with a local development environment
It’s not all perfect though
While we’re big fans of SST, and we definitely think that we made the right choice using it, it’s not perfect. Our biggest issue with it by far is the lack of support for Windows. Apparently this is something that is being worked on, but for the duration of our project it meant that we had to do all development inside WSL. As both VS Code and WebStorm have support for working inside of WSL, this shouldn’t be that big of an issue. Unfortunately, developing inside WSL consumes massive amounts of resources which meant that even team members with strong desktop machines occasionally struggled with system performance.
We also wanted to set an expiry policy on the S3 bucket storing our generated speech audio (as it’s not required after a video is finished), but SST doesn’t provide an option for doing this. Fortunately, due to it being based on Pulumi, we were able to use Pulumi-native code instead and connect it to the SST component for the bucket.
const pollyBucket = new sst.aws.Bucket('PollyBucket');
new aws.s3.BucketLifecycleConfigurationV2('PollyBucketLifecycle', {
      bucket: pollyBucket.name,
      rules: [
        {
          id: 'DeleteExpiredObjects',
          status: 'Enabled',
          expiration: {
            days: 1,
            expiredObjectDeleteMarker: true,
          },
        },
      ],
    });
  },
});
Architecture
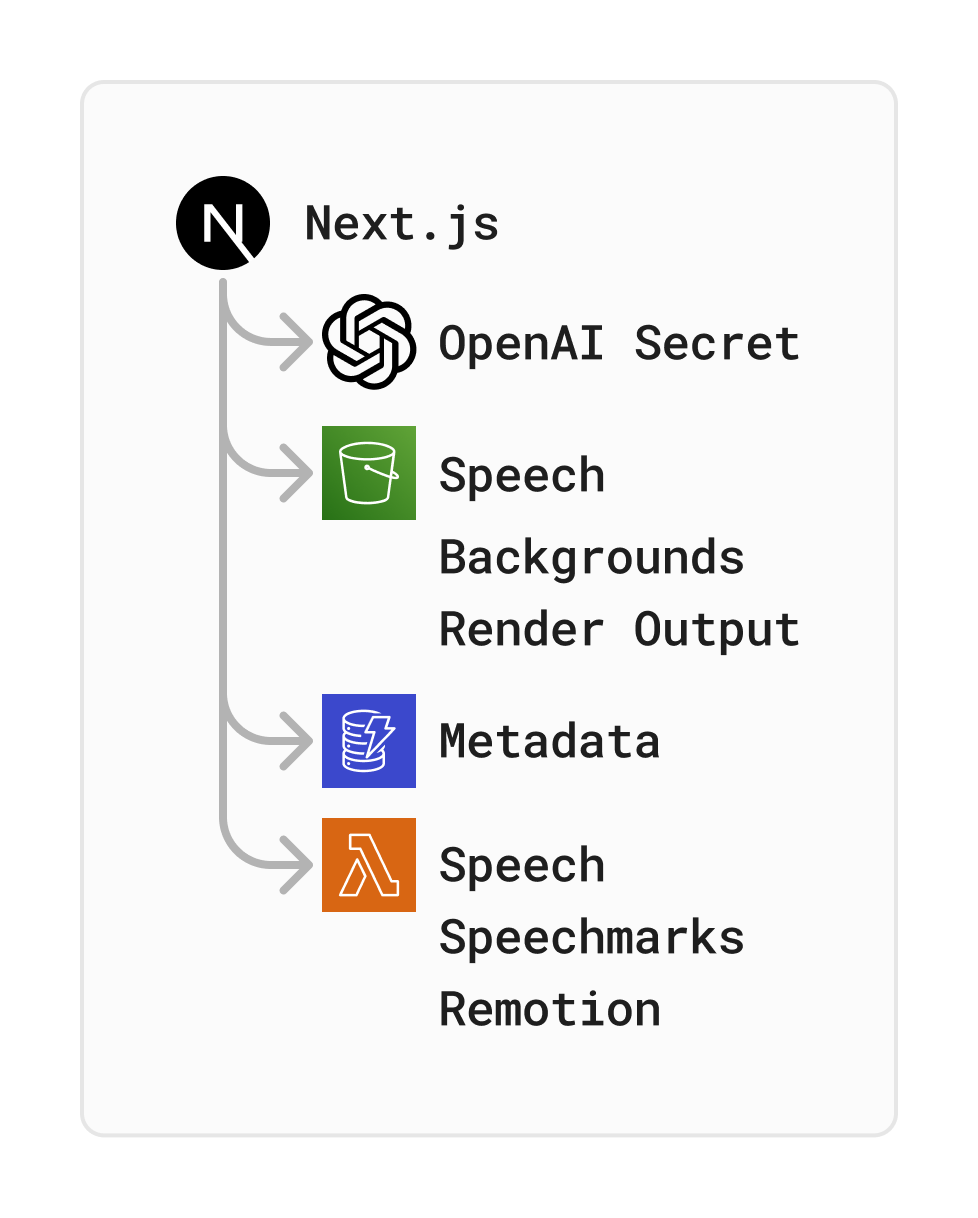
Our tech stack has already been mentioned, but let’s take a closer look at the communication between our various components.
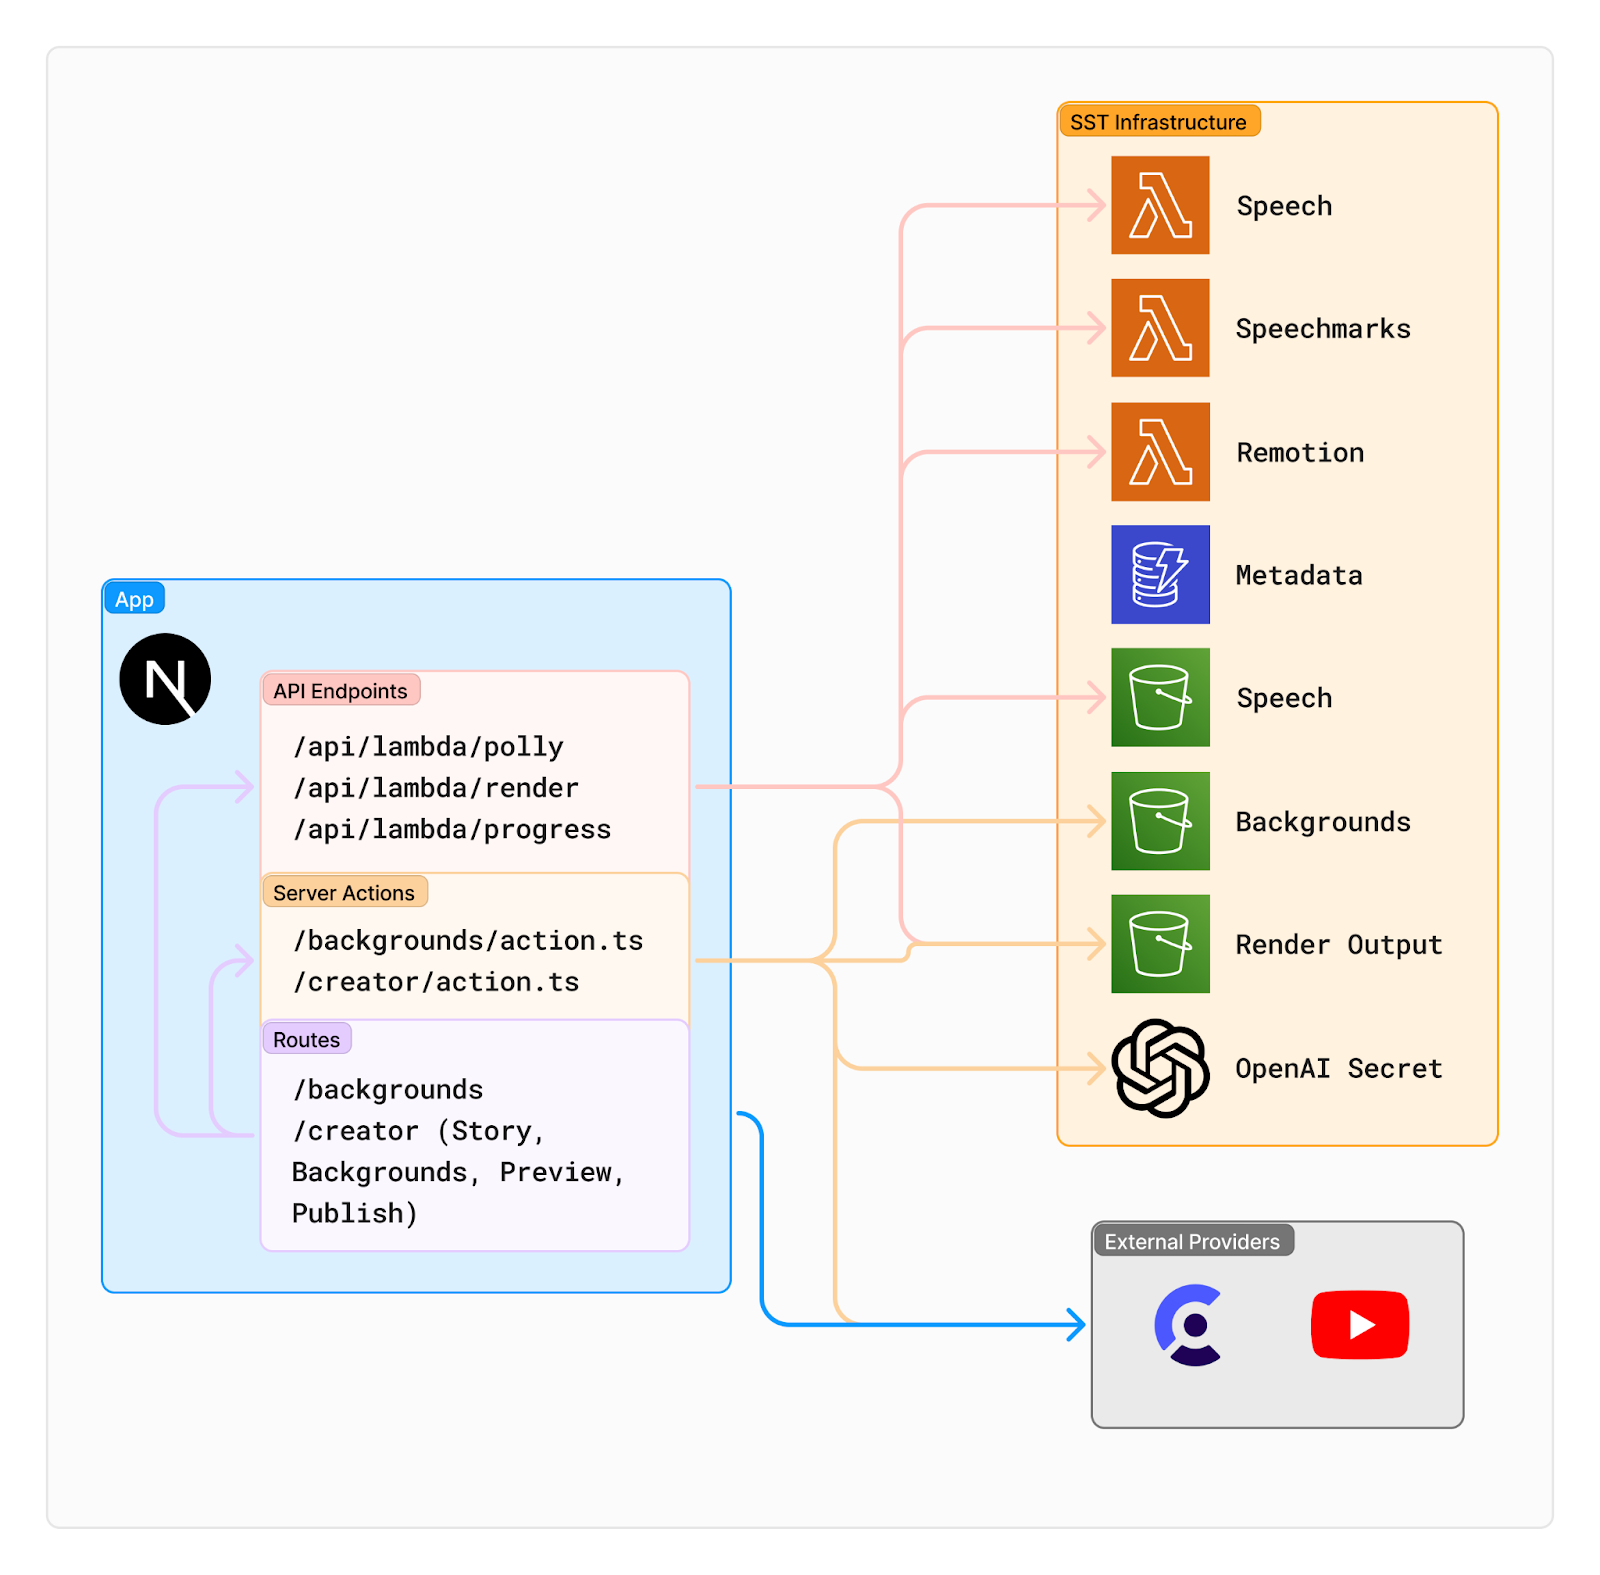
The core of our project is a Next.js app. In addition to serving the frontend and authenticating users using Clerk, it has several API routes and Server Actions which communicate with the other SST components and external providers.
Server Actions are a relatively new feature in Next.js. They are authored as normal asynchronous JavaScript functions, but can be called from both the server and the frontend. Behind the scenes, Next.js actually transforms them into API endpoints which can then be called by the frontend. We could’ve used regular API endpoints instead, but Server Actions proved to be more convenient for some of our use cases.
As previously mentioned, Remotion SST deploys a Lambda function to concurrently render the final video. We communicate with this Lambda using two regular API endpoints to start a new render and get its progress.
There’s also two lambda functions responsible for generating speech and speechmark, which talk to the Polly API internally. We’re doing this because we struggled with returning both audio and speechmarks in a regular Next.js function. To keep them both in sync, every time we want to invoke a speech processing we call an API endpoint which triggers both lambdas simultaneously.
Struggles
As with any bigger project, we encountered a number of issues during the development process that caused quite a bit of frustration.
We’ve already talked about how much effort it was to set up a development environment using WSL, but for illustrative purposes, we’d like to briefly go over all the steps: Create an account in IAM Identity Center, install WSL, install the AWS CLI, create an AWS CLI profile, install SST, set up WSL to work with GitHub, install Node inside WSL, make Node work with the PNPM package manager, set up an IDE to work inside WSL, Phew. Doing this process again and again on many different machines almost drove us insane.
Oh, and on the topic of authentication. IAM Identity Center is a tool designed to make it easier to share an AWS account. Each of us got their own IAM Identity Center account, which could then be used to log in to AWS. Unfortunately, the setup process for this is very convoluted. Every user needs to get an invitation, create their account (including mandatory 2FA), then get assigned a group which is allowed to act as our original AWS account. Now, every time one of us wants to sign into AWS, they have to go to a specific sign-in URL (the normal AWS sign-in won’t work), then select the original AWS account. And before we discovered settings to change the session length, this had to be done every 2 hours for both the AWS console and CLI.
The biggest challenge we faced though, was integrating third-party APIs, including those from platforms such as Reddit, TikTok and YouTube. Access to these APIs is difficult to get, making it hard to get the data we needed for our project. Each platform has its own set of restrictions, rate limits and quirks that we had to work around. The Reddit API, as mentioned above, was completely inaccessible to us due to several restrictions that limited automated access. TikTok’s API has a pretty elaborate registration process and we were also pretty sure that TikTok wouldn’t like our use case that much. So we decided to try uploading to YouTube, but here was the next hurdle. YouTube’s API has a rough quota limit per day that only allows us to upload 6 videos per day for the whole application. We could have requested an increase of this, but, like TikTok, they also require a detailed registration process. As this was just a student project, we didn’t see any chance of success.
Another very scary thing we didn’t think of at first were the costs. During setup, we set the AWS Cost Alert for our infrastructure to 5$. This should’ve prevented any serious cost spike, but, well…

We needed a database for storing our metadata and wanted to use Drizzle as ORM due to its convenience. As the official SST documentation had instructions on how to set this up, we decided to follow them.
async run() {
  const vpc = new sst.aws.Vpc("MyVpc");
  const rds = new sst.aws.Postgres("MyPostgres", { vpc });
},
Doesn’t look very threatening, does it?
This turned out to be a massive mistake though. We never actually got Drizzle to work properly, with errors warning about a missing region or hitting the maximum number of addresses allocated to the VPC instance. So we abandoned our attempts and moved on to DynamoDB without an ORM, which was surprisingly simple to set up. It took some time before we eventually received an email from AWS mentioning that we had slightly exceeded our budget. By 75$. It turned out that the VPC and RDS database we had created were still running. And a sentence we had read over in the docs mentioned that this setup, in its smallest form, would cost about $40/month. For some strange reason, sst remove, which should normally remove all AWS components for a user, didn’t apply to them. Even worse, as two different people had followed the docs, we actually had two instances of both the VPC and database.
Conclusion
At the start of this semester, none of us had any experience with the larger cloud providers. While some of us had used platforms like Vercel or hosted a VPS at a provider like Hetzner, the scale and complexity of platforms like AWS was entirely new to us. The learning curve was steep, but it also provided us with an opportunity to expand our skills in an area that is increasingly important in the tech industry.
Through the course, we gained a deeper understanding of cloud platforms and their complexities. AWS, in particular, introduced us to challenges and features we hadn’t encountered before. Whether it was figuring out how to properly configure permissions or instructing the cloud provider on how to perform certain functions, each task forced us to develop new skills and improve our understanding of cloud infrastructure.
We’ve talked a lot about SST throughout this post (we promise we’re not sponsored). Despite the rough edges, overall, it gave us a better development experience than we could have had with any other tool. As we’re writing this, it looks like there’s finally progress being made on a Windows version too. We’d definitely recommend that anyone building projects inside the JavaScript ecosystem give them a try.
It’s unfortunate that we haven’t been able to integrate with the platforms more deeply. As AI-generated “slop” floods everything from social media to search results, it’s understandable why platforms are becoming increasingly hostile to anyone trying to extract value out of content they host. To be completely honest, we’re a part of this problem too. Scraping the web trying to auto-generate content for the web to try and make a profit isn’t exactly making the world a better place. The fact our project is only a proof of concept is probably for the best.
We’re still proud of the technical achievements we made working on this project. We’ll just try and use our newfound knowledge for better ideas in the future.
Leave a Reply
You must be logged in to post a comment.