About the Robustness of Machine Learning

Glitch

In the past couple of years research in the field of machine learning (ML) has made huge progress which resulted in applications like automated translation, practical speech recognition for smart assistants, useful robots, self-driving cars and lots of others. But so far we only have reached the point where ML works, but may easily be broken. Therefore, this blog post concentrates on the weaknesses ML faces these days. After an overview and categorization of different flaws, we will dig a little deeper into adversarial attacks, which are the most dangerous ones.

Continue reading

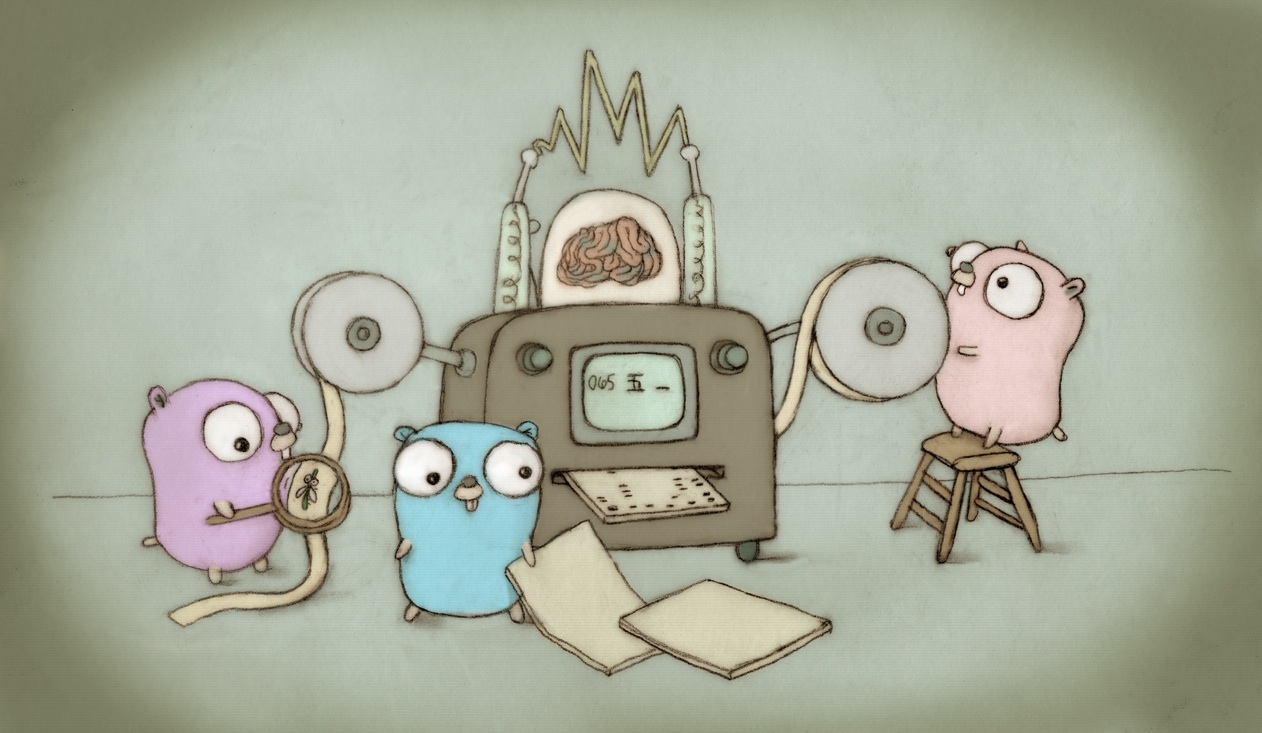
About using Machine Learning to improve performance of Go programs

Gophers

This Blogpost contains some thoughts on learning the sizes arrays, slices or maps are going to reach using Machine Learning (ML) to increase  programs’ performances by allocating the necessary memory in advance instead of reallocating every time new elements are appended.

What made me write this blogpost?

Well first of all I had to because it is part of the lecture Ultra Largescale Systems (ULS) I attended past winter term. But as an introduction I’ll tell you what made me choose this topic: I started to learn Golang and coming from mainly Java, Python and JavaScript the concept of Arrays with fixed sizes and Slices wrapped around them for convenience was new to me. When I understood that initializing them with the correct capacity is good for performance and memory usage I always tried to so. Until I came to some use case where I could not know the capacity in advance. At almost the same time we talked about “ML for Systems” in the ULS-lecture. There the power of ML is used to speed up Databases, loadbalance Elastic Search Queries and other things. So I came up with the idea of ML for programming languages in this case for learning capacities in Golang. By the way I wanted to try out ML in Go, which is said to bring some performance advantages compared to python and is easier to deliver. But neither ML in Go (go for ML) nor ML on Go is topic of this post, though both appear at some parts.

The goal in more detail

As explained in various blogposts like here and there, arrays have fixed sizes in Go. For convenient manipulation anyway they can be wrapped by slices. Thus appending to a slice that reached its capacity needs to create a new slice with a larger underling array, copy the contents of the old slice to the new one and then replace the old one by the new one. This is what the append method does. That this process is more time consuming than appending to a slice that has a sufficient capacity can be shown with some very simple code that just appends 100 times to a test slice in a loop. Once the slice is initialized with a capacity of zero and once with 100. For both cases we calculate the durations it takes and compare them. Since those durations can vary for the same kind of initialization we run this 1000 times each and calculate the average duration to get more meaningful results. The averages are calculated by the method printSummary which is left out here in order to keep track of things. However the whole code can be found on GitHub.

func main() {
times := 1000
results := make([]time.Duration, 0, times)
for t := 0; t < times; t++ {
start := time.Now()
// initialize either with capacity of 0
// test := make([]int, 0)
// or initialize with final capacity of 100
test := make([]int, 0, 100)
for i := 0; i < 100; i++ {
// uncomment to see how the capacity grows in larger steps
// fmt.Println(cap(test), len(test))
test = append(test, i)
}
elapsed := time.Now().Sub(start)
results = append(results, elapsed)
}
printSummary(results)
}

As expected the correct initialized version runs with an average of 1714ns faster than the other one with an average of 2409ns. Of course those durations are still just samples and vary if the code runs multiple times. But in over 20 runs each there is only one average value of the bad initialized slice lower than some of the good ones.

If we also take a look at the capacity the slower version ends up with, we see that this is 128 instead of the required 100. This is because append always doubles the capacity if it reaches the limit.

So we can see that it is worth setting the capacity correct in advance for performance and resource consumption reasons. But this is not always as easy as in the example we just saw and sometimes it is not even possible to know the length a slice will grow up to in advance. In those cases it might make sense to let the program learn the required capacities. It could be helpful at initialization with make as well as for growing with append.

A basic example

Setup

To check out feasibility I created a basic example that is a bit more complex than the first one but still possible to calculate as well. It iterates over index j and value s of a slice of random integer samples and for each of them the test slice is created. Then we append s times three values and one value j times. So the final length (and required capacity) of test can be calculated as s*3+j.

Also in this loop training data gets gathered. One sample consists of s and j as input and len(test) as label. Since the main goal of this scenario is to check if it’s worth using a trained ML model to predict the required capacity, this data is collected always to create equal conditions for every test case. Ways to avoid the time expensive training and data collection at runtime are discussed later.

func appendInBasicLoop(kind string) training.Examples {
samp := getSamples(1000)
data := make([]training.Example, 0, len(samp))
times := 1000
results := make([]time.Duration, 0, times)
for trys := 0; trys < times; trys++ {
start := time.Now()
for j, s := range samp {
var test []int
switch kind {
case "zero":
test = make([]int, 0)
case "calc":
test = make([]int, 0, s*3+j)
case "func":
test = make([]int, 0, getCap(s, j))
case "model":
test = make([]int, 0, getCapFromModel(s, j))
case "model+1":
test = make([]int, 0, getCapFromModel(s, j)+1)
}
for i := 0; i < s; i++ {
test = append(test, i)
test = append(test, j)
test = append(test, s)
}
for k := 0; k < j; k++ {
test = append(test, k)
}
data = append(data,
training.Example{
Input: []float64{float64(s), float64(j)},
Response: []float64{float64(len(test))}})
}
elapsed := time.Now().Sub(start)
results = append(results, elapsed)
}
printSummary(results)
return data
}

As implementation for the ML part I chose go-deep. I picked it from this list because it looked well documented, easy to use and sufficient for my needs, though not perfect.

I used the collected training data to train a MLP (Multi Layer Perceptron) with two hidden layers containing two and five neurons. Of course I configured RegressionMode to use Identity as activation function in the output layer and MSE (Mean Square Error) as loss function. I also played around with some other hyperparameters but kept a lot from the examples provided as well, because the MSE already decreased very fast and became 0.0000 after three training-iterations. This is not surprising since the function to learn is very simple. Also there is no need to avoid overfitting in this basic example. I kept some of the belonging hyperparameters with low values anyway. In a real world use case one would probably try to keep the model as small as possible to get quickest responses.

var net *deep.Neural
func init() {
net = deep.NewNeural(&deep.Config{
Inputs: 2,
Layout: []int{2, 5, 1},
Activation: deep.ActivationReLU,
Mode: deep.ModeRegression,
Weight: deep.NewUniform(0.1, 0.0),
Bias: true,
})
}
func trainModel(data training.Examples) {
optimizer := training.NewAdam(0.02, 0.9, 0.999, 1e-8)
trainer := training.NewBatchTrainer(optimizer, 1, 200, 8)
training, heldout := data.Split(0.75)
trainer.Train(net, training, heldout, 7)
}
func getCapFromModel(s, j int) int {
p := net.Predict([]float64{float64(s), float64(j)})
return int(p[0])
}

Results

The following table shows the test cases I compared along with the average durations in nanoseconds calculated over 1000 tries each. Since those averages vary again from run to run the table contains three of them.

Test caseAvg ns run1Avg ns run2Avg ns run3
Initialize capacity with
zero
12.790.50114.267.92514.321.735
Use s*3+j directly in make5.679.5956.067.9685.943.731
Use a function to
calculate s*3+j
5.242.1826.012.9205.515.661
Use the prediction of the
learned model
10.898.4376.361.9119.056.003
The model’s prediction +16.069.7765.714.3486.144.386
The model’s prediction
on new random data
10.165.7646.096.9299.296.384

Even though the durations vary the results show that not initializing the capacity is worst. Also usually it is best to calculate the capacity, if possible. It does not really matter if the calculation happens in a function or directly. When I took a closer look at the model’s predictions I saw that they are quite often exactly one less than the actual capacity. This is why I also added the prediction+1 test case, which is almost as good as the direct calculations. So investigating a bit deeper in what the model predicts is worth it. Maybe some finetuning on the hyperparameters could also fix the problem instead of adding 1 manually. The results also show that the learned model works on completely new random data as well as on partly known data from the training.

Conclusion

Of course creating such a model for a small performance optimization is heavy overengineered and thus not worth it. It could be worth in cases where you know you have a bottleneck at this place (because your profiler told you) and you cannot calculate the required capacity in any other way in advance. In the introduction I already mentioned that I had a use case where it is not possible to do so. In this case the length of the slice depends on a sql.rows object which doesn’t tell you how many rows it contains in advance. Other examples might be conditional appends where you cannot know how many elements fulfill the condition to be appended to a slice or something else. But also in those cases the required capacity might depend on something else. For example the current time, the size of an HTTP request that caused this action or the length this slice reached the last time. In those cases using a ML model might be helpful to avoid a performance bottleneck. With dependencies to previous lengths especially RNNs (Recurrent Neural Networks) might be helpful. At least they probably could give a better guess than a developer himself.

Looking ahead

As stated above in examples like this the engineering effort is too high. So ways for automating would be desirable. First I thought about a one-size-fits-all solution meaning one pretrained model that predicts for various makes the required capacity. But it would be difficult to find good features because they could change from make to make and just using all sorts of possible features would create very sparse matrices and require larger models if they could work at all.

So we should stick to use case specific models that can be smaller and use meaningful features depending on their environment like lengths of arrays, slices, maps or strings “close” to them or values of specific bools or integers. The drawback is that individual models need individual training maybe with production like data. Training during runtime would cause an overhead that might destroy the benefit the model could bring and slow the program down at least for a while until training can be stopped or paused because the ML model’s performance is good enough. So if possible pure online learning should be avoided and training on test stages or at times with low traffic should be preferred. If the length of a slice depends on the current traffic this is of course not possible. Then one should at least make use of dumping a model’s weights from time to time to the logs to be able to reuse them when starting a new node.

Still we need to solve the overengineering issue and try to build a model automatically at compile time, if the developer demands to do so for example using an additional argument in the call to make. I think that this might be another use case for ML on code: Finding good features and parameters to build a ML model by inspecting the code. Unfortunately I’m not sure what such an ML model on code could look like and what it would require to train it. Using a GAN (Generative adversarial network) to generate the models would probably require already existing ones to train the discriminator. If the automation could be realized the use case also could get broader because then calculating the capacity would be more effort than just saying “learn it”.

Some final thoughts

Using ML would not magically boost performance. It would require developers to remeasure and double check if it’s worth using it. For example it is not only important how often the program needs to allocate memory but also where. So stack allocation is cheap and heap allocation is expensive as explained in this blog post. If using ML to predict the capacity requires the program to allocate on the heap it might be slower even when the predictions are correct. In the test scenario above all the cases instead of initializing with zero escaped to the heap. There it was worth it but it needs to be measured. So the performance should be compared with and without learning for short and for longer running applications. As another example sometimes the required capacities might not be learnable because they are almost random or depend on things that cannot be used as features in an efficient way.

Another drawback of using ML is that your code behaves less predictable. You won’t know what capacity will be estimated for a slice in advance anymore and it will be much harder to figure out why the program estimated exactly what it did afterwards.

I also thought about to train the model to reduce a mix of performance and required memory instead of using the final length as labels. But then it is not that easy anymore to get the training data. In some cases however it might also be difficult to get the “final” length of a slice as well.

The last thing to remember is that it is always helpful to set a learned model some borders. In this case a minimum and a maximum. My test model for example predicted a negative capacity before I got the hyperparameters right, what made my program crash. So if the model for some reason thinks this could be a great idea a fixed minimum of zero should prevent the worst. Also such borders make a program a bit more predictable again.

Experiences from breaking down a monolith (3)

Written by Verena Barth, Marcel Heisler, Florian Rupp, & Tim Tenckhoff

DevOps

Code Sharing

Building multiple services hold in separated code repositories, we headed the problem of code duplication. Multiple times a piece of code is used twice, for example data models. As the services grow larger, just copying is no option. This makes it really hard to maintain the code in a consistent and transparent way, not to mention the overhead of time required to do so. In the context of this project, this issue was solved by creating an own code library. Yes, a library with an own repository which not directly builds an executable service. But isn’t it much work to always load and update it in all the services?  Yes it is – as long as you are not familiar with scripting. Therefore the build management tool gradle is a big win. It gives you the opportunity to write your own task to be executed, such like the packaging of a java code library as maven package and the upload to a package cloud afterwards. Good thing there is the free package host provider packagecloud.io around, which allows a storage size of 150MB for free. When the library was hosted online, this dependency could easily loaded automatically by the gradle dependency management.

By the use of this approach, the code development process could focus on what it really needs to – the development and not code copying! Also the team did more think about how to design the code to be more flexible, to be able to reuse it in another service. Of course it was an overhead of additional work, but the advantages outweigh. If the library is to be updated, this could achieved by an increment of its version number. Therefore all services can change only the version number and get the new software automatically updated.

CI/CD

To bring development and operations closer together we set up a CI/CD-Pipeline. Because we wanted to have a quick solution to support the development as fast as possible by enabling automated builds, tests and deployments, we had to choose a tool very early. We came up with the alternatives GitLab hosted by our University or setting up Jenkins ourselves. We quickly created the following table of pros and cons and decided to use HdM’s GitLab mainly because it is already set up and contains our code.

Our first pipeline was created ‘quick and dirty’, and it’s main purpose was just to build the projects with Gradle (in case of a Java project), to run it’s tests and to deploy it to our server. In order to improve the pipeline’s performance we wanted to cache the Gradle dependencies which turned out to be not that easy. Building the cache as the official GitLab Docs described it did not work, neither the workaround to set the GRADLE_USER_HOME variable to the directory of our project (which was mentioned very often, e.g. here and here). The cache seemed to be created but was deleted again before the next stage began. We ended up pushig the Gradle Wrapper in our repository as well and using it to build and test our application. Actually it is recommended anyway to execute a build with the Wrapper to ensure a reliable, controlled and standardized execution of the build. To make use of the Wrapper you need to make it executable (see “before_script” command in the code below). Then you’re able to build your project, but with other commands, like “./gradlew assemble” instead of “gradle build”.

image: openjdk:11-jdk-slim-sid

stages:
 - build
 # [..]

before_script:
 - chmod +x gradlew
 - apt-get update -qy

build:
 stage: build
 script:
    - ./gradlew -g /cache/.gradle clean assemble

# [..]

In the end we improved the time needed from almost four to about two and a half minutes.

Having this initial version in use we spent some more time on improving our pipeline. In doing so we found some more pros and cons of the different tools we compared before and a third option to think about.

The main drawbacks we found for our current solution were, that HdM does not allow docker-in-docker (dind) due to security reasons and GitLab container registry is disabled to save storage. In return we read that the docker integration is very powerful in GitLab. The added option GitLab.com could solve both the problems we had with HdM’s GitLab. But we came up with it too late in the project because we were already at solving the issues and didn’t want to migrate all our repositories. Also company-made constraints might always occur and we learned from solving them.

Our GitLab Runner

To solve our dind problem we needed a different GitLab Runner because the shared runners provided by HdM don’t allow docker-in-docker for security reasons. Trying to use it anyway makes the pipeline fail with logs containing something like this:

docker:dind ...
Waiting for services to be up and running...
*** WARNING: Service runner-57fea070-project-1829-concurrent-0-docker-0 probably didn't start properly.
Health check error:
service "runner-57fea070-project-1829-concurrent-0-docker-0-wait-for-service" timeout
Health check container logs:
Service container logs:
2018-11-29T12:38:05.473753192Z mount: permission denied (are you root?)
2018-11-29T12:38:05.474003218Z Could not mount /sys/kernel/security.
2018-11-29T12:38:05.474017136Z AppArmor detection and --privileged mode might break.
2018-11-29T12:38:05.475690384Z mount: permission denied (are you root?) 
*********

To use our own runner there are some possibilities:

  1. Install a runner on a server
  2. Install runners locally
  3. Integrate a Kubernetes cluster and install a runner there

Since we already have a server the first option is the easiest and makes the most sense. There are tutorials you can follow straight forward. First install the runner and then register the runner for each GitLab repository you want to allow to use this runner. The URL and token you need to specify for registration can be found in GitLab under Settings -> CI/CD -> Runners -> Set up a specific Runner manually.  It is also help provided to choose the executor, which needs to be specified on registration.

We chose Docker as executer because it provides all we need and is easy to configure. Now the runner can be started with “gitlab-runner start”. To be able to use docker-in-docker some more configuration is necessary but all changes to the config file “/etc/gitlab-runner/config.toml“ should automatically be detected and applied by the runner. The file should be edited or modified using the “gitlab-runner register” command as described here. For dind the privileged = true is important that’s why it already occurred in the logs above. Finally Docker needs to be installed on the same machine as the runner. The installation is described here. We chose to install using the repository. If you don’t know which command to choose in step 4 of “Set up the repository” you can get the information with “uname -a”. We also had to replace the “$(lsb_release -cs)” with “stretch” as mentioned in the Note. To figure out the parent Debian distribution we used “lsb_release -a“.

Pipeline Setup

Now that we solved our docker-in-docker problem we can set up a CI pipeline that first builds our project using a suitable image and then builds an image as defined in a corresponding Dockerfile.

Each service has its own Dockerfile depending on it’s needs.For the Database service image for example we need to define many environment variables to establish the connection between the database and message broker. You can see it’s Dockerfile below.

FROM openjdk:8-jdk-slim

RUN mkdir /app/
COPY build/libs/bahnalyse-database-service-1.0-SNAPSHOT.jar /app
WORKDIR /app

ENV RABBIT_HOST 172.17.0.2
ENV RABBIT_PORT 5672

ENV INFLUXDB_HOST 172.17.0.5
ENV INFLUXDB_PORT 8086

CMD java -jar bahnalyse-database-service-1.0-SNAPSHOT.jar

The frontend Dockerfile is splitted in two stages: The first stages builds the Angular app in an image which inherits from a node image version 8.11.2 based on the alpine distribution. For serving the application we use the nginx alpine image and move the dist-output of our first node image to the NGINX public folder. We have to copy our nginx configuration file, in which we define e.g. the index file and the port to listen to, into the new image as well. This is how the final frontend Dockerfile looks like:

# Stage 1 - compile Angular app

FROM node:8.11.2-alpine as node

WORKDIR /usr/src/app
COPY package*.json ./
RUN npm install
COPY . .
RUN npm run build

# Stage 2 -  For serving the application using a web-server

FROM nginx:1.13.12-alpine

COPY --from=node /usr/src/app/dist /usr/share/nginx/html
COPY ./nginx.conf /etc/nginx/conf.d/default.conf

Now let’s look at our gitlab-ci.yml file shown below:

image: docker:stable
 
variables:
  DOCKER_HOST: tcp://docker:2375/
  DOCKER_DRIVER: overlay2
 
services:
  - docker:dind
 
stages:
  - build
  - test
  - package
  - deploy
 
gradle-build:
  image: gradle:4.10.2-jdk8
  stage: build
  script: "gradle build -x test"
  artifacts:
    paths:
      - build/libs/*.jar
 
unit-test:
  image: gradle:4.10.2-jdk8
  stage: test
  script:
    - gradle test
 
docker-build:
  only:
  - master
  stage: package
  script:
  - docker build -t $CI_REGISTRY_IMAGE:latest -t $CI_REGISTRY_IMAGE:$CI_COMMIT_SHA .
  - docker login -u token -p $IBM_REGISTRY_TOKEN $CI_REGISTRY 
  - docker push $CI_REGISTRY_IMAGE:latest
  - docker push $CI_REGISTRY_IMAGE:$CI_COMMIT_SHA
 
server-deploy:
  only:
  - master
  image: kroniak/ssh-client
  stage: deploy    
  script:    
  - echo "$CI_SSH" | tr -d '\r' > pkey
  - chmod 400 pkey    
  - ssh -o stricthostkeychecking=no -i pkey root@bahnalyse.mi.hdm-stuttgart.de "docker login -u token -p $IBM_REGISTRY_TOKEN $CI_REGISTRY && docker-compose pull bahnalysebackend && docker-compose up --no-deps -d bahnalysebackend"

Compared to our first version we now make use of suitable Docker images. This makes the jobs faster and the file clearer. Most of the first parts are taken from this pretty good tutorial, so we’ll keep the explanations short here. At first we specify docker:stable as default image for this pipeline. This overrides the one defined in the runner configuration and can be overridden in every job again. Using the “services” keyword we also add docker-in-docker to this image. The variable DOCKER_HOST is required to make use of dind because it tells docker to talk with the daemon started inside of the service instead of the default “/var/run/docker.sock” socket. Using an overlay storage driver improves the performance. Next we define our stages “build”, “test”, “package” and “deploy” and then the jobs to run in each stage.

The gradle-build job now uses the gradle image with the version matching our requirements. This includes all the dependencies we need to build our jar file with “gradle build”. We use the -x test option here to exclude the tests because we want to run them in a separate stage. This gives a better overview in the GitLab UI because you see what went wrong faster. Using “artifacts” we can store the built jar file to the specified path. There it gets available for other jobs as well as downloadable from the GitLab UI.

In the test stage we simply run our unit tests using “gradle test”. This needs to compile again because we excluded the tests from the jar in our build task.

In the package stage we create a Docker image including our jar file. Using the “only” keyword we specify that this should only happen in the master branch. The first line of the “script” block uses a backend Dockerfile mentioned above in the root directory of the project (specified by the dot at the end of the line) to create the image.

For the following steps to work we need to solve our second problem: the absence of the GitLab Container Registry in HdM’s GitLab. A registry is a storage and content delivery system, holding named Docker images, available in different tagged versions. A common use case in CI/CD is to build the new image in the pipeline, tag it with something unique like a timestamp and as “latest”, push it to a registry and then pull it from there for deployment. There are alternatives to the registry integrated in GitLab we will discuss later. First let’s finish the explanations of the yaml file. We followed the just described use case of the registry. As something unique we chose the commit hash because the images get saved with a timestamp in the registry anyway. It is accessible using the predefined environment variable $CI_COMMIT_SHA. We also defined environment variables for the login credentials to the registry so that they don’t appear in any files or logs. Using environment variables like the name of the image can also help to make the registry easier exchangeable because this file could stay the same and only the variables would need to change. They can be defined in the GitLab UI under Settings -> CI/CD -> Environment variables.

In the deploy stage we used a public image from docker hub that has ssh installed so that we don’t have to always install it in the pipeline what costs time. A more secure solution would be to create such an image ourselves. We login to our server using a ssh key saved in the CI_SSH environment variable. Then run the commands on the server to login to our registry, pull the latest image and start it. To pull and start we use docker-compose. Docker Compose is a tool for defining and running multi-container Docker applications. It is mainly used for local development and single host deployments. It uses a file by default called docker-compose.yml. In this file multiple services can be defined with the Dockerfiles to build them or with the name including registry to get them from as well portmappings and environment variables for each service and dependencies between them. We use the –no-deps option to restart only the service where the image has changed and -d to detach it into the background otherwise the pipeline never stops.

Choosing a Registry

Since we cannot use the registry integrated into GitLab we considered the following alternatives:

  1. Set up our own registry
  2. Use docker hub
  3. Use IBM Cloud Registry (or other cloud provider)

The first approach is described here. Especially making the registry accessible from outside e.g. from our pipeline make this approach much more complicated than the other solutions. So we discarded this one.

Instead we started out using the second approach, docker hub. To login to it the $CI_REGISTRY variable used in the gitlab-ci.yml file should contain “index.docker.io” or it can just be omitted because it is the default for the docker login command. Besides the ease of use the unlimited storage is its biggest benefit. But it has also some drawbacks: You get only one private repository for free. To use this repository for different images makes it necessary to distinguish them using tags what is not really their purpose. Also login is only possible with username and password. So using it from a CI pipeline forces a team member to write its private credentials into GitLab’s environment variables where every other maintainer of this project can read them.

For these reasons we switched to the IBM Cloud Registry. There it is possible to create a user with its own credentials only for the pipeline using the IBM Cloud IAM-Tools or just creating a token to use for the docker login. To switch the registry only the GitLab environment variable $CI_REGISTRY needs to be adjusted to “registry.eu-de.bluemix.net” and the login needs to be updated, too (we changed from a username and password approach to the token one shown in the file above). Also the amount of private repositories is not limited and you get another helpful tool on top: Vulnerability-Checks for all the images. Unfortunately the amount of free storage is limited. Since our images are too big we got access to HdM’s paid account. So to minimize costs we had to ensure that there are not too many images stored in this registry. Since logging in to IBM Cloud’s UI and removing old images manually is very inefficient we added a clean-up job to our pipeline.

The possibilities to such a clean up job work are quite limited. There is no simple docker command for this, like docker login, push or pull. Probably the most docker-native way is would be using the docker REST API as described here. But this is only accessible for private cloud customers at IBM. The other approach described in the mentioned blogpost is deleting from the filesystem what is even less accessible in a cloud registry. So we have to use an IBM Cloud specific solution. Some fellow students of us had the same problem and solved it using the IBM Cloud CLI as described in their blogpost. We were looking for a solution without the CLI-tools for IBM Cloud and found a REST API that could do the job which is documented here. But for authorization you need a valid bearer token for which to receive in a script you need to use the CLI-tools. We chose to use this API anyway and ended up with the following additional job in our gitlab-ci.yml file:

registry-cleanup:
  stage: deploy
  script:
  - apk update
  - apk add curl
  - curl -fsSL https://clis.ng.bluemix.net/install/linux | sh
  - ibmcloud plugin install container-registry
  - apk add jq
  - ibmcloud login --apikey $IBM_API_KEY -r eu-de
  - ibmcloud iam oauth-tokens | sed -e 's/^IAM token:\s*//g' > bearertoken.txt
  - cat bearertoken.txt
  - >-
      curl
      -H "Account: 7e8029ad935180cfdce6e1e8b6ff6910"
      -H "Authorization: $(cat bearertoken.txt)"
      https://registry.eu-de.bluemix.net/api/v1/images
      |
      jq --raw-output
      'map(select(.RepoTags[0] | startswith("registry.eu-de.bluemix.net/bahnalyse/testrepo")))
      | if length > 1 then sort_by(.Created)[0].RepoTags[0] else "" end' > image.txt
  - >-
       if [ -s image.txt ] ;
       then 
       curl -X DELETE
       -H "Account: 7e8029ad935180cfdce6e1e8b6ff6910"
       -H "Authorization: $(cat bearertoken.txt)"
       https://registry.eu-de.bluemix.net/api/v1/images/$(cat image.txt) ;
       else
       echo "nothing to delete" ;
       fi

We run it at deploy stage so it could run in parallel to the actual deploy job if we had more than one runner.

First we install the required tools curl, IBM Cloud CLI and jq. This should be done by creating and using an appropriate image later. Then we login using the CLI-tools and get a bearer token. From the answer we need to cut off the beginning because it is (sometimes) prefixed with “IAM token: “ and then write it into a file. Curl is used to call the REST API with the headers for authorization to set and receive all the images available in our registry. We pipe the output to jq which is a command line tool to parse JSON. We select all the images with the same name as the one we just created. If there are already more than two we sort them by the created timestamp, grab the oldest one and write its name, including the tag, to file. If there are only two or less of these images we create an empty file. The –raw-output option of jq omits the quotes that would be around a JSON output. Finally we check if the file contains an image and delete it via API call if there is one. Somehow the else block, telling that there is nothing to delete, doesn’t really work yet. It is probably something wrong with the spaces, quotes or semicolon, but debugging a shell script defined in a yaml file is horrible so we’ll just live with our less talking pipeline. The yaml format also makes the >- at the beginning of a command necessary, otherwise the yaml is invalid. In our case an error like “(<unknwon>): mapping values are not allowed in this context at line … column …” occurred.

Conclusion

Our aims for the implementation of the application Bahnalyse was to play around with modern technologies and practices. While learning a lot about architectural patterns (like SOA and microservices), cloud providers, containerization and continuous integration, we successfully improved the application’s architecture.

We found out that the pure implementation of architectural principles is hardly possible and rarely makes sense. Although we initially wanted to split our monolith up into several microservices we ended up creating a SOA which makes use of both, a microservice and services which are composed or make use of other services. To put it in a nutshell, we can conclude there might never be a complete roadmap on which architecture or technology fits your needs the best. Further, a microservice architecture is not the universal remedy, it also entails its drawbacks. In most cases you have to evaluate and compare those drawbacks of the different opportunities available and decide which really succeeds your business case.

Outlook

Further points to take a look at would be improving our password management. Currently we save our credentials in GibLab’s environment variables which offers a security risk, because in this way every maintainer working at our project with GitLab is able to see them. We want to avoid this e.g. by outsourcing it to a tool like a Vault by HashiCorp. It is a great mechanism for storing sensitive data, e.g. secrets and credentials.

Another thing to focus on is the further separation of concerns into different microservices. A perfect candidate herefore is the search service of which the frontend makes use of to autocomplete the user’s station name input. It’s independent of any other component and just sends the user input to the VVS API and returns a collection of matching station names.

Finally deploying Bahnalyse to the cloud would be an interesting thing for us to try out. We already figured out which cloud provider fits our needs best in the first part of our blog post series. The next step would be to explore the IBM Cloud Kubernetes service and figure out the differences between deploying and running our application on a server and doing this in the cloud.