Continuous Integration
This is the last part in our series of blog posts concerning the development of an Alexa Skill. If you missed the previous parts you can catch up by reading part 1 here, part 2 here and part 3 here.
Introduction
Every student group that has worked on a software project can retell the following situation: you’re one week ahead of the deadline, every team member has spent the last weeks working on their part of the project. So far, everything looks great – every module works on its own, the GUI is designed and implemented, the database is modeled and set up, client and server are both running smoothly. All that’s left is combining all the bits and pieces to see everything in action together. Easy, right? Fast forward another five days, it’s the weekend before the final presentation: the air is thick with panic with everyone furiously debugging their code, solving merge conflicts left and right while trying to get the project to some kind of working state that will at least survive the demo. Things that were already working in isolation are now broken and quite a bunch of features that were an inch close to completion will never make it into the presentation. So what has gone wrong? And what have we done to prevent the same from happening with our Alexa Skill?
The scenario just outlined is well known in the software industry – so well actually that it was given a dedicated name: welcome to Integration Hell. The problem is that the sum is greater than its parts: it takes a certain amount of effort to put modules together that were working perfectly fine in isolation and make them function in combination with other modules as part of a bigger architecture. This task of integration gets exponentially more difficult the more time has passed since the last integration was made. The solution? Continuous Integration!
Escaping Integration Hell
To avoid running into integration hell it is important that new code is merged with the existing code base in regular intervals, as often as possible. To achieve that, some kind of version control system is essential. In our case, we used git with two repositories at Bitbucket (one for the hdm-client, the other for the alexa lambda function) to manage our sourcecode. Developers were working on features on their own machines while frequently pushing to the master branch, integrating their code with the central repository in the process. During phases of intensive development, updates where merged as often as multiple times per day. This pattern of constantly synchronizing the developer’s local code with the shared codebase led to small deltas that were easy to merge. Another benefit was intensive communication among all team-members, since changes by others could be monitored and misunderstandings were revealed quickly.
Let’s put it to the test!
Regularly integrating with the central repository is a necessary first step, but it does not automatically guarantee that integration problems are actually solved. While resolving merge conflicts, potentially problematic side-effects are easily overlooked, sometimes things break even without a direct conflict, and newly written code always brings the danger of introducing new bugs by itself. Thus it is important to always run tests on the new state after changes have been merged in. Since we used Test Driven Development in our project, dynamic tests were already in place. Code coverage analysis helped us to not forget any code in our unit tests and static analysis ensured a common code style for better readability and overall increased code quality. For the developer, this resulted in the following workflow: write new code, run all tests locally, push and merge with the central repository, run tests on the newly integrated code – with the last step being of special importance, because integration errors should be spotted and fixed as early as possible, as explained already. Since running tests manually is cumbersome and a developer may even forget the last step the question is: how can we run the tests automatically?
Automagical Integration with Jenkins
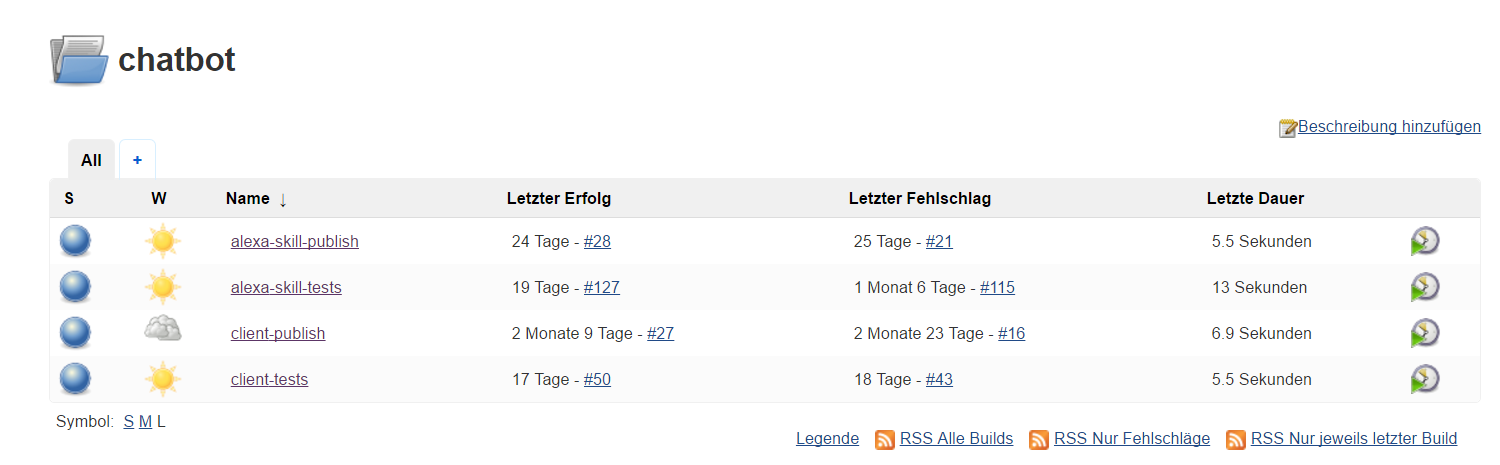
To automatically perform actions as soon as changes are pushed to the central repository, a build server is the tool of choice. Out of the many available options we chose Jenkins, an open source java-based solution that enjoys great popularity in the development community. For the build server to always be available we set it up on an Amazon Webservice EC2 {t2-micro} instance. Since newly registered AWS-accounts are eligible for 12 months of one free t2-micro EC2 instance we got away without any costs. To install and configure jenkins on the server we used a preconfigured bitnami-image that we could apply as an Amazon Machine Image (AMI) when creating the EC2-instance. This made the setup process as easy as it could get, leaving us with a running jenkins build server ready for us to configure build jobs and customize using plugins. To automatically run static and dynamic tests regularly we created one build job each for the hdm-client and our lambda function. Both were configured as free-style jobs and triggered via a webhook from bitbucket as soon as new commits were pushed to the master branch on the repository. The job then fetched the newest version and retrieved all necessary dependencies via npm install. Static and dynamic tests were then executed through custom node tasks defined in the package.json. This led to the following build script for the alexa-skill-tests job: npm install; npm run xunit-test; npm run test-coverage; npm run test-coverage-reports; npm run lint; npm run jscs, with the client-tests job looking mostly identical. With this configuration we had the tests running automatically on each update to the repository, with a failing build indicating that one or more tests failed while a successful build signaled everything green. The next important step was adding an array of notifications to communicate a failed build – because an automated system without anyone noticing failed builds clearly is of little use. A simple but very effective way to communicate a failed build was automatically sending an e-mail to the person that triggered the offensive push using the Email Extension Plugin. To get a direct overview over successful and failed builds we added the Bitbucket Status Notifier Plugin, giving us icons detailing the build status for every commit directly in the web view of our repository. To increase the motivation to produce stable builds (by running tests locally before checking in the code), we added a build status badge to our readme-files and the npm info page for the hdm-client. The Embeddable Build Status Plugin provided us with nice shields.io-like images resembling the current build status. For teams using Slack there is also an integration available that automatically posts build status notifications to a specified channel. Another advantage of the build server for our project was centralized access to all test and coverage results and diagrams showing the amount of failed, successful and overall tests over time.

From Continuous Integration to Continuous Deployment
After setting up the jenkins build server and automating our tests, we were ready for the next stage: from Continuous Integration to Continuous Deployment. To actually try newly implemented features of our Alexa skill on a real Amazon Echo device, we needed to publish the lambda function’s new code to AWS. Doing this by hand involved fetching all dependencies, packaging the code in a zip-file and uploading it to AWS lambda via the AWS Management Console web interface. With jenkins and the AWS Lambda Plugin we were sure we could do better. The challenge, however, was not pushing every new commit to lambda, but to do so only when we felt confident enough to publish a new version. To mark a version increase, the relevant commit was tagged with the new version (i.e. “v1.2.3”). With this workflow in place we could use the Git Tag Message Plugin in combination with the Flexible Publish Plugin in our already existing tests-job to enable the deployment as a downstream job only in case a matching tag was present. In our tests-job, the Git Tag Messages Plugin made the tag available as an environment variable. We could then use that in a regular expression for the Flexible Publish Plugin. In case a match was found and the tests had run successfully, the plugin scheduled the deployment-job to run. A similar configuration was used to publish updates of the hdm-client to npm. In this case, the developer workflow was especially straightforward, since running npm version automatically creates a commit with the necessary git tag.
Conclusion
Using Continuous Integration helped us to avoid Integration Hell. Frequent synchronization with the central repository kept the amount of changes small, speeding up the task of integration while reducing its complexity. Newly introduced bugs and issues were revealed almost instantly by our automated tests and could be fixed quickly since only the most recent changes had to be reviewed. As a bonus, communication among team members increased and misunderstandings were be discussed before serious problems could arise. The build server not only automated running tests on newly integrated source code, but also freed us from manually deploying to lambda and npm. This enabled us to frequently publish new versions of the Alexa Skill and helped with manual testing on real Amazon Echo devices. Jenkins did a decent job creating our builds, especially considering it being freely available and open source. While we found the user interface a bit cluttered at times and some features to not be as straightforward to use as we had hoped, there are tons of plugins available, and with a bit of tinkering and creativity a great deal of use cases can be realized. All in all we will definitely start using Continuous Integration in all of our future projects and kindly invite you to try it as well!
Have you already used Continuous Integration with jenkins or another build tool in one of your projects? Leave a comment and tell us your thoughts and experience!
Leave a Reply
You must be logged in to post a comment.