Introduction
As part of the lecture „Software Development for Cloud Computing“, we had to come up with an idea for a cloud related project we’d like to work on. I had just heard about Artistic Style Transfer using Deep Neural Networks in our „Artificial Intelligence“ lecture, which inspired me to choose image transformation as my project. However, having no idea about the cloud environment at that time, I didn’t know where to start and what is possible. A few lectures in I had heard about Infrastructure as a Service (IaaS), Platform as a Service (PaaS) and Function as a Service (FaaS). Out of those three I liked the idea of FaaS the most. Simply upload your code and it works. Hence, I went with Cloud Functions in IBMs Cloud Environment. Before I present my project I’d like to explain what Cloud Functions are and how they work.
What are Cloud Functions?
Choose one of the supported programming languages. Write your code. Upload it. And it works. Serverless computing. That’s the theory behind Cloud Functions. You don’t need to bother with Infrastructure. You don’t need to bother with Load Balancers. You don’t need to bother with Kubernetes. And you definitely do not have to wake up at 3 am and race to work because your servers are on fire. All you do is write the code. Your Cloud Provider manages the rest. Cloud provider of my choice was IBM.
Why IBM Cloud Functions?
Unlike Google and Amazon, IBM offers FREE student accounts. No need to deposit any kind of payment option upon creation of your free student account either. Since I have no experience using any cloud environment, I didn’t want to risk accidentally accumulating a big bill. Our instructor was also very familiar with the IBM Cloud, in case I needed support I could have always asked him as well.
What do IBM Cloud Functions offer?
IBM offers a Command Line Interface (CLI), a nice User Interface on their cloud website, accessible using the web browser of your choice and very detailed Documentation. You can check, and if you feel like it, write or edit your code using the UI as well. The only requirement for your function is: It has to take a json object as input and it has to return a json as well. You can directly test the Function inside the UI as well. Simply change the Input, declare an example json object you want to run it with, then invoke your function. Whether the call failed or succeeded, the activation ID, the response time, results, and logs, if enabled, are then displayed directly. You can add default input Parameters or change your functions memory limit, as well as the timeout on the fly as well. Each instance of your function will then use the updated values.
Another nice feature of IBM Cloud Functions are Triggers. You can connect your function with different services and, once they trigger your function, it will be executed. Whether someone pushed new code to your GitHub repository or someone updated your Cloudant Database, IBMs database service. Once invoked by this trigger, your function executes.
You can also create a chain of Cloud Functions. The output of function 1 will then be the input of function 2.
IBM Cloud Function use the Apache OpenWhisk service, which packs your code into a Docker Container in order to run it. However, if you have more than one source file, or dependencies you need, you can pack it in a docker image or, in some cases, like Python or Ruby, you can also zip them. In order to do that in Python, you need a virtual environment using virtualenv, then zip the virtualenv folder together with your python files. The resulting zip files and Docker images can only be uploaded using the CLI.
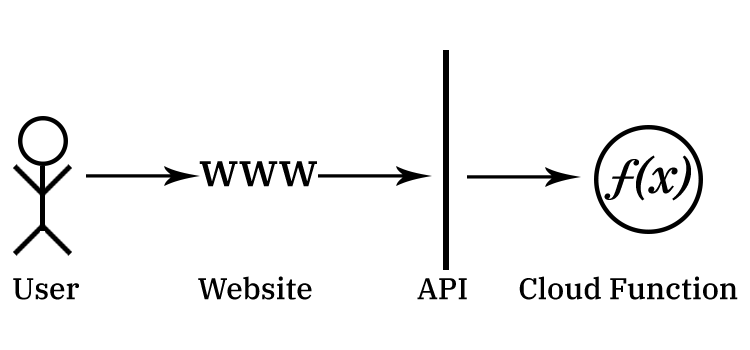
You can also enable your function as Web Action, which allows it to handle HTTP Events. Since the link automatically provided by enabling a function as web action ends in .json, you might want to create an API Definition. This can be done with just a few clicks. You can even import an OpenAPI Definition in yaml or json format. Binding an API to a function is as simple as defining a base path for your API, giving it a name and creating an operation. For example: API name: Test, Base path for API: /hello and for the operation we define the path /world select our action and set response content type to application/json. Now, whenever we call <domain>/hello/world, we call our Cloud Function using our REST-API. Using the built-in API-Explorer we can test it directly. If someone volunteers to test the API for us, we can also share the API Portal Link with them. Adding a custom domain is also easily done, by dropping the domain name, the certificate manager service and then Certificate in the custom domain settings.
Finally, my Project
The idea was:
A user interacts with my GitHub Page, selects a filter, adds an Image, tunes some parameters, then clicks confirm. The result: They receive the transformed image.
The GitHub Page has been written with HTML, CSS and JavaScript. It sends a POST request to the API I defined, which is bound to my Cloud Function, written in Python. It receives information about the chosen filter, the set parameters and a link to the image (for the moment, only jpeg and png are allowed). It then processes the image and returns the created png byte64 encoded. The byte64 encoded data will then be embedded in the html site and the user can then save the image.
The function currently has three options:
You can transform an image into a greyscale representation.

You can upscale an image by a factor of two, three or four

and you can transform an image into a Cartoon representation.

Cartoon images are characterized by clear edges and homogenous colors The Cartoon Filter first creates a grayscale image and median blurs it, then detects the edges using adaptive Threshold, which currently still has a predefined window size and threshold. It then median filters the colored image and does a bitwise and operation between every RGBA color channel of our median filtered color image and the found edges.
Dis-/ Advantage using (IBM) Cloud Functions

Serverless Infrastructure was fun to work with. No need to manually set up a server, secure it, etc. Everything is done for you, all you need is your code, which scales over 10.000+ parallel instances without issues. Function calls themselves don’t cost that much either. IBMs base rate is currently $0,000017 per second of execution, per GB of memory allocated. 10.000.000 Executions per month with 512MB action memory and average execution time of 1.000ms only cost $78,20 per month, including the 400,000 GB-s free tier. Another good feature was being able to upload zip packages and docker images.
Although those could only be uploaded using the CLI. As a Windows user it’s a bit of a hassle. But one day I’ll finally set up the 2nd boot image on my desktop pc. One day. Afterwards, no need for my VM anymore.
The current code size limit for IBM Cloud Functions is 48 MB. While this seems plenty, any modules you used to write your code, not included by default in IBMs runtime, needs to be packed with your source code. OpenCV was the module I used before switching over to Pillow and numpy, since OpenCV offers a bilateral filter, which would have been a better option than a median filter on the color image creation of the Cartoon filter. Sadly it is 125 MB large. Still 45 MB packed. Which was, according to the real limit of 36 MB after factoring in the base64 encoding of the binary files, sadly still too much. Neither would the 550 MB VGG16 model I initially wanted to use for an artistic style transfer neural network as possible filter option. I didn’t like the in- and output being limited to jsons either. Initially, before using the GitHub Page, the idea was to have a second Cloud Function return the website. This was sadly not possible. There being only a limited selection of predefined runtimes and modules are also more of a negative point. One could always pack their code with modules in a docker imag/zip, but being able to just upload a requirements.txt and the cloud automatically downloading those modules as an option would have been way more convenient. My current solution returns a base64 encoded image. Currently, if someone tries to upscale a large image and the result exceeds 5 MB, it returns an error, saying „The action produced a response that exceeded the allowed length: –size in bytes– > 5242880 bytes.“
What’s the Issue?
Currently, due to Github Pages not setting Cross Origin Resource Sharing (CORS) Headers, this does not work currently. CORS is a mechanism that allows web applications to request resources from a different origin than its own. A workaround my instructor suggested was creating a simple node.js server, which adds the missing CORS Headers. This resulted in just GET requests being logged in the Cloud API summary, which it responded to with a Code 500 Internal Server Error. After reading up on it, finding out it needs to be set by the server, trying to troubleshoot this for… what felt like ages, adding headers to the ajax jquery call, enabling cross origin on it, trying to workaround by setting the dataType as jsonp. Even uploading Cloud Function and API again. Creating a test function, binding it to the API (Which worked by the way. Both as POST and GET. No CORS errors whatsoever… till I replaced the code). I’m still pretty happy it works with this little workaround now, thank you again for the suggestion!
Other than that, I spent more time than I’m willing to admit trying to find out why I couldn’t upload my previous OpenCV code solution. Rewriting my function as a result was also a rather interesting experience.
Future Improvements?
I could give the user more options for the Cartoon Filter. the adaptive Threshold has a threshold limit, this one could easily be managed by the user. An option to change the window size could also be added, maybe in steps?
I could always add new filters as well. I like the resulting image of edge detection using a Sobel operator. I thought about adding one of those.
Finding a way to host a website/find a provider that adds CORS Header, allowing interested people to try a live-demo and play around with it, would be an option as well.
What i’d really like to see would be the artistic style transfer uploaded. I might be able to create it using IBM Watson, then add it as sequence to my service. I dropped this idea previously because i had no time left to spare trying to get it to work.
Another option would be allowing users to upload files, instead of just providing links. Similar to this, I can also include a storage bucket, linked to my function in which the transformed image is saved. It then returns the link. This would solve the max 5 MB response size issue as well.
Conclusion
Cloud Functions are really versatile, there’s a lot one can do with them. I enjoyed working with them and will definitely make use of them in future projects. The difference in execution time between my CPU and the CPUs in the Cloud Environment was already noticeable for the little code I had. Also being able to just call the function from wherever is pretty neat. I could create a cross-platform application, which saves, deletes and accesses data in an IBM Cloudant database using Cloud Functions.
Having no idea about Cloud Environments in general a semester ago, I can say I learned a lot and it definitely opened an interesting, yet very complex world I would like to learn more about in the future.
And at last, all Code used is provided in my GitHub repository. If you are interested, feel free to drop by and check it out. Instructions on how to set everything up are included.
Leave a Reply
You must be logged in to post a comment.