Daniel Knizia – dk100@hdm-stuttgart.de
Benjamin Janzen – bj009@hdm-stuttgart.de
The project
CatchMe is a location-based multiplayer game for mobile devices. The idea stems from the classic board game Scotland Yard, basically a modern version of hide & seek. You play in a group with up to 5 players outside, where on of the players gets to be chosen the “hunted”. His goal is trying to escape the other players. Through the app he can constantly see the movement of his pursuers, while the other players can only see him in set intervals.
The backend of the game builds on Colyseus, a multiplayer game server for Node.js, which we have adjusted to our needs. There’s a lobby, from which the players can connect into a room with other players and start the game.
Goal
One of our intentions for this project was, to learn more about cloud in general and how we can in integrate it in the development of our app. Basically a big playground to learn and test new concepts and further our software development skills. The following should give you a brief overview of our experience and problems we.
The Beginning
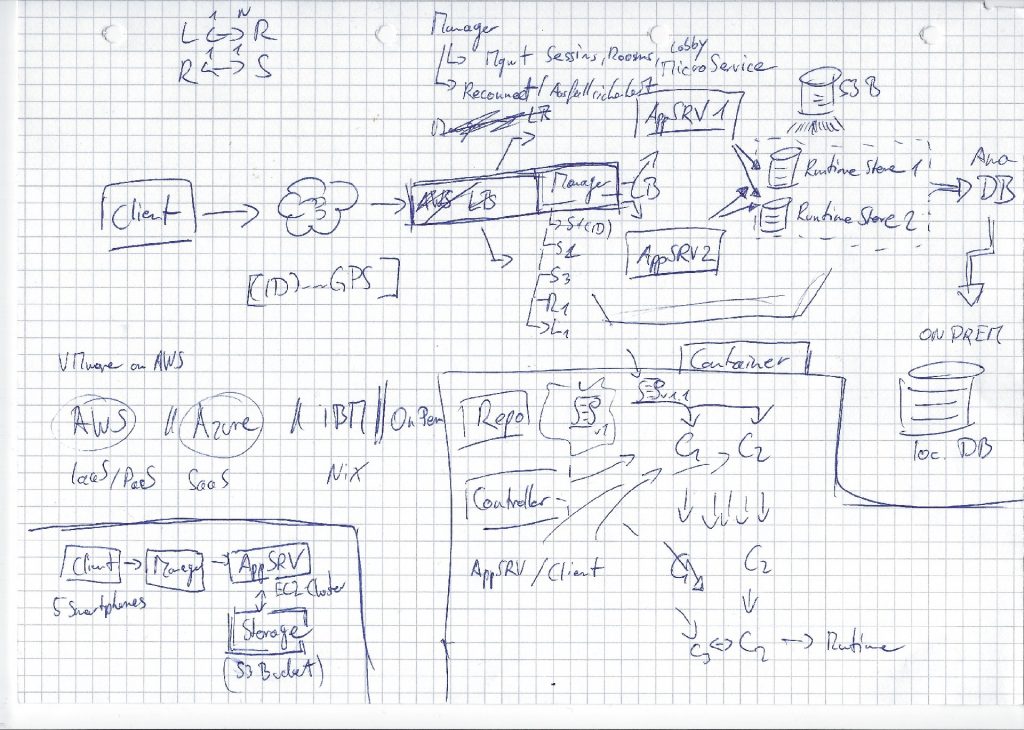
A pictures says more than a 1000 words! Here was our first attempt to understand cloud computing in general and trying to figure out, how we can get our app there. For this we had several conversations with various specialists.
Where the cloud helps and where not …
It is worth reading the article form the front and not only the part that is relevant for our current section
AWS Elastic Beanstalk
We started of doing some research and comparing various cloud provider (e.g. Google, IBM, Microsoft, Amazon) to find out about their services and payment models. The free tier model and the alleged simplicity of deploying an app with Elastic Beanstalk let us to the decision to use Amazons web services (AWS). With basically the touch of a button you get a full environment with multiple server instances, load balancing, database etc. Just upload your code and you are all set, well at least in theory…
Deploying Typescript to Elastic Beanstalk and automatin the process with Gitlab Ci/CD Pipline
One of the bigger problems we encountered was deploying our Typscript app. Since you can’t directly run Typscript on the Elastic Beanstalk we’ve found a little workaround by compiling it first into Javascript and than using Gitlabs CI/CD Pipeline to automate the process. In the following we just want to briefly illustrate the steps we took to get everythin running.
- In the
tsconfig.json, which specify the compile options for Typscript, we set the output directory todist. We than altered thescriptssection of ourpackage.jsonand added a build script so that we can compile the application withnpm run buildand start than the compiled Javascript application directly fromdistfolder withnpm start. (Link) - That’s what our
tsconfig.jsonlooks like:
        {
        "compilerOptions": {
            "outDir": "dist",
            "target": "es6",
            "module": "commonjs",
            "strict": true,
            "esModuleInterop": true,
            "experimentalDecorators": true
        }
        }
That’s the script section of our package.json:
  "scripts": {
    "build": "tsc",
    "start": "node dist/index.js"
},- We than simply set up a hook for gitlab with is executed before every commit. For that we simply had to create the file .git/hooks/pre-commit in your repo add the following lines:
        npm install
        npm run build
git add .- To even see the CI/CD option we first had to to create a
.gitlab-ci.ymlfile in our repository root folder. - For saftey reasons we created and AWS IAM User with only the AWSElasticBeanstalkFullAccess Policy. (Link)
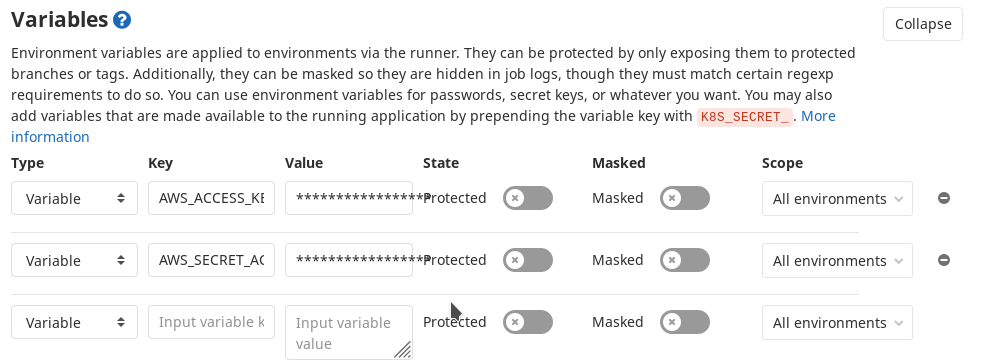
- We than saved that access Id and KEY as Variables in the CI / CD settings of the Gitlab repository.
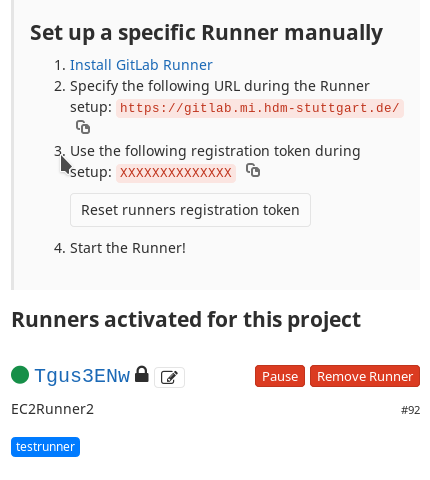
- We then proceeded to install our own Gitlab Runner on a seperate AWS EC2 Instance, (though Gitlabs shared runner worked fine as well) and registered it in the settings of our Gitlab Repository (Link)
- With the EB CLI installed we initalized the the repository with
eb initand adjusted our.gitlab-ci.yml. We used the image coxauto/aws-ebcli from the offical Docker Hub, which comes with the EB CLI already installed and $AWS_ACCESS_KEY_ID and $AWS_SECRET_ACCESS_KEY are the variables we set in our settings for the IAM users access id and key.
        development:
        image: coxauto/aws-ebcli
        type: deploy
        environment: production
        script:
        - touch ~/.aws/credentials
        - printf "[eb-cli]\naws_access_key_id = %s\naws_secret_access_key = %s\n" "$AWS_ACCESS_KEY_ID" "$AWS_SECRET_ACCESS_KEY" >> ~/.aws/credentials
        - touch ~/.aws/config
        - printf "[profile eb-cli]\nregion=eu-central-1\noutput=json" >> ~/.aws/config
        - eb deploy Catchmeserver-env
        only:
        - master
Before every new commit our Application is now getting automatically compiled to Javascript. After every push to the master branch of the repository the Gitlab runner deploys with help of the EB CLI the application our Elastic Beanstalk. Of course this is still far from ideal. The proper way would be to run first lints and test before and have different stages and branches which we omitted here for brevity 🙂
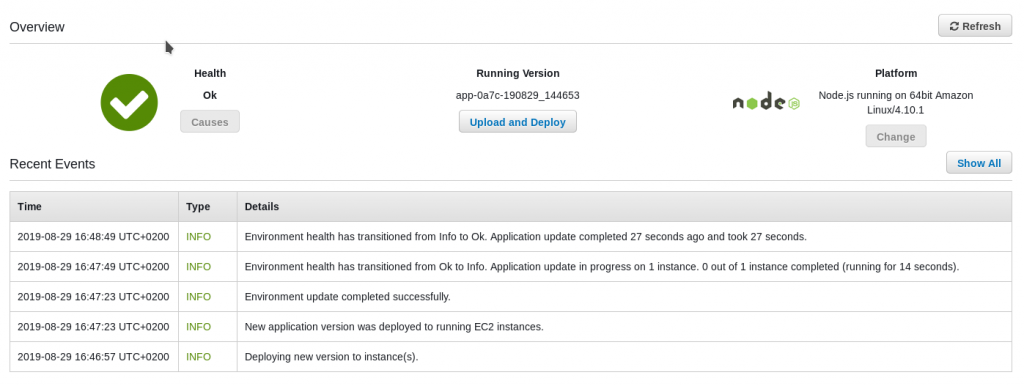
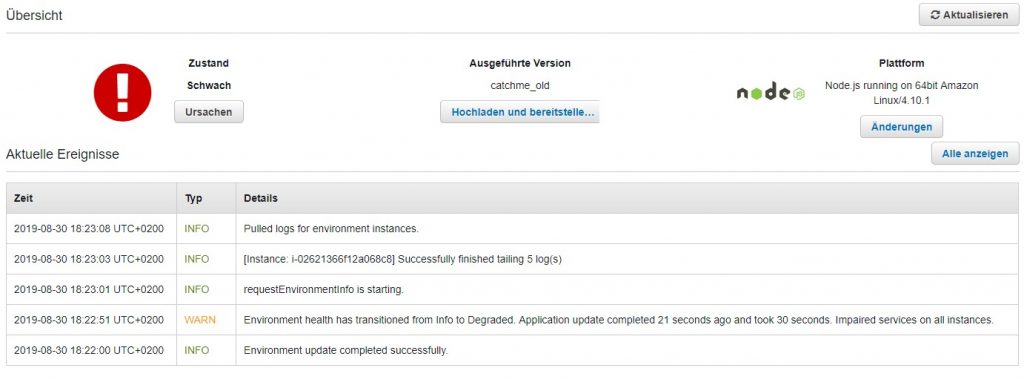
If everything is green and you still having issues it might be well worth your time checking out the logs for your Elastic Beanstalk ;). We didnt realize that the boilerplate code for our app specified, next to the standard colyseus port 2567, the systems enviroment port which got used instead.
AWS Lambda
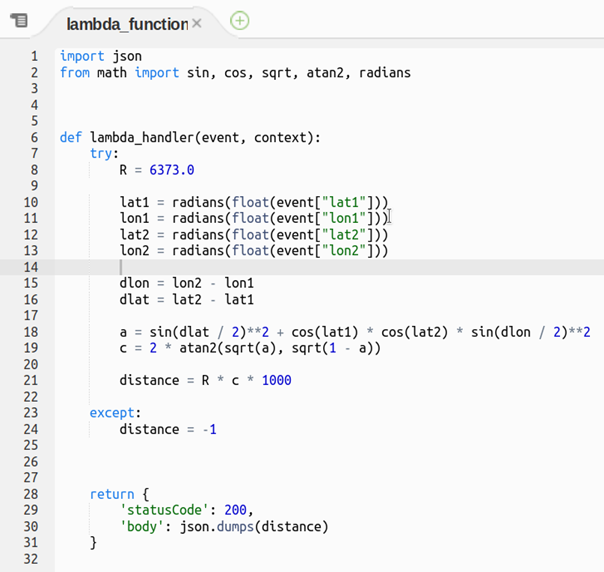
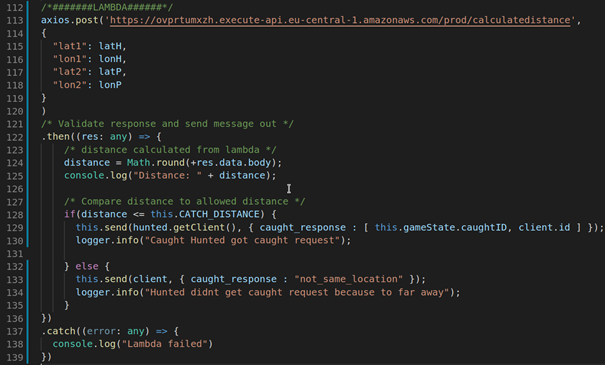
After we had our app successfully running, we tried to use other services of AWS. For example, for our mathematical calculations we wanted to use the Lambda function. E.g. the calculation for the distance of two players with the Haversine formula.
Creating the Lambda function
- Under AWS Services go to AWS Lambda
- Create a new Function in your preferred language (we used python)
- Implement your code. The body that’s beeing send to your Lambda function are getting saved into a dictionary `event`. You can access the key-value pairs by e.g. event[“key”]
- You can write test events to feed data into your lamba function.
Exposing your Lambda function
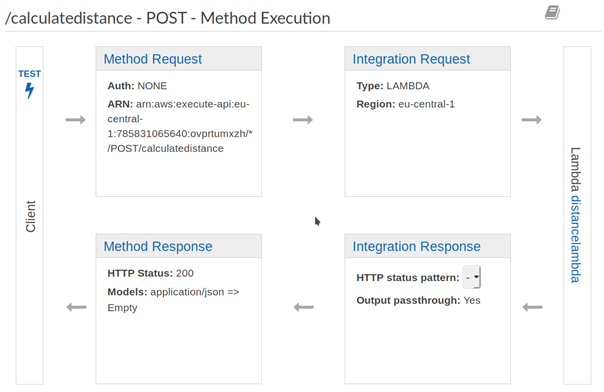
To use the lamba function in your code you need a API Gateway first.
- Under AWS Services go to API Gateway
- Create a new REST-API
- Create a new Resource under Action
- Under Action use “Create Method” choose the HTTP method with which you want to “talk” to your lambda function (we used POST).
- Choose the lambda function you access.
- Under Action you can now Deploy the API
- You find the URL on the left under Stages
Leave a Reply
You must be logged in to post a comment.