by Dominik Ratzel (dr079) and Alischa Fritzsche (af094)
For the lecture “Software Development for Cloud Computing”, we set ourselves the goal of exploring new things and gaining experience. We focused on one topic: “How do you get a web application into the cloud?”. In doing so, we took a closer look at Continuous Integration / Continuous Delivery, Infrastructure as a Code, and Secure Sockets Layer. In the following, we would like to share our experiences.
Overview of the content of this blog post
- Comparison GitLab and GitHub
- CI/CD in GitLab
- Problem: Where are the CI/CD settings in the HdM Gitlab?
- Problem: Solve Docker in Docker by creating a runner
- CI/CD in GitHub
- CI/CD in GitLab
- Set up SSL for the web application
- Problem: A lot of manual effort
- Watchtower
- Terraform
- Problem: A lot of manual effort
- Testing
- Create a test environment
- Automated Selenium frontend testing in GitHub
- Docker Compose
- Problem: How to build amd64 images locally with an arm64 processor?
Continuous Integration / Continuous Delivery
At the very beginning, we asked ourselves which platform was best suited for our approach. We limited ourselves to the best-known platforms so that the comparison would not be too complex: GitHub and GitLab.
Another point we wanted to try was setting up a runner. For this purpose, we set up a simple pipeline in both GitLab and GitHub to update Docker images on Docker Hub.
GitLab vs. GitHub
GitHub is considered the original cloud-based Git platform. The platform focuses primarily on the community. Comparatively, it is also the largest (as of January 2020: 40 million users). GitLab is the self-hosted open-source alternative to GitHub. During our research, we noticed the following differences concerning our project.
| GitLab | GitHub | |
| Free private and public repositories | ✓ | ✓ (since Jan. 2019) |
| Enterprise versions | ✓ | ✓ |
| Self-hosted version | ✓ | ○ (only with paid Enterprise plan) |
| CI/CD with shared or personal runners | ✓ | ○ (with third-party apps) |
| Wiki | ✓ | ✓ |
| Preview code changes | ✓ | ✓ |
Especially the point that it is only possible in GitLab to use self-hosted runners for the CI/CD pipeline caught our attention. From our point of view, this is a plus for GitLab in terms of data protection. The fact that GitLab can be self-hosted is an advantage but not necessary for our project. Nevertheless, it is worth mentioning, which is why we have included the point in our list. In all other aspects, GitLab and GitHub are very similar.
CI/CD – GitLab vs. GitHub
GitHub: provides the user so-called GitHub Actions. This way, the user does not have to set up, configure or host his runner.
+ very easy to use
+ free of charge
– Critical from a data protection perspective, as the code is executed/read “somewhere”
GitLab: To use the CI/CD, a custom runner must be configured, hosted, and integrated into the code repository.
+ code stays on own runner (e.g., passwords and source code are safe)
+ the runner can be configured according to one’s wishes
– complex to set up and configure
– Runner could cost money depending on the platform (e.g., AWS)
Additional information: HdM offers students so-called shared runners. However, Docker-in-Docker is not possible with these runners for security reasons. In the following, we will explain how we configured our GitLab runners to allow Docker-in-Docker. Another insight was that the Docker_Host variable must not be specified in the pipeline, otherwise the Docker socket will not be found, and the pipeline will fail.

CI/CD in GitLab
Where are the CI/CD settings in the HdM GitLab?
We are probably not the first to notice that the CI/CD is missing in the MI GitLab navigation. The “advanced features” have been disabled to avoid “overwhelming” students. However, they can be easily activated via the GitLab settings (Settings > General > Visibility, project features, permissions) (https://docs.gitlab.com/ee/ci/enable_or_disable_ci.html).
Write the .gitlab-ci.yml file
The next step is to write an individual .gitlab-ci.yml file (https://docs.gitlab.com/ee/ci/quick_start/index.html).
The script builds a Docker container and pushes it to Docker Hub. The DOCKER_USERNAME and DOCKER_PASSWORD are stored as Variables in GitLab (Settings > CI/CD > Variables).
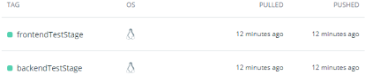
Tip: If you want to keep the images private but do not want to pay for the second private repository on Docker Hub (5$/month), you can create a private repo and push the images separated by tag (in our case, “frontend” and “backend”).
stages:
  - docker

build-push-image:
  stage: docker
  image: docker:stable
  tags:
    - gitlab-runner
  cache: {}
  services:
    - docker:18.09-dind
  variables:
    DOCKER_DRIVER: overlay2
    DOCKER_TLS_CERTDIR: ""
    # This variable DOCKER_HOST should never be set, because otherwise the default address of the Docker host will be
    # overwritten and the runner will not be able to access the socket and the pipeline will fail!
    # DOCKER_HOST: tcp://localhost:2375/
  before_script: # Install docker-compose
    - apk add --update --no-cache curl py-pip docker-compose
  script:
    - echo $DOCKER_PASSWORD | docker login --username $DOCKER_USERNAME --password-stdin
    - docker-compose build
    - docker-compose push
  only:
    - master
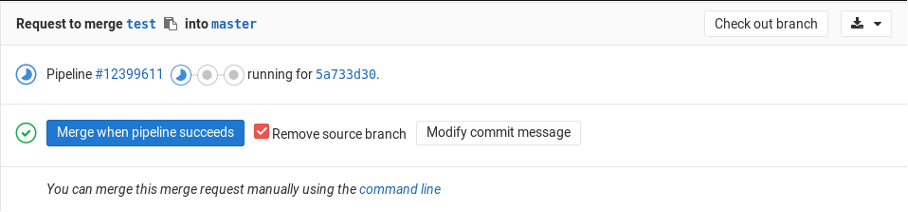
Configuring Gitlab
Next, we asked ourselves how we could restrict merges into the master. The goal was only to allow a branch to be added to the master if the pipeline was successful. This setting can be found in Settings > General > Merge requests > Merge checks the item “Pipelines must succeed”.
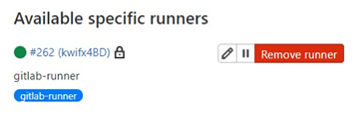
Setting up and configuring GitLab Runner
For this, we have written a runnerSetup.sh.
#!/bin/bash

# Download the binary for your system
sudo curl -L --output /usr/local/bin/gitlab-runner https://gitlab-runner-downloads.s3.amazonaws.com/latest/binaries/gitlab-runner-linux-amd64

# Give it permission be executed
sudo chmod +x /usr/local/bin/gitlab-runner

# Create a GitLab CI user
sudo useradd --comment 'GitLab Runner' --create-home gitlab-runner --shell /bin/bash

# Install and run as service
sudo gitlab-runner install --user=gitlab-runner --working-directory=/home/gitlab-runner
sudo gitlab-runner start
sudo gitlab-runner status

# Command to register the runner
sudo gitlab-runner register --non-interactive --url https://gitlab.mi.hdm-stuttgart.de/ \
 --registration-token asdfX6fZFdaPL5Ckna4qad3ojr --tag-list gitlab-runner --description gitlab-runner \
 --executor docker --docker-image docker:stable \
 --docker-volumes /var/run/docker.sock:/var/run/docker.sock \
 --docker-privileged

# Install Docker and give the GitLab runner permissions so that it can access the Docker socket.
echo "Installing Docker"
curl -fsSL https://download.docker.com/linux/ubuntu/gpg | sudo apt-key add -
sudo add-apt-repository "deb [arch=amd64] https://download.docker.com/linux/ubuntu $(lsb_release -cs) stable"
sudo apt-get update
sudo apt-get install -y docker-ce

sudo usermod -aG docker gitlab-runner

# Restart Docker and GitLab Runner Service
sudo systemctl restart gitlab-runner
sudo systemctl restart docker.service
During the step “# Command to register the runner” we fixed the problem we had with the HdM runners. “–docker-volumes/var/run/docker.sock:/var/run/docker.sock” gives the runner access to the Docker socket. “–docker-privileged” allows the runner to access all devices on the host and processes outside the container (be careful).
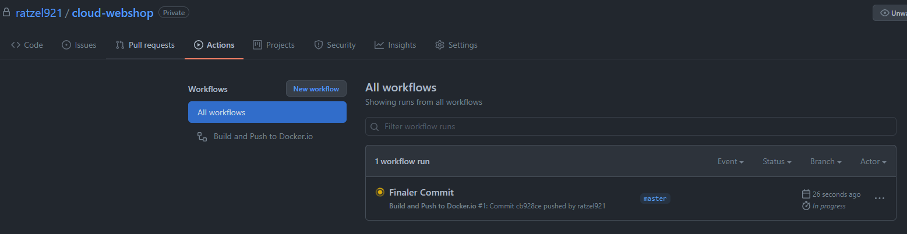
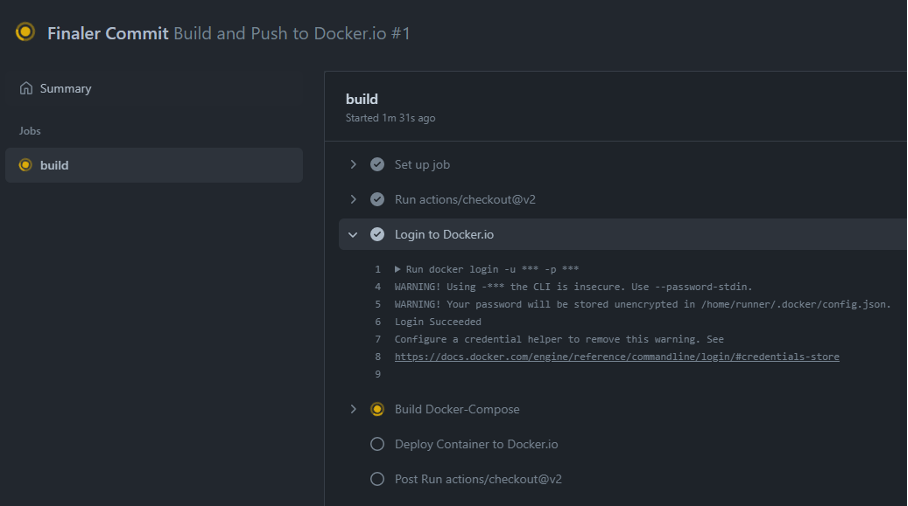
CI/CD in GitHub
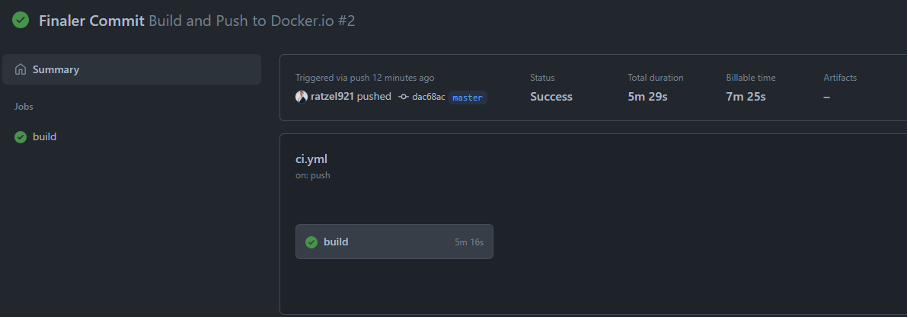
This is done by adding the following code in the GitHub repository in the self-created .github/workflows/ci.yml file.
Like the previous .gitlab-ci.yml file, the script creates a Docker container and pushes it to Docker Hub. The DOCKER_USERNAME and DOCKER_PASSWORD are stored in the Action Secrets of GitHub (Settings > Actions).
name: Build and Push to Docker.io

on:
  push:
    branches: [ master ]
  pull_request:
    branches: [ master ]

jobs:
  build:

    runs-on: ubuntu-latest

    steps:
    - uses: actions/checkout@v2
    - name: Login to Docker.io
      run: docker login -u ${{ secrets.DOCKER_USERNAME }} -p ${{ secrets.DOCKER_PASSWORD }}

    - name: Build Docker-Compose
      run: docker-compose build

    - name: Deploy Container to Docker.io
      run: docker-compose push
SSL
SSL is used to encrypt the data exchange between the web browser and web server. It thus protects against access by third parties. To set up SSL, it is necessary to have an SSL certificate.
Configuration
We decided to use “all-inkl.com” due to an existing subscription.
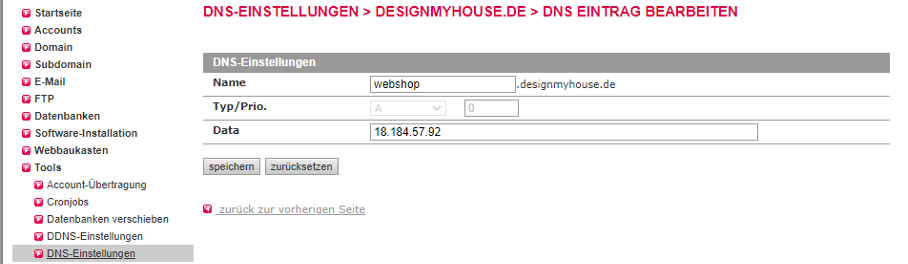
In the KAS admin center (after setting up the domains and subdomains), new DNS records can be created and edited (Domain > DNS Settings > Actions (Edit)). Here, a new Type-A record can be created that points to the IP address of the AWS reverse proxy. The email (which needed for verification) can easily be created in email > email Inbox.
Server configuration
We used the free CA Let’s Encrypt (https://letsencrypt.org/) for the creation and renewal of the SSL certificates. For the configuration, we used the following images: jwilder/nginx-proxy as Nginx Proxy and jrcs/letsencrypt-nginx-proxy-companion as Nginx Proxy Companion (it creates the certificates and mounts them via the volumes into the Nginx Proxy so that it can use them).
In the docker-compose.yml, the environment variables can now be added for the service “frontend”.
  frontend:
    image: dr079/webshop:frontend
    build:
      context: ./frontend
      dockerfile: Dockerfile
    restart: always
    environment:
      API_HOST: backend
      API_PORT: 8080
      # Subdomain
      LETSENCRYPT_HOST: webshop.designmyhouse.de
      # Email for domain verification
      LETSENCRYPT_EMAIL: admin@designmyhouse.de
      # For the Nginx proxy
      VIRTUAL_HOST: webshop.designmyhouse.de
      # The Port on which the frontend responds. Tells the Nginx proxy who to send the requests to.
      VIRTUAL_PORT: 80
# Not needed when deploying with reverse proxy
#    ports:
#      - "80:80"
After that, we created the docker-compose-cert.yml file, which starts the Nginx Proxy and the Nginx Proxy Companion.
version: "3.3"
services:
  nginxproxy:
    image: jwilder/nginx-proxy
    restart: always
    volumes:
      - ./nginx/data/certs:/etc/nginx/certs
      - ./nginx/conf:/etc/nginx/conf.d
      - ./nginx/dhparam:/etc/nginx/dhparam
      - ./nginx/data/vhosts:/etc/nginx/vhost.d
      - ./nginx/data/html:/usr/share/nginx/html
      - /var/run/docker.sock:/tmp/docker.sock
    ports:
      - 80:80
      - 443:443
    labels:
      - "com.github.jrcs.letsencrypt_nginx_proxy_companion.nginx_proxy"

  nginxproxy_comp:
    image: jrcs/letsencrypt-nginx-proxy-companion
    restart: always
    depends_on:
      - nginxproxy
    volumes:
      - ./nginx/data/certs:/etc/nginx/certs:rw
      - ./nginx/conf:/etc/nginx/conf.d
      - ./nginx/dhparam:/etc/nginx/dhparam
      - ./nginx/data/vhosts:/etc/nginx/vhost.d
      - ./nginx/data/html:/usr/share/nginx/html
      - /var/run/docker.sock:/var/run/docker.sock:ro
AWS EC2 instance
In AWS, an EC2 instance (consisting of an Ubuntu server and a security group) can now be created and started with the settings Verify and Launch.


The IP address of the created instance can now be entered as a Type-A entry under “all-inkl.com”.
Install Docker on Ubuntu
It is now possible to connect to the EC2 instance and run the following commands to make the project accessible through the domain/subdomain. (Note: It may take a few hours for the DNS server to apply the settings. Solution: Use the Tor browser)
# Add GPG key of Docker repository from APT sources.
curl -fsSL https://download.docker.com/linux/ubuntu/gpg | sudo apt-key add -

sudo add-apt-repository "deb [arch=amd64] https://download.docker.com/linux/ubuntu $(lsb_release -cs) stable"

# Update Ubuntu package database
sudo apt-get update

# Install Docker
sudo apt-get install -y docker-ce

# Install Docker Compose
sudo curl -L https://github.com/docker/compose/releases/download/1.18.0/docker-compose-`uname -s`-`uname -m` -o /usr/local/bin/docker-compose

# Give Docker Compose the execute permission
sudo chmod +x /usr/local/bin/docker-compose

# Log in as root user
sudo -s

# Clone project
git clone https://github.com/user_name/project_name.git

# Build and launch project
docker-compose -f ./project_name/docker-compose-cert.yml up --build -d

# Pull images from DockerHub
sudo docker-compose -f ./cloud-webshop/docker-compose.yml pull

sudo docker-compose -f ./cloud-webshop/docker-compose.yml up -d
Watchtower
With Watchtower, updates to the Docker registry can be automatically detected and downloaded. The container will then be rebooted with the new image. Watchtower accesses the Docker repo via REPO_USER & REPO_PASS and checks in the set time interval (— interval 30) if the Docker images have changed and updates them on the fly.
This requires adding the following code to the docker-compose.yml (replace REPO_USER and REPO_PASS with Docker.io Access Token credentials (Settings > Security)).
  watchtower:
    image: v2tec/watchtower
    environment:
      REPO_USER: REPO_USER
      REPO_PASS: REPO_PASS
    volumes:
      - /var/run/docker.sock:/var/run/docker.sock
    command: --interval 30
Terraform
The preceding steps involve a considerable manual effort. However, it is possible to automate this, e.g., with Terraform. To achieve this, the following files must be written.
main.tf
resource "aws_instance" "test" {
  ami           = data.aws_ami.ubuntu.id
  instance_type = var.ec2_instance_type

  tags = {
    Name = var.ec2_tags
  }

  user_data = file("docker/install.sh")
//  user_data = file("docker/setupRunner.sh")
  key_name = aws_key_pair.generated_key.key_name
  security_groups = [
    aws_security_group.allow_http.name,
    aws_security_group.allow_https.name,
    aws_security_group.allow_ssh.name]
}

output "instance_ips" {
  value = aws_instance.test.*.public_ip
}
providers.tf
provider "aws" {
  access_key = var.aws-access-key
  secret_key = var.aws-secret-key
  region = var.aws-region
}
security_groups.tf
resource "aws_security_group" "allow_http" {
  name = "allow_http"
  description = "Allow http inbound traffic"
  vpc_id = aws_default_vpc.default.id

  ingress {
    from_port = 80
    to_port = 80
    protocol = "tcp"
    cidr_blocks = [
      "0.0.0.0/0"
    ]
  }

  egress {
    from_port = 0
    to_port = 0
    protocol = "-1"
    cidr_blocks = [
      "0.0.0.0/0"]
  }
}

resource "aws_security_group" "allow_https" {
  name = "allow_https"
  description = "Allow https inbound traffic"
  vpc_id = aws_default_vpc.default.id

  ingress {
    from_port = 443
    to_port = 443
    protocol = "tcp"
    cidr_blocks = [
      "0.0.0.0/0"
    ]
  }

  egress {
    from_port = 0
    to_port = 0
    protocol = "-1"
    cidr_blocks = [
      "0.0.0.0/0"]
  }
}

resource "aws_security_group" "allow_ssh" {
  name = "allow_ssh"
  description = "Allow ssh inbound traffic"
  vpc_id = aws_default_vpc.default.id

  ingress {
    from_port = 22
    to_port = 22
    protocol = "tcp"
    # To keep this example simple, we allow incoming SSH requests from any IP. In real-world usage, you should only
    # allow SSH requests from trusted servers, such as a bastion host or VPN server.
    cidr_blocks = [
      "0.0.0.0/0"
    ]
  }
}
variables.tf
variable "ec2_instance_type" {
  default = "t2.micro"
}

variable "ec2_tags" {
  default = "Webshop"
//  default = "Gitlab-Runner"
}

variable "ec2_count" {
  default = "1"
}


data "aws_ami" "ubuntu" {
  most_recent = true
  filter {
    name   = "name"
    values = ["ubuntu/images/hvm-ssd/ubuntu-focal-20.04-amd64-server-*"]
  }
  filter {
    name   = "virtualization-type"
    values = ["hvm"]
  }
  owners = ["099720109477"] # Canonical
}
ssh_key.tf
variable "key_name" {
  default = "Webshop"
}

resource "tls_private_key" "example" {
  algorithm = "RSA"
  rsa_bits = 4096
}

resource "aws_key_pair" "generated_key" {
  key_name = var.key_name
  public_key = tls_private_key.example.public_key_openssh
}

resource "aws_default_vpc" "default" {
  tags = {
    Name = "Default VPC"
  }
}
variable_secrets.tf
variable "aws-access-key" {
  type = string
  default = "aws-access-key"
}

variable "aws-secret-key" {
  type = string
  default = "aws-secret-key"
}

variable "aws-region" {
  type = string
  default = "eu-central-1"
}
install.sh for EC2 setup
To do this, we created a ./docker/install.sh file with the following content.
#!/bin/bash

# Install wget to update IP at all-inkl.com
echo "Setup all-inkl.com"
sudo apt-get install wget

# Save public IP to variable
ip="$(dig +short myip.opendns.com @resolver1.opendns.com)"

# Add all-inkl.com variables
kas_login="username"
kas_auth_data="pw"
kas_action="update_dns_settings"
sub_domain="sub"
record_id="id"

sudo sleep 10s

# Update all-inkl.com dns-settings with current IP and account data
sudo wget --no-check-certificate --quiet \
  --method POST \
  --timeout=0 \
  --header '' \
    'https://kasapi.kasserver.com/dokumentation/formular.php?kas_login='"${kas_login}"'&kas_auth_type=plain&kas_auth_data='"${kas_auth_data}"'&kas_action='"${kas_action}"'&var1=record_name&wert1='"${sub_domain}"'&var2=record_type&wert2=A&var3=record_data&wert3='"${ip}"'&var4=record_id&wert4='"${record_id}"'&anz_var=4'


echo "Installing Docker"
curl -fsSL https://download.docker.com/linux/ubuntu/gpg | sudo apt-key add -
sudo add-apt-repository "deb [arch=amd64] https://download.docker.com/linux/ubuntu $(lsb_release -cs) stable"
sudo apt-get update
sudo apt-get install -y docker-ce

echo "Installing Docker-Compose"
sudo curl -L https://github.com/docker/compose/releases/download/1.18.0/docker-compose-`uname -s`-`uname -m` -o /usr/local/bin/docker-compose
sudo chmod +x /usr/local/bin/docker-compose

# Follow guide to create personal access token https://docs.github.com/en/github/authenticating-to-github/keeping-your-account-and-data-secure/creating-a-personal-access-token
sudo git clone https://username:token@github.com/ratzel921/cloud-webshop.git
sudo docker login -u username -p token
sudo docker-compose -f ./cloud-webshop/docker-compose-cert.yml up --build -d
sudo docker-compose -f ./cloud-webshop/docker-compose.yml pull
sudo docker-compose -f ./cloud-webshop/docker-compose.yml up
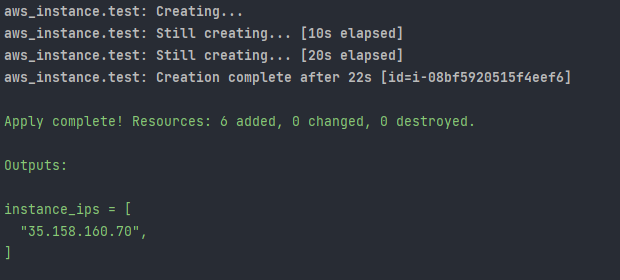
Next, run the following commands. This will automatically create an EC2 instance (runs the application), a Security_Group (for connections to the EC2 instance via HTTPS, HTTP, and SSH), an SSH_KEY (allows to access the EC2 instance via SSH). In the end, the IP address of the EC2 instance is displayed in the console. This will automatically be entered into all-inkl.com or manually add it.
# Get terraform provider with init and use apply to start the terraform script.
terraform init
terraform apply --auto-approve

# (Optional) Delete EC2 instances
terraform destroy --auto-approve


Testing
Creating a Testing Environment
Using Terraform and an EC2 instance, it is also possible to create a testing environment. We used the GitHub pipeline for this.
Backend/Dockerfile
# Build stage
FROM maven:3.6.3-jdk-8-slim AS build
COPY src /home/app/src
COPY pom.xml /home/app
RUN mvn -f /home/app/pom.xml clean test
RUN mvn -f /home/app/pom.xml clean package

# Package stage
FROM openjdk:8-jre-slim
COPY --from=build /home/app/target/*.jar /usr/local/backend.jar
COPY --from=build /home/app/target/lib/*.jar /usr/local/lib/
EXPOSE 8080
ENTRYPOINT ["java","-jar","/usr/local/backend.jar"]
frontend/nginx/nginx.conf
server {
  listen 80;
  server_name www.${VIRTUAL_HOST} ${VIRTUAL_HOST};

    location / {
        root   /usr/share/nginx/html;
        index  index.html index.htm;
        try_files $uri $uri/ /index.html;
        proxy_cookie_path / "/; SameSite=lax; HTTPOnly; Secure";
    }

    location /api {
        proxy_set_header X-Real-IP $remote_addr;
        proxy_set_header X-Forwarded-For $proxy_add_x_forwarded_for;
        proxy_set_header Host $http_host;
        proxy_set_header X-NginX-Proxy true;

        proxy_pass_header Set-Cookie;

        proxy_cookie_domain www.${VIRTUAL_HOST} ${VIRTUAL_HOST};
        #rewrite ^/api/?(.*) /$1 break;
        proxy_pass http://${API_HOST}:${API_PORT};
        proxy_redirect off;
    }

   error_page   500 502 503 504  /50x.html;

   location = /50x.html {
        root   /usr/share/nginx/html;
    }
}
frontend/Dockerfile
# Build stage
# Use node:alpine to build static files
FROM node:15.14-alpine as build-stage

# Create app directory
WORKDIR /usr/src/app

# Install other dependencies via apk
RUN apk update && apk add python g++ make && rm -rf /var/cache/apk/*

# Install app dependencies
# A wildcard is used to ensure both package.json AND package-lock.json are copied
# where available (npm@5+)
COPY package*.json ./

RUN npm install

# Bundle app source
COPY . .

# Build static files
RUN npm run test
RUN npm run build


# Package stage
# Use nginx alpine for minimal image size
FROM nginx:stable-alpine as production-stage

# Copy static files from build-side to build-server
COPY --from=build-stage /usr/src/app/dist /usr/share/nginx/html

RUN rm /etc/nginx/conf.d/default.conf
COPY nginx/nginx.conf /etc/nginx/templates/

# EXPOSE 80
CMD ["/bin/sh" , "-c" , "envsubst '${API_HOST} ${API_PORT} ${VIRTUAL_HOST}' < /etc/nginx/templates/nginx.conf > /etc/nginx/conf.d/nginx.conf && exec nginx -g 'daemon off;'"]
Modifying the docker-compose.yml
To do this, we created a copy of docker-compose.yml (docker-compose-testStage.yml). We changed the images and the LETSENCRYPT_HOST & VIRTUAL_HOST for the “backend” and “frontend” service in this file.
Modifying the Terraform files
In the testStage.sh, we changed the record_id and “docker-compose -f ./cloud-webshop/docker-compose.yml pull & sudo docker-compose -f ./cloud-webshop/docker-compose.yml up -d” to “sudo docker-compose -f ./cloud-webshop/docker-compose-testStage.yml pull sudo docker-compose -f ./cloud-webshop/docker-compose-testStage.yml up -d“
In the main.tf, “user_date = file(“docker/test_Stage.sh”)” is set.
After that, the EC2 instance, the security group, and SSH can be started as usual using Terraform.

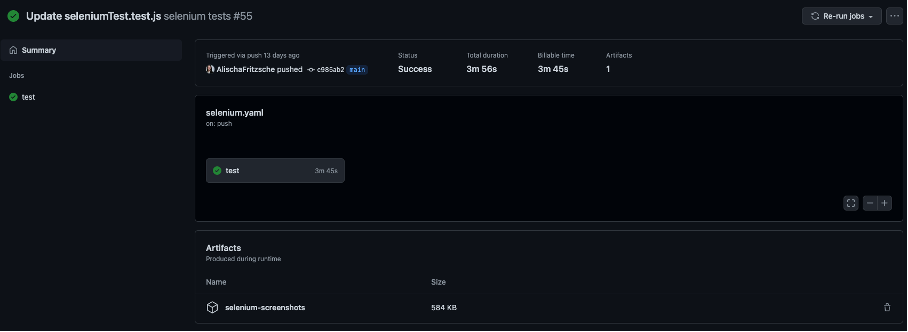
Automated Selenium frontend testing with GitHub
To do this, create the .github/workflows/selenium.yml file with the following content.
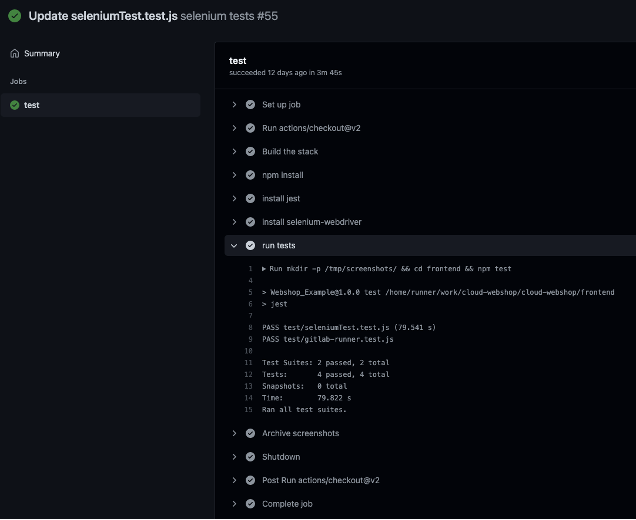
The script is executed on every push to the repository. It installs all necessary packages, creates a screenshot folder, and runs the pre-programmed Selenium tests located in the frontend folder.
After a push or manual execution, the test results with the artifacts (screenshots) are located on the Actions tab.
name: selenium tests
on: push
jobs:
  test:
    runs-on: ubuntu-latest
    steps:
      - uses: actions/checkout@v2
      - name: Build the stack
        run: docker-compose up -d
      - name: npm install
        run: cd frontend && npm install
      - name: install jest
        run: cd frontend && npm install jest
      - name: install selenium-webdriver
        run: cd frontend && npm install selenium-webdriver
      - name: run tests
        run: mkdir -p /tmp/screenshots/ && cd frontend && npm test
      - name: Archive screenshots
        uses: actions/upload-artifact@v2
        with:
          name: selenium-screenshots
          path: /tmp/screenshots/
      - name: Shutdown
        run: docker-compose down
Note that Chromedriver must be run headless, as GitHub cannot run a browser on a screen.
var driver = await new Builder()
        .forBrowser('chrome')
        .setChromeOptions(new chrome.Options().headless())
        .build();
Infrastructure as a Code
Cloud computing is the on-demand provision of IT resources (e.g., servers, storage, databases) via the Internet. Cloud computing resources can be scaled up or down depending on business requirements. You only pay for the IT resources you use.
On July 27, 2021, Gartner published the latest “Magic Quadrant” for Cloud Infrastructure and Platform Services. Like last year, Amazon Web Service is the top performer in the Magic Quadrant. Followed by Microsoft and Google. (https://www.gartner.com/doc/reprints?id=1-271OE4VR&ct=210802&st=sb). Since we were interested in trying Docker Compose, we decided to use AWS for deployment.
Deployment on Amazon ECS with Docker Compose
Since early 2020, AWS and Docker have started working on an open Docker Compose specification, which will make it possible to use the Docker Compose format to deploy containers on Amazon ECS and AWS Fargate. In July 2020, the first beta version for Docker Desktop was released; the first stable version has been available since September 15, 2020.
Customize docker-compose.yml
The AWS ECS CLI supports Compose versions 1, 2, and 3. By default, it looks for docker-compose.yml in the current directory. Optionally, you can specify a different filename or path to a Compose file with the –file option. The Amazon ECS CLI only supports a few parameters, so correcting the yml may be necessary (https://docs.aws.amazon.com/AmazonECS/latest/developerguide/cmd-ecs-cli-compose-parameters.html).
# (Optional) Create a new Docker context to point the Docker CLI to the correct endpoint. For this step you need the AWS_ACCESS_KEY and AWS_SECRET_ACCESS_KEY.
docker context create ecs myecscontext

# (Optional) Use context
docker context use myecscontext

# Deploy application to AWS
docker compose up

# Here you can see which containers were started as well as the URLs
docker compose ps

# (Optional) Shut down container. (Don't forget to change the context back to default).
docker compose down

# Convert Docker Compose file to CloudFormation to track which resources are created or updated
docker compose convert
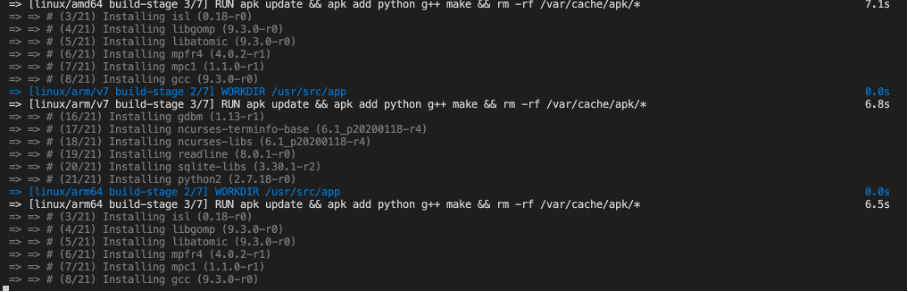
BuildX
Building images for other processors
For example, if you have an M1 with an arm64 processor, a locally created image would not be accepted by AWS (error message “EssentialContainerExited: Essential container in task exited”). The reason is that ECS instances only support amd64 images.
Since Docker version >= 19.03, Docker offers buildX. The plugin is officially no longer considered experimental as of August 5, 2020. With the buildX functionality, it is relatively easy to create Docker images that work on multiple CPU architectures.
# (optional) Create a new Builder instance
docker buildx create --name mybuilder

# (optional) Use created builder
docker buildx use mybuilder

# Show all available builder instances (here you can also see which CPU architectures are supported by the builder)
docker buildx ls

# Build and push image for example for amd64, arm64 and arm/v7
docker buildx build --platform linux/amd64,linux/arm64,linux/arm/v7 --tag username/repository_name:tag_name --push .

# Delete images
docker buildx prune --all

Leave a Reply
You must be logged in to post a comment.