Tag: Kubernetes
Morehuehner: Ein Moorhuhn-Remake als Cloud-Native Multiplayer-Browsergame
Entwicklung einer verteilten Cloud-Anwendung am Beispiel eines Multiplayer Spiels
Einleitung Den meisten sollte das Spielprinzip von “Cookie Clicker” bekannt sein: Ein Klick auf einen Keks erhöht den Spielstand um einen Punkt. Das Spiel ist endlos, hat keine Punktegrenze. Es geht darum, im Leaderboard nach oben zu klettern. Im Rahmen der Vorlesung “System Engineering and Management” (143101a) erweiterten wir das Konzept zu einem Echtzeit-Multiplayer Spiel.…
Integration von KI in DevOps: Ein Überblick über AIOps-Prinzipien und -Praktiken
Beyond Reactive: How AI is Revolutionizing Kubernetes Autoscaling
Note: This blog post was written for the module Enterprise IT (113601a) in the summer semester of 2025 Introduction Kubernetes has become the leading open-source platform for managing containerized applications. Its ability to automate deployment, scaling, and operations helps teams efficiently manage microservices architectures and dynamic cloud workloads. A cornerstone of efficient Kubernetes cluster management is…
Einsatz von Künstlicher Intelligenz zur automatischen Skalierung von Kubernetes-Clustern
Anmerkung: Dieser Blogpost wurde für das Modul Enterprise IT (113601a) verfasst.Aus Gründen der besseren Lesbarkeit wird in dieser Arbeit auf eine geschlechtsneutrale Differenzierung verzichtet. Sämtliche Personenbezeichnungen gelten gleichermaßen für alle Geschlechter. Kurzfassung Die Branche der fortschreitenden Cloud Digitalisierung und die steigenden Anforderungen an hochverfügbaren, skalierbaren Anwendungen haben Kubernetes zu einer der führenden Container-Orchestratoren gemacht. Eines der…
Cloudy mit Aussicht auf Wörter: Unser Weg mit CrowdCloud
Willkommen zu unserem Erfahrungsbericht aus der Vorlesung „System Engineering and Management“. In den letzten Monaten haben wir uns an ein Projekt gewagt, das uns sowohl technisch als auch persönlich herausgefordert hat – CrowdCloud. Anstatt uns in trockene Theorien zu verlieren, möchten wir euch in diesem Blog-Beitrag erzählen, wie aus einer spontanen Idee eine interaktive, skalierbare…
GitOps Demystified: Principles, Practices, and Challenges
GitOps, a term coined by Alexis Richardson (CEO of Weaveworks) in 2017, represents a modern approach to continuous deployment and infrastructure management that leverages Git as its core technological foundation [1]. At its essence, GitOps extends the familiar Git workflow patterns from application development to infrastructure management, establishing Git repositories as the single source of…
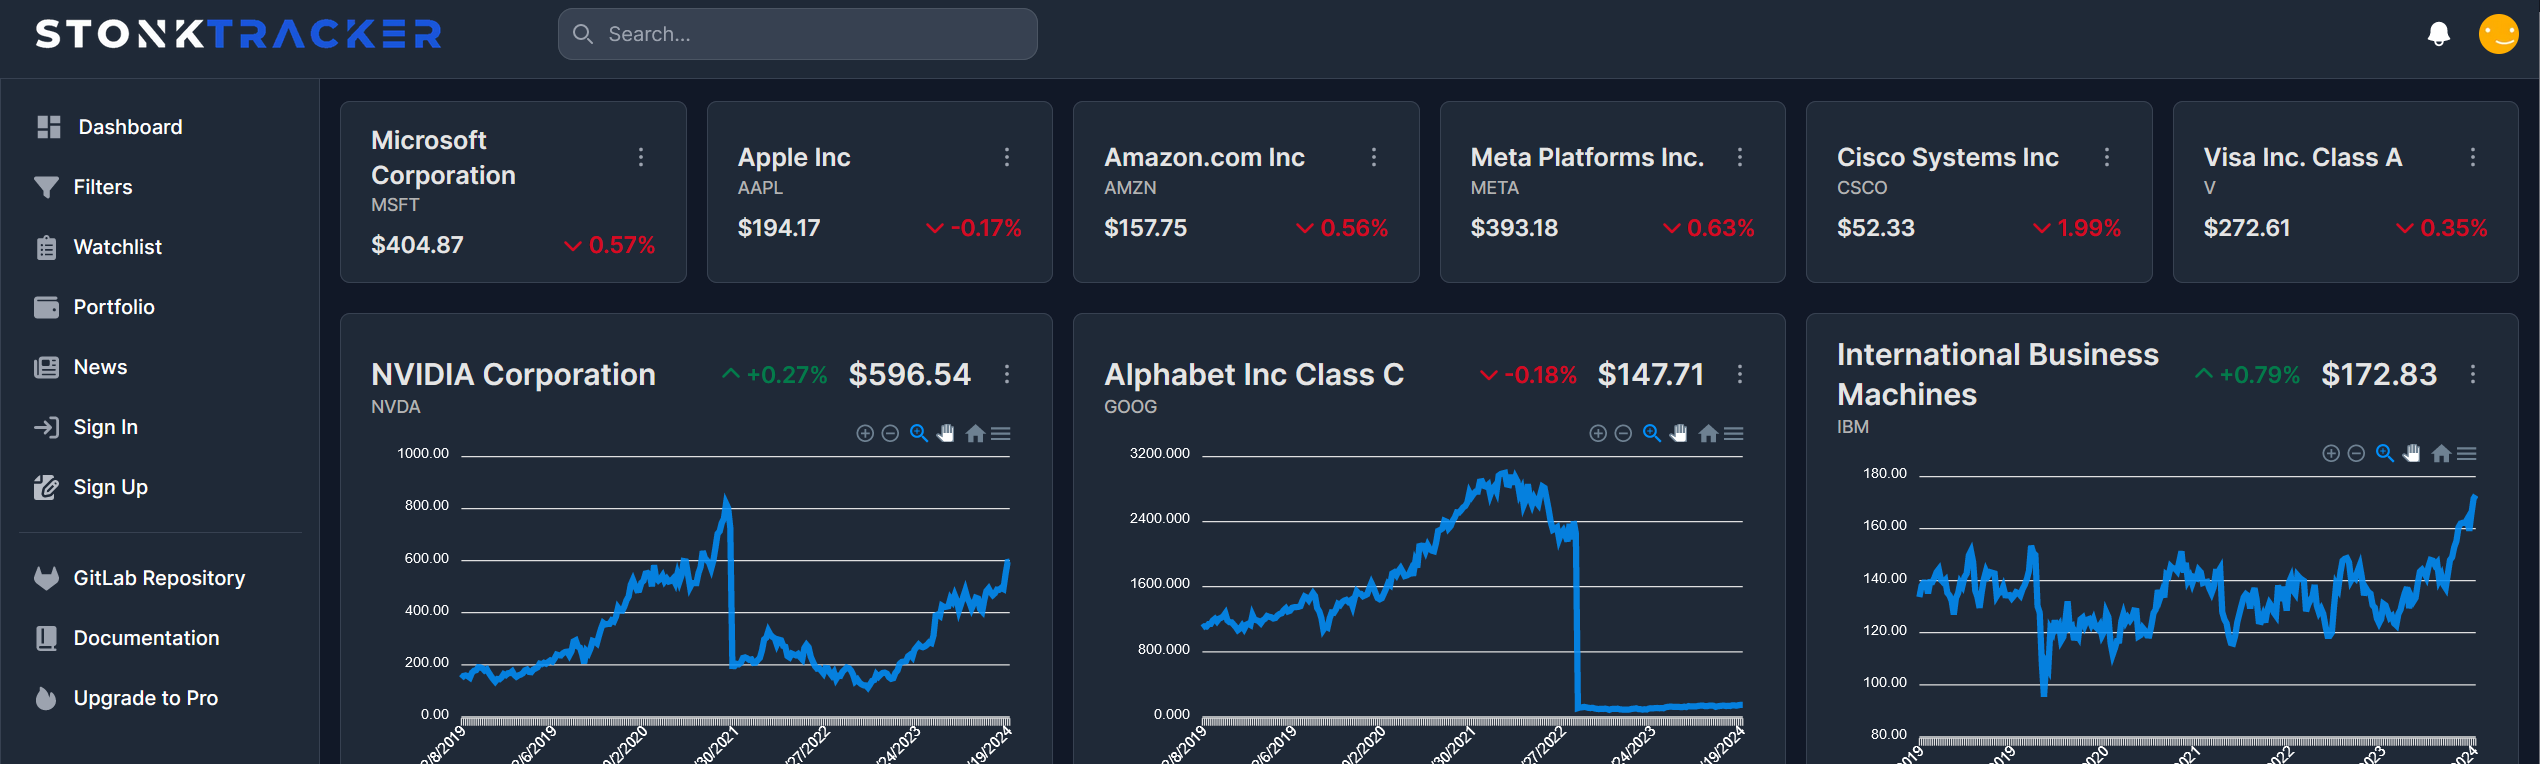
Die Meere der Systemtechnik navigieren: Eine Reise durch die Bereitstellung einer Aktien-Webanwendung in der Cloud
Auf zu neuen Ufern: Einleitung Die Cloud-Computing-Technologie hat die Art und Weise, wie Unternehmen Anwendungen entwickeln, bereitstellen und skalieren, revolutioniert. In diesem Beitrag, der im Rahmen der Vorlesung “143101a System Engineering und Management” entstanden ist, werden wir uns darauf konzentrieren, wie eine bereits bestehende Webanwendung zur Visualisierung und Filterung von Aktienkennzahlen auf der IBM Cloud-Infrastruktur…
Automate PDF – A Cloud-Driven Workflow Tool with Cloud Functions and Kubernetes
Gitlab You can find the Project under this link https://gitlab.mi.hdm-stuttgart.de/fb089/automatecloud Wiki You can find all the Infos in our Gitlab Wiki (https://gitlab.mi.hdm-stuttgart.de/fb089/automatecloud/-/wikis/AutomateCloud). You can even try it urself. Feel free Short Description Automate PDF is a workflow automation tool created in the course “Software Development for Cloud Computing”. The application provides a simple graph editor…
- Cloud Technologies, Design Patterns, Secure Systems, System Architecture, System Designs, System Engineering
High Availability and Reliability in Cloud Computing: Ensuring Seamless Operation Despite the Threat of Black Swan Events
Introduction Nowadays cloud computing has become the backbone of many businesses, offering unparalleled flexibility, scalability and cost-effectiveness. According to O’Reilly’s Cloud Adoption report from 2021, more than 90% of organizations rely on the cloud to run their critical applications and services [1]. High availability and reliability of cloud computing systems has never been more important, as…